The Surge 2 bosses are spatial enemies with their own dedicated battle arenas and a bid health bar too. They have a variety of special moves and abilities. And for every boss, you need to be well prepared and choose your armor, gear, weapons and combat drone very carefully to defeat these formidable foes.
The Surge 2 Bosses
Warden Garcia
You will face off with Warden Garcia in JCPD Lobby – Detention center and it is a compulsory boss to keep going in the game. Warden Garcia will be using AID Nightfall set, a combat drone, and an MG Jackknife Pro.
He will use a combo attack, you just need to wait until the combo ends and then go in and strike. Also keep an eye for the drone attack, before the drone attack you will see a red laser pointing at you.
Just dodge these attacks and hide behind something.
If you get far away from Garcia, he will jump on you or will throw Molotov cocktail. Try to dodge those attacks as well by jumping to the sides.
When you attack, aim for the right arm of Garcia because if you finish him by a blow on the right arm you will be rewarded MG jackknife Pro and AID Nightfall Gear.
Violent Vic
Violent Vic is the first boss you will face in the game, at JCPD Armory – Detention Center. This boss has armor all over his body except his head, that automatically makes his head most vulnerable part to attack.
You need to use Limb targeting system and just aim to his head when you attack. Violent Vic uses equalizer and attacks with a combo, you just need to dodge that and when he is recovering make your move.
Repeat this until you defeat the boss. By defeating him, you will get Keycard to Officer Johnson and 100 tech scrap.
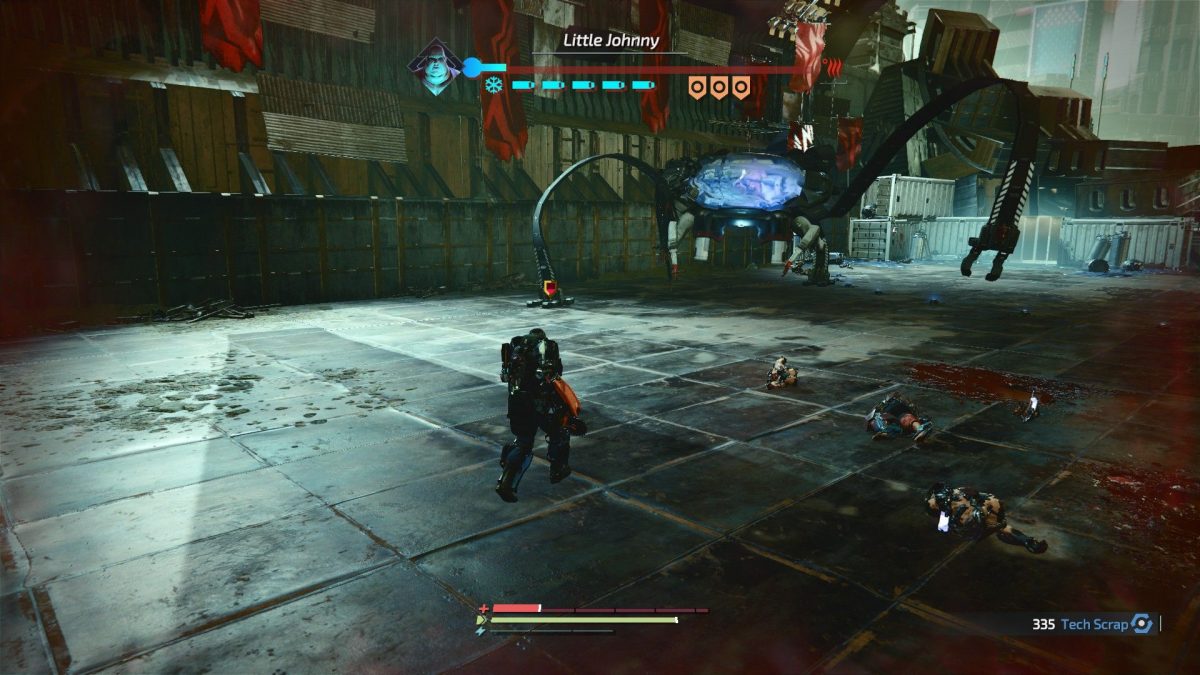
Little Johnny
You will find Little Johnny in Port Nixon – Terminal Z. So the main objective of this fight is to destroy the batteries on the body of little johnny. There are 5 batteries in total, 2 on its body and 1 on each leg.
It also has two claws that can be destroyed off its body separately.
Little Johnny will chase you in the whole arena and if you get below it, it will throw itself on you dealing high damage. You need to get just get close to him and then just go for its claws first, one at a time.
When you are done with claws, you can always wait until its combo ends and its in recovery. So after claws, destroy the two batteries on its body. After that, go for one arm at a time to destroy remaining batteries.
Keep in mind that when you destroy one arm, the poison will start spilling out so get away from that.
Alternatively, SPARK Defender’s set can also save you from the poison. You will be rewarded EMP-44 ‘Starfish’, 5000 tech scrap for defeating Little Johnny.
Brother Eli
Brother Eli will be in Port Nixon – Seaside Court Supply route. You will face off with him after Little Johnny. Always keep your focus on him as brother Eli is very quick and his quick attacks can take you off of your balance.
Just dodge his attacks and when he goes for recovering, you go for attacking. Brother Eli will also summon 2 Twin-Rigged SPARK Aspirants. You need to deal with them first, you can also use a drone to get rid of them quickly.
You will get 100 tech scrap and on a hardcore kill, you will also get Warhammer of Forced Conversion.
Captain Cervantes
You will find this enemy at Gideon’s Rock. It is a hard battle and battleground is small too. Cervantes can perform short and long-range attacks very effectively. You have more chances to survive if you stay closer to him.
He uses his cloaking ability and can disappear at one instance and can come back from somewhere else with an attack.
You can stop this from happening either by destroying its cloaking device or attack him using your drone as soon as he tries to go invisible.
He will get closer to you to perform a parry attack. You need to dodge it. He also uses a long-range katana attack which is very difficult to dodge and parry. You can try evading it by dodging to the left but is a very quick attack so good luck.
But it does take a lot of time to charge so you will have an open window to give as much damage as you can. After performing some other attack, he will draw his gun and perform a ranged attack that you can easily parry.
Defeating him will give you 6000 tech scrap, Jag-22 ‘Aetena’ (on cutting his arm), Cervanta’s Secret 3/3, and depending on the finishing blow you will also get a wraith set.
Delver
This enemy will also be at Gideon’s rock. Now, this is a very difficult fight and this boss has three phases. You cannot even recover between these phases so if you die you will have to restart.
In phase one, it will be standing on two legs and will attack you with a three-side combo, you need to block the first one very carefully and the next two will be easy.
Now it will burrow into the ground, use this time to deal as much damage as you can. It will come out two times to do single attacks, dodge those attacks and when it goes back, deal some more damage.
When the whole health bar drops the next phase will be started.
Now at this stage, it will be a four-legged beast and will try to stomp on you. Just dodge the attacks and do your own when you find an opening. After some time, it will jump to the roof and will throw nanites at you.
These nanites will also damage the boss itself. After that, it will throw two volleys and then will throw itself at you. And will also absorb the nanites on the ground to recover its health.
If you dodge the nanites and then destroy them it will not be able to recover its health.
The third phase is easy, it will again be on two legs and will be very slow. It will throw itself on the ground and will come towards you leaving a big trail of nanites behind it.
You just need to wait and when it comes close enough you just dodge it and attack it as strongly as you can and just repeat the process until you defeat it.
You will get 20000 tech scrap, Nano brain, Helix of the Delver for defeating the boss.
Major General Ezra Shields
You will find it in AID Command. This enemy has two phases. In the first phase, the general will be piloting a two-legged giant Metal armor. It moves very slowly and will attack with a gun and a flame thrower.
When the gun points at you just go back and wait for the attack to end and then do your attack. As for the flamethrower, just run in circles and when the attack ends go for your attack. Deal as much damage as you can in the recharging phase.
In phase two, the general will be out of the armor and will fight with melee and punches. Armor will still fire beams and flamethrower at you which you can destroy by selecting the robot and selecting limb.
You will be rewarded 20000 tech scrap, General’s ACU, Vulc-88 ‘Panthera’ Rotary Gun.
Delver Echo Alpha
This enemy will be underground, and this one is very similar to the Delver that you have previously encountered (phase 2). It will run around in the arena to stomp you and it will also try to do a combo from both sides which you have to dodge.
It will also try to leap at you to bite you. Now similar to the previous delver, it will jump to the roof and throw nanites at you. It will take a toll on its health.
You need to dodge those nanites and also destroy them so that it doesn’t absorb them again to recover its health. It will also throw itself on you which you have to dodge as well. You can also use a drone to give a lot of damage.
You will get 10000 tech scrap, Energetic Speed Intensifier.
Brother Eli Revived
Its location is CREO Institute of Technology and it is a very similar fight as you have encountered before in the game. The boss will also summon Twin Rigged Spark Aspirant that you need to deal with first before you deal with Eli.
Just focus on blocking directional attacks and nanites and you will be fine. You will get 8000 tech scrap and Critical Oxygenator.
Delver Echo Gamma
This enemy will be in Downtown Jericho City. Now this one is also very similar to the Delver from phase 3. It will be very slow and leave a trail of nanites behind you.
You just need to run in circles and dodge when it comes closer to you and keep destroying nanites behind it as well. You will get 20000 tech scrap and Deflection Hardener for defeating the boss.
Matriarch Celeste
This enemy will be in Cathedral of the Spark. There are two phases of this one as well. She is a very simple enemy with simple attacks, you just need to dodge these attacks and strike her back right after blocking.
You can also get far away from her and as she charges at you, you can parry her which will stagger her and then you can deal as much damage as you want.
In the second phase, Now the field will be electrified from the sides. You need to stay near her and parry her as she tries to attack.
You can also let her use hug attack and deal damage when she is using her attack. Keep in mind to not stand behind her as she can use her mechanical arms to stagger you and deal critical damage.
You will get 25000 tech scrap and Icon of the Spark for defeating her.
PROTEUS Ambush
You will find this enemy in CREO Institute of Technology. When you enter the room you will be attacked by 4 proteus, just focus on one at a time and you will be fine. It is an easy fight if you keep defeating them one by one. You will get Proteus parts by giving a finishing blow on each body part of proteus.
H.A.R.O.L.D. Boss
It will also be found in CREO Institute of Technology. It is going to be a small arena, and the enemy is going to be very quick. Just focus on directional blows and you will be okay.
You will get 10000 tech scrap, Tactile Amplifier and if you get a tail finishing blow you will also get H.A.R.O.L.D.’s Holographic Tailblade.
Goddess Helena
This enemy will be in AID Command. It also has two phases. First, it will act very similar to the Shielded Gaia, where its attacks will not be very good but it will be well protected.
It will be open to attacks when shielded when its using Head Beam attack. You can also break the shield by using a vertical charged attack.
In the second phase, it will have a larger number of attacks as its shield is broken. You need to stay closer and spin and deal damage during this time.
When she uses the beam attack, she is very slow and this is the best opportunity for you to attack her. You will get 12500 tech scrap, Twinlance of Corruption, Goddess Helena’s set for defeating.
Archangel Eli
This is the final boss of the game and is a very difficult one as well. You will find it at The Great Wall. He has a vast variety of attacks at his disposal.
You need to be able to good enough to dodge all kind of attacks from close-ranged strikes to nanites to everything that he throws at you.
You need to get rid of his arms as soon as possible as they provide him with various buffs. After that, the game will be pretty easy and you just need to do some usual dodging and you will be able to defeat this boss.
That wraps our Surge 2 Bosses Guide.