If you don’t love blowing zombies into bits and pieces with ridiculously overpowered but hard-earned firearms, you’re looking in the wrong place. It’s not just about having fun blowing up zombies in Call of Duty Black Ops 4, but doing so with Wonder Weapons that give you a massive advantage.
This is especially true for bigger rounds, as the higher rounds you land in, the higher the difficulty rises, leaving you no choice but to get stronger weapons. Getting such useful weapons, however, takes a lot of effort. You will either have to find or build these weapons to get your hands on them, which are complex processes.
Where to find every Wonder Weapon in Black Ops 4 Zombies?
For those playing the COD Zombies for a while now, you guys should be familiar with how Wonder Weapons in Zombies Mode work. First off, they’re quite powerful and once you get your hands on them, you can bet you’ll be looking at some flashy sequences and fireworks, oh, and a lot of body count.
But first, you’ll need to find the individual build parts scattered around the map for each of these wonderful Wonder Weapons. Do note that the WW build parts will spawn randomly across three possible locations but all these are very close to each other, as they’re in the same vicinity.
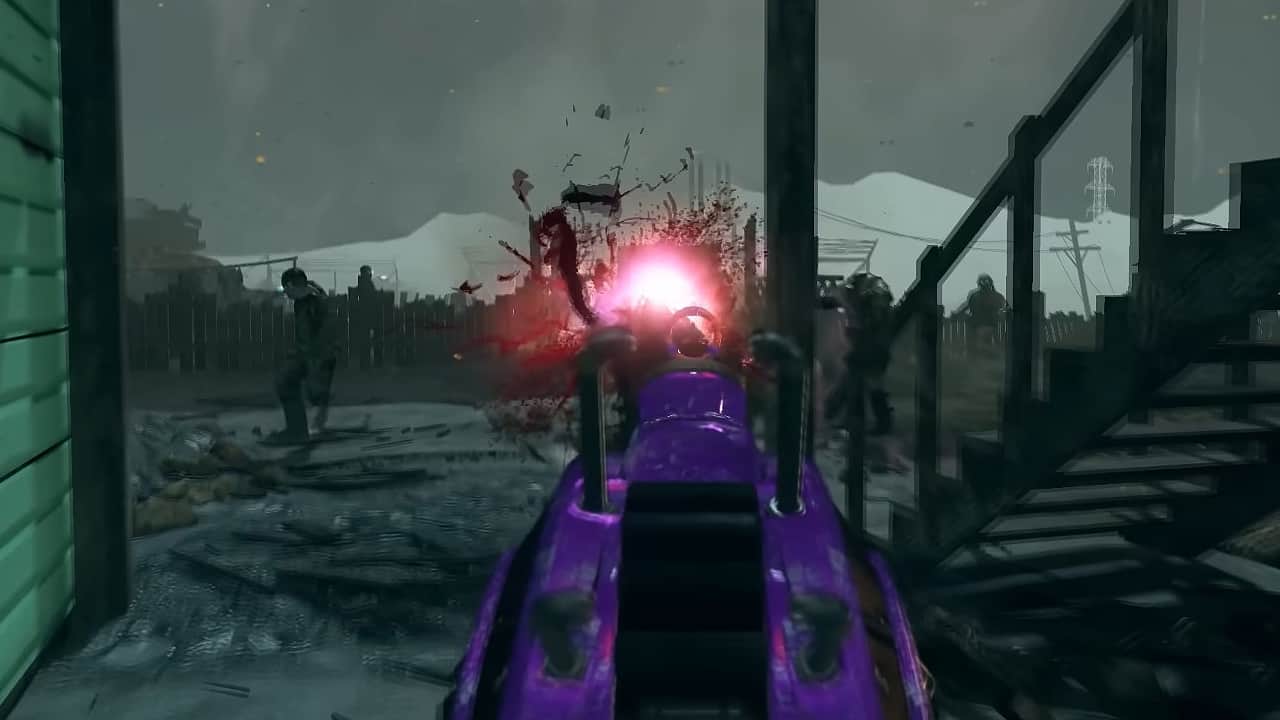
Hell’s Retriever
This replaces the slot of your explosives and gives you access to a powerful tomahawk. The weapon can be thrown and will soon after return to the user’s hand in a Mjolnir-type manner. Apart from the killing, you can use it to collect objects far from you by throwing the Hell’s Retriever towards them.
But how to get Hell’s Retriever? The actual process for finding this weapon is not as difficult as how it was originally in The Mob of The Dead. In the original game, you had to find different dog heads, or Cerberus Heads, as they were called, and then feed them. After that, you could collect the weapon from a hidden chamber. The process is the same for the most part but the location of all of the parts is different.
Regarding the process, you just need to execute some zombies, a total of ten, near the three Cerberus Heads. Look for the dog marks on the wall and kill a zombie to make the dog appear. Wait for the last zombie to be eaten before you kill another one so that the dog can feed on their souls.
The first dog is found at the start of the game near the spawn room. Go upstairs from Richtofen’s Lab and enter the New Industries room. The head is in the corner adjacent to a wooden desk.
The second dog head is at the same location that it was in the original Mob of the Dead map. It is upstairs in the center of the prison, right in between the two wings. Get to it by the Cell Block on the 2nd floor, passing through the catwalk and the C-D street.
The third and final dog head is in the Eagle Plaza, on the wall as you leave the Warden’s Room. You need to go through the Administration and then into the room before leaving it for the Eagle Plaza.
To collect your reward, head to the Citadel area; this can be accessed through the showers in the main prison area. There are 3 dog heads on the wall but those are not your concern.
There is a tunnel underneath which you need to use to pick up the weapon. This is identifiable through the entrance on the floor of the room where there are lava pools underneath the gates. You need to pay the price of 500 points to access it. Once you have used the tunnel, you need to be ready for the item and interact with it at the right time to collect it.
Blood of the Dead Spectral Shield
The Spectral Shield is very important since it is not only a great defense mechanism but it also allows you to suck in zombies and then unleash the built-up energy. The protection is two-fold, from the back when you’ve not equipped it and from the front when you’re using that instead of a primary weapon.
Apart from that, it can be used to drain the essence from the zombies and then use it to spirit blast when the shield is drawn. These blasts are very important as they can be used to charge the fuse meters around the map. This section will detail everything you need to know about how to get the Spectral Shield.
There are three pieces you need to collect for obtaining the Spectral Shield. The first thing to find is the Shield Plate. It can be found near the Citadel Tunnel.
Look for it around the staircase area as it houses multiple plates. Alternatively, you can look for it in China Alley in a spot right across from Building 64.
Next, you need to look for the Afterlife Essence. This will always be lying on top of a red fuse box. It can be found in either Times Square, the Library, or on Michigan Avenue.
Now, you need to gather the last piece, the Warden’s Electric Key. It can be found when you first encounter and take down Brutus. Most probably, the fight will occur when you first switch on the Power at Building 64.
Once you have collected all of the shield parts, you can assemble them on a workbench that is scattered throughout the map. The docks have a good, secluded workbench which you can use.
Once you are at the workbench, interact with it and the shield will be built eventually. Once your shield is broken down, you can simply come back here to repair it.
Classified Spectral Shield
Want to know how to get a Classified Spectral Shield? We have got you covered! For the first piece, you can head to Central Filing and look around in three potential places.
The first location is left from the side passage, the second may be found near the two windows in the right corner, or lastly somewhere near the file cabinets within the room.
For the shield part of the Classified Spectral Shield, you would want to search through the lower level of the War Room.
The first location is right beneath the staircase, the second is next to the central portal here, and lastly, try to look for it behind the computer terminal in one of the rooms.
The final piece, Metal Clunk, is spawned on one of the three locations in the South and North laboratories. In the South Laboratory, one may be found right across from the power switch.
Otherwise, look for it near the purple portal next to the broken window. Lastly, you may find it right next to a window near the portal in the North Laboratory.
To acquire the shield, go to the workbench and assemble the parts similarly to how you formed the Blood of the Dead Shield.
IX Spectral Shield
The IX Spectral Shield has its first part, The Blade, lying around three possible locations in Zeus Tower. One location is the Altar Room on the statue behind the staircase. While entering the Zeus Tower, you may happen to get the Blade on a statue across from the staircase of the Altar Room. Finally, look for it near the stairs of the Bathhouse.
For the Shield part, head to the Ra Altar Room and check the corner of the room, left of the gong, or right of it. Lastly, for the Buckler part to complete the shield at the workbench, you need to make your way to the Odin Tower.
Here, you may find the buckler while entering the tower; it’ll be on a shelf. Otherwise, look near the stairs in the Altar Room or on the wall near the shields in the Cauldron area of the tower.
Voyage of Despair Spectral Shield
To find the Handle of the Shield, head to the 1st Class section, and there in the Laundry Room of the State Rooms, you may find one lying on the shelf.
The next possible location is right across from the laundry room and next to some wooden furniture. Within this same room, you may find it lying on a wooden chair.
Then you would need to head to the bridge and search the area for the Visor Part of the shield. Ascend the stairs from the right and it’ll be next to the metal railing.
If you didn’t find much luck there, then move to the corridor and find it on one of the gold railings. Otherwise, your last chance is the room adjacent to the previous location; the equipment may be atop a wooden crate.
For the last part, you will need to have unlocked the Provisions Area which becomes accessible after getting the Sentinel Artifact. The actual shield part may be found in the 3rd Class Berths area of the Provisions, near a stairway.
For a second location, you need to drop drown from the 3rd Class Berths area and look around to see the shield lying on a crate. Now, for maybe the last location, just before you enter the Engine Room, you may find the shield next to the ICR-7 Wallbuy.
Acidgat
The Acidgat is a far superior version of the already super shotgun, Blundergat which you can obtain from a Mystery Box on Blood of the Dead map.
The Acidgat throws out heaps of acid and every bit of zombie flesh is instantly corroded away into non-existence. So in addition to the damage from the bullets, there is the burn damage status that remains over time.
Unlike other Wonder Weapons in Black Ops 4 Zombies, you don’t need to look for potential locations as the parts always spawn in fixed places. You can also upgrade the Acidgat later to the Magmagat.
When it comes to how to get Acidgat, the first part of the Acidgat can always be found in the Transverse Tunnel, just in between the path to New Industries and Power House. Next, use the Warden’s Key (from defeating Brutus) to unlock the metal gate in the Warden’s Office to get the second part for Acidgat.
Lastly, the third and final piece can be collected from the locked cabinet of the Infirmary via the Warden’s Key.
The final upgrade version for the Acidgat is the Magmagat for which you first need to turn Acidgat to Vitriolic Withering via the Pack-a-Punch.
To initiate the process, head to the fireplace room of the Warden’s House and place the Vitriolic Withering in the fireplace. Then eliminate a bunch of zombies around the fireplace for the three blue skulls over the fireplace to start glowing.
Collect the now-glowing blue Acidgat and make your to the New Industries while stopping occasionally to rekindle the Acidgat with the blue fire via the glowing blue barrels in the way.
Once you’ve reached the New Industries, place the weapon in the green press and your Acidgat will turn into the final and lethal form, the Magmagat.
The Gold Spork
This is the melee weapon to end all melee weapons. Being able to one-hit kill any type of enemy, you’ll need all of the above Wonder Weapons first before you can be on your way to acquire the Gold Spork in Black Ops 4 Zombies.
Though it may take you 30 rounds on the Blood of the Dead map to obtain it, it replaces your standard melee attack with a devastating one.
Firstly, you’ll need to find the Spoon. For it, first get the Warden’s Key that’s obtained from defeating Brutus, the boss enemy. Next, make your way to the Warden’s Office and use the Spectral Shield to aim down the sights.
This will let you visualize and inspect three secret numbers within the office. The numbers are random and maybe the locations are too but you’re likely to find them written on the pillars and the walls.
After noting down the numbers, head to the lowest level of the Citadel Tunnels and observe the number pads on the locked boxes. These can be activated by energizing them via a Spirit Blast move from the Shield. Then input the numbers you previously got, to let the cage fall into the water below.
Move to the Docks and activate the electricity gauge there, again with the Spirit Blast. Now you can throw in the Hell’s Retriever to get the Spoon which will be lying on a crate.
Now, all you need to do is collect the Gold Spork. Your goal would be to fill the bathtub in one of the rooms in the Infirmary with blood. This is carried out by killing enough zombies on the Roof section by using Acidgat.
Note, you can also use Magmagat or Vitrolic Withering. Before filling the tub with blood, place your Spoon. Then when the tub is filled with blood, drain all of it and the Spoon goes along with the blood.
Finally, proceed to the Catwalk and make out the middle pipe on the water tower. Use the Hell’s Retriever to hit this exact spot and the tomahawk will return with the Gold Spork.
Kraken
Almost shooting like a mini-cannon, the three-barreled firearm can prove deadly, even when hordes of zombies are swarming in from all directions. It works a little differently from the other Wonder Weapons in Black Ops 4 Zombies since you don’t need to acquire parts to build it.
You can obtain the weapon straight away from any Mystery Box located on the Voyage of Despair map. However, to upgrade the weapon to devastating uses, you’ll need to hunt for different parts.
Firstly, you need to get a hold of the three upgrade parts: Chamber, Barrel, and Metal Tubing. For the Chamber, look around the 1st Chamber of the ship while for the Barrel, look for it in the Cargo Hold where it may be near the car or behind the stairs. Finally, Metal Tubing can be found in the Gallery section in the burning room or along the walls.
Next, you will need to find the elements to give that extra bit of status effects to your weapon’s output. These special elements, Acid, Fire, Ice, and Lightning are gathered from the loot of special mini-bosses.
Choose either one and then head to the workbench in the Engine Room to start making the Elemental Kraken. After spending 6,000 points, you’ll be able to imbue the element with your weapon and get to the zombie-killing
Death of Orion
To unlock the Death of Orion, you first have to get the Pack-a-Punch. After that, you have to make an Acid Trap and grab three pieces of gear to put inside it. Two of these are in the temple, while the other can be obtained via Melee challenges.
Once that’s done, you must get a Statue Head from one of the towers in the arena followed by obtaining the Scorpion Key after placing the Statue Head in the Acid Trap.
Lastly, you must find the Gold Vase by fighting in the arena raising your Crowned Affinity, and then filling it with Poison. Once all that is done, you must head over to the Mystery Box IX and Poison it to obtain the Death of Orion from it.
Alistair’s Folly
Featured in the Call of Duty: Black Ops 4 Zombies map, Dead of the Night. It can be obtained through using the Mystery Box, or by unlocking it from a wall through a small Easter egg requiring the player to find four colored letters around the map that spawn at random and inserting them into the safe lock to open the safe and obtain the weapon.
Chakrams of Vengeance
This weapon can be found in the map Voyage of Despair. This is a Specialist Weapon that has three different levels which give unique abilities. These are Flawless Vision, Velocity, and Lacerating Whirlwind, respectively.
Death Machine
The Death Machine can be found in the Zombies maps “Five”, Ascension, Dead Ops Arcade, Call of the Dead, and Moon as a power-up. In power-up form, it appears as a three-dimensional model of the icon for the Rapid Fire attachment. It is easily identifiable, casting a blue glow instead of the usual green. The Death Machine lasts for 30 seconds with unlimited ammo
Hammer of Valhalla
This wonder weapon can be found in the Chaos Story maps of Black Ops 4 Zombies: Voyage of Despair, IX, Dead of the Night, and Ancient Evil. This is a Specialist Weapon that has three levels, each offering a different ability. These are Lightning Strike, Storm Barrier, and Lightning Bold, respectively.
Hand of Charon
In the map Ancient Evil, the player may obtain this weapon. Firstly players must locate a Dormant Hand around the map, which the Oracle will provide a cryptic clue to the location of one. Find it and bring it to the Shrine of Charon in the Python Pass and place it on the shrine.
The player will be condensed in a small circular barrier and must survive until the barrier disappears. The Fallen Hand of Charon can now be grabbed from the shrine.