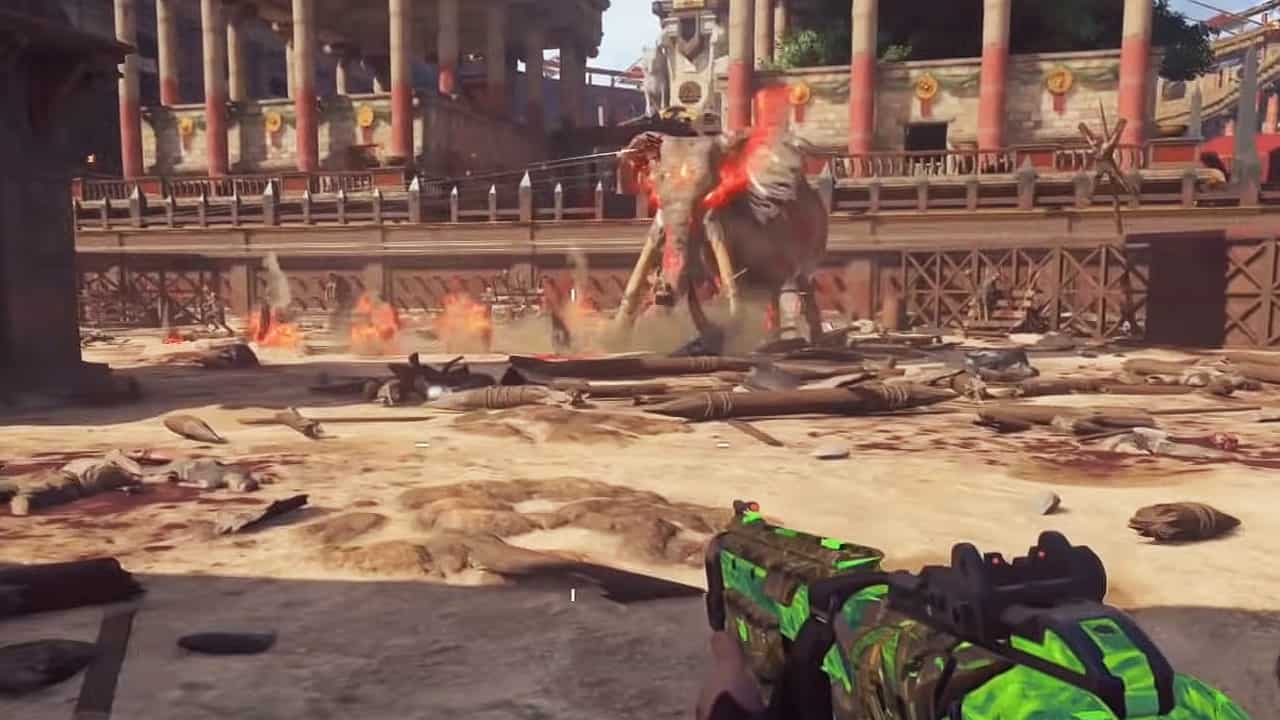
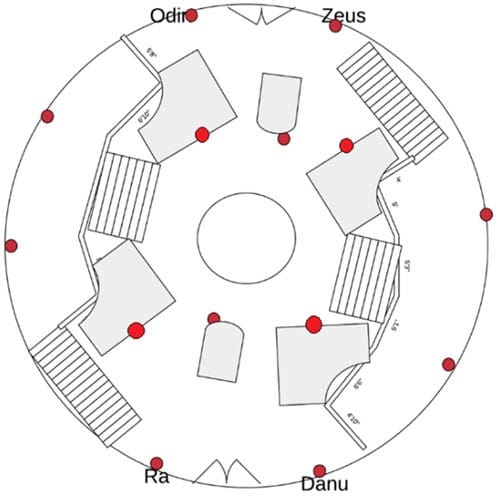
The IX easter egg is one of the toughest and most time-consuming easter eggs in all of the Black Ops 4 Zombies maps. It is modeled after a medieval Roman Colosseum and has connections to four gods namely Ra, Danu, Odin, and Zeus.
The easter egg, as said earlier, is quite long and requires you to complete a series of steps and sub-steps. We highly recommend using the following loadout before starting. These perks, weapons, etc, will give you an added advantage against the enemies and challenges you are going to face.
Perks
- Danu – Quick Revive
- Ra – Stamin-Up
- Odin – Deadshot Dealer (Optional)
- Zeus – Dying Wish
Weapons
- Specialist Weapon – The hammer or The Viper and Dragon
- Start Weapon – Strife MkII
Equipment
- Wraith Fire
Elixirs
- Temporal Gift
- Stock Option
- Equip Mint
Step #1: Activate the Pack-a-Punch machine
To get the Pack-a-Punch machine, you need to kill 4 Champions on the IX map and put their heads on spikes. They will be indicated at the bottom of the screen i.e. Danu, Ra, Odin, and Zeus. These Champion Zombies are mini-bosses and each of these can be found in the 4 altar rooms.
Do note that you can refer to the left top corner of the screen to know what room you are in. There will be only 2 altar rooms unlocked at the beginning of the game but the other two can be unlocked after earning some points
Altar of Ra
This champion will be in his room i.e. Ra Altar Room. Go through the arena and take the first door to the right. Head upstairs and you will find this Altar Room. Interact with the gong there and the champion will be summoned. Defeat this champion to obtain his head as a reward.
Altar of Danu
This champion will be in his room i.e. Danu Altar Room. From the Ra Altar Room, head for the next room and open the bridge. Cross this bridge and head into the Altar Room. Interact with the gong there and the champion will be summoned. Defeat this champion to obtain his head as a reward.
Altar of Odin
This champion will be in his room i.e. Odin Altar Room. From the Danu Altar Room, follow the path until you reach the Odin Altar Room. Interact with the gong there and you will summon the champion. Defeat this champion to obtain his head as a reward.
Altar of Zeus
This champion will be in his room i.e. Zeus Altar Room. From the Odin Altar Room, open the bridge passage nearby and cross it. You will inevitably get to Zeus Altar Room in no time. Interact with the gong there and you will summon the champion. Defeat this champion to obtain his head as a reward.
Place the heads on the spikes in the Temple
After getting all 4 champion heads, you must head to the Temple Room. You will find the Temple Room downstairs from the Zeus Altar Room and into an underground tomb.
When you reach the Temple Room, you will see 4 spikes there. Interact with any of the spikes to lay all 4 heads as sacrifices to the Temple.
Wait for a little while after sacrificing the heads. The large statue in front of the spikes will crumble to pieces and a Pack-A-Punch will be revealed inside.
Step #2: Obtain the statue’s head
Head to the Danu-Ra Temple Entrance, a crumbled wall should have appeared. Peek through the wall and you will see a bowl of fire there; shoot it! The bowl will fall and you will see fire rising.
Once you have done that, you need to head through the Danu Tower Entrance and onto the Stone Bridge. You will need to spend some points to unlock the drawbridge but you should have enough by now.
You will notice the fire that you lit up before, pointing in a specific direction. Head into the tower that the fire is pointing towards and you will find a statue head. There are a few things to note here:
If the Fire Is Pointing Towards Danu Tower
You will find the statue head at the bottom level of the tower, in the water. This area will be called Danu Tower: Arboretum.
If the Fire Is Pointing Towards Ra Tower
Head to the basement floor of the tower and you will find the statue head behind a fire pit, in the corner of the floor.
If the Fire Is Pointing Towards Odin Tower
Head to the basement floor and you will see a cauldron. The statue head will be near this cauldron.
If the Fire Is Pointing Towards Zeus Tower
Head towards the basement floor. The area should be called Zeus Tower: Bath House. You will find the statue head there.
Step #3: Get Death of Orion (Secret’s Kiss)
The Death of Orion is a Wonder Weapon in Black Ops 4 Zombies that is required to complete the IX Easter Egg and it can be upgraded to Secret’s Kiss via the Pack-a-Punch machine.
You can obtain the Death of Orion through the following steps:
Build the Acid Trap
The Acid Trap consists of three parts.
- Pot: You must complete three challenges in the arena. Cut down the banners outside the Arena using your melee attack. You can find the first part in the middle of the Arena after you have completed the three challenges.
- Chain: Head inside the Temple and run along the corners of the map. You will find a Chain that you will be able to interact with. Interact with it to obtain the part.
- Gear: Go to the room opposite where you found the chain. On the left in the room, you will find the gear below a cage holding a skeleton
Once done, build the trap and place the statue head on the metal grate. Wait for the Acid Trap to run its course. You will find that the statue head is gone and instead, a Scorpion Key will appear.
Get the Golden Cup
From there, head out to the arena and hold out for 2 rounds with FULL Crowd Affinity. This part can get very difficult. After completing two rounds, you will get a gift from Serket. One of the items that the crowd will now throw towards you will be a Golden Cup. Pick that up as you will need it for the next step.
Fill the Golden Cup and find the Mystery Box
Head to the Danu Tower and go into the underground area. You will find a tree with a hole in it. Melee it to put Scorpion Key in the whole which turns out to be a sapper.
Interact with the sapper to put the cup under it. The sapper will begin extracting the tree extract and dropping it into the Golden Cup. Head for the Arena again and finish a round or so. Head back to the basement and pick the filled cup up.
Now find the Mystery Box and interact with it from one of the sides and you will see an option to “Poison” it. Once you poison the Mystery Box, you will get the Death Orion weapon. Do note that only one player will get the weapon so be sure to give it to your best teammate.
Upgrade to Secret’s Kiss
Having obtained the Death of Orion, head to the Pack-A-Punch and PaP this weapon. You will now receive the Wonder Weapon “Serket’s Kiss”. Pick it up and zap all the enemies you can find.
Step #4: Purge the Blight
The next step in completing the IX easter egg is to complete the Purge the Blight objectives which once again will require you to complete multiple tasks.
Collect the Wood
Head to the starting Arena and wait for a zombie wielding an Axe to appear. You need to tempt the zombie until he throws his axe at one of the wooden pyres on the platform in the center of the Arena.
If the axe hits the pyre, some wood will break off. Collect that wood from the floor by using the Interact button.
Burn the Wood
Head for the Odin Tower, Cauldron, and hold the interact button to throw the wood inside the Cauldron. Fight off the zombies for three rounds and the wood will convert to charcoal. Pick up the charcoal with the interact button.
Find the Skull
Find a skull with a blue symbol on its forehead from the myriads of skulls along the walls and break it off using your character’s specialist weapon. The spawn locations are somewhat random, but you can find them in one of the locations marked below in the vicinity of the Pack-A-Punch room.
Grind the Skull
Head to the Flooded Crypt room afterward and find the grinder which is embedded into the wall. Fire 3 Fully charged the Death of Orion shots to force-start the grinder and wait until the skull is no longer visible. Bone meal can now be collected from the ground skull.
Collect the Poop
To obtain the dung, you need to reach negative affinity which you can do by taking hits, shooting into the crowd, throwing grenades, and taking fire damage in the Arena.
It will prompt the crowd to throw items, or more specifically, poop into the arena. Remember to pick it up. Throwing 3 grenades directly at the audience should be enough to prompt them to fling some poop your way.
Fertilize the Poop
Head to the Zeus Tower Bath House and place the poop, charcoal, and bone meal in the bowl between the bloodbath and the curtain.
Fight off the zombies for two rounds until the poop is fertilized. Pick up the fertilized poop. Head to the Danu Tower Arboretum and place the fertilizer between the two trees, onto the ground. Wait for three rounds until the fertilizer begins emitting green smoke.
Shoot the red tree spores
Use a Pack-a-Punched weapon with Firebomb status to kill zombies near the smoking fertilizer. The fertilizer should turn blue shortly. Stand on the blue symbol and you will be teleported to a new area. This area looks like a colorless version of the Danu Tower.
Once done, survive the onslaught. Shoot the glowing red spores on the trees and survive until your objective changes to Answer the Dawn.
Step #5: Answer the Dawn
The next main objective is to Answer the Dawn. This is another lengthy objective for the IX easter egg in Black Ops 4 Zombies. This objective will have you build one of the best shields in the game and set some bull symbols on fire.
Build the Brazen Bull Shield
Once your objective changes to Answer the Dawn, you will need to build a shield. To build this shield, find the three parts. The parts can be in any of the locations:
Part #1 – Shield
- Ra Tower: Altar Room – opposite the mystery box location
- Ra Tower: Altar Room – Corner to the right of the gong
Part #2 – Blade
- Zeus Tower: Bath Room – by the stone mural
- Zeus Tower: Altar room – at the foot of the statue.
- Zeus Tower: Entrance – on the statue with the reaching-out arm
Part #3 – Buckler
- Odin Tower: Altar Room – in the barrel between the spears
- Odin Tower: Cauldron – to the left of the two shields on the wall.
- Odin Tower: Entrance – on the bottom row of the shields stand.
After getting all the parts, head to any workbench and build the Brazen Bull Shield. The ideal location for a workbench is in the Pit. It is also recommended to Pack-a-Punch the shield to make it even more powerful.
Set the Bull symbols on Fire
After having obtained the shield, you now have to set four bulls on fire. To do this, you will have to find them first and then burn them using the shield. A champion will spawn on the map for each bull you kill. Kill the champion and collect his essence into the Ra statue.
The bulls can be in any of the following locations:
- Danu Altar Room
- Flooded Crypt
- the Pit
- Ra Tower: Burial Chamber,
- Temple
- Odin Zeus: Temple Entrance
- Danu Tunner
- Drawbridge
- Arena
You can use the shield to find the glowing bull.
Complete the Ra tower trial
Head back to the Ra Tower Altar and go upstairs until you reach the obelisk with a blue symbol on it. Hold the interact button and you will be teleported to another dimension.
Note down the 4 flashing symbols on the obelisk as you will need to kill an enemy of a type related to the obelisk. The following image explains what type of zombies the symbols correlate to.
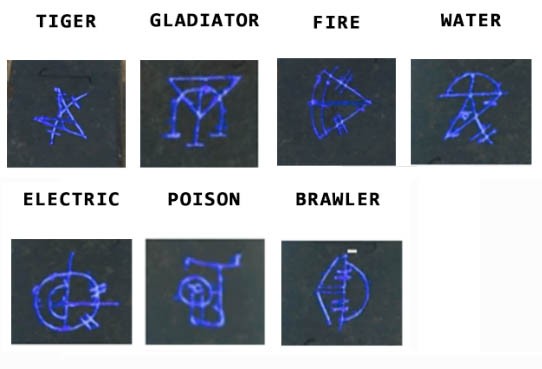
You must kill these enemies in the order the obelisk shows you and if the symbol is not one of the ones shown here, it corresponds to the Blightfather.
If you accidentally kill any other Special zombie, you will have to retry in the next round. Repeat this once the new set of symbols appears.
Step #6: Summon the Storm
Head to the arena and interact with the stone pillar in the middle of the platform. If you are playing with other people, each player must do this at the same time.
You will then be teleported to the basement area where you will find four poles that have been summoned. Shoot each pole to raise them above ground. The location for each pole is as follows:
- Pole 1 – the Collapsed Tunnel, through the window.
- Pole 2 – the Odin Tunnel, on the ceiling.
- Pole 3 – the Danu Tunnel, through the window.
- Pole 4 – the Cursed Room, hanging from the ceiling.
Fill the electrical orbs
Return to the arena to find the various electric orbs that have spawned on the map. Use a weapon with the Kill-O-Watt effect to ensnare the enemies near the bulb and kill them inside the circle. You can get the Kill-o-Watt status for your weapon by using a Pack-a-Punch machine. Doing so should fill up a nearby electrical orb.
Fill all 4 electrical orbs using the same method until they are full and ultimately move to the center of the arena. Stand on the platform and hold the interact button to be teleported to an arena with locked doors. Kill everyone and survive until the objective changes to Channel the Flood.
Step #7: Channel the Flood
Now there will be nine blue symbols on the map. The aim here is to shoot at least three symbols at a time with one hit of Serket’s Kiss. Hit all the symbols in the pairing of three until they’re dim.
If done incorrectly or you inadvertently missed a shot, the symbols will fade again and you will have to retry. The three spawning locations of these symbols are the Danu Tunnel, The Pit, and The Crypts. If done correctly, the symbols will start glowing bright blue.
Head to the Pit and have yourself and your team stand on the large metal grate. Shoot it with your specialist weapon and interact with it.
From here, you’ll be transported into the final trial. You will have to survive numerous waves of zombies. Moreover, you will also be encountering multiple Blightfathers.
Serket’s Kiss can be extremely useful in this scenario due to its effectiveness from a distance. You can check your progress by looking at the water level through the metal grate
Step #8: Defeat the final boss
Like most of the other Easter Egg maps, the final hurdle in completing the IX Easter Egg is a tough boss fight. But unlike other Black Ops 4 Zombie maps, this EE requires you to defeat 2 legendary bosses.
Head to the central area of the arena, where you should now see a portal. Enter the portal to be teleported to the boss fight arena. Defeat the onslaught of multiple enemies (zombies, gladiators, tigers). The sheer number of enemies can be overwhelming so you must keep moving and be wary of space around you while trying to gather as much ammo as you can find to prepare for the bosses.
The first boss is a zombified Elephant called Fury. The best way to proceed is to knock down all of its armor first and then aim for its head.
Once the first boss is defeated, a second boss called Wrath will spawn. It is essentially a much stronger version of the same boss which means the same strategy will work for it as well. It might take a bit longer but once its armor is down your Wonder Weapon should make short work of him as long as you are aiming for the weak spot on its forehead.
Defeating the second boss will complete the IX Easter Egg quest and will trigger a somewhat shocking cutscene.