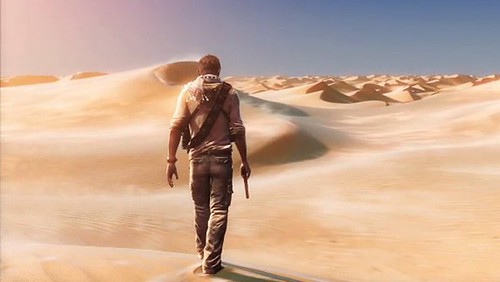
Nathan Drake is back and this time, he is looking for treasure rich city lost somewhere in the sands of Rub al-khali desert. Like always, there are some baddies and unforeseen hindrances to make the adventure action packed and full of surprises. But that’s what you want, don’t you?
This RPG action adventure won’t let you get bored as there is plenty to do like brawling fights, exciting shooting encounters and head scratching puzzles. Cutscenes and story telling makes you feel like as you are watching a Hollywood movie with you being an active part of it.
Apparently, it seems that you will be roaming across the desert environment throughout the game but that is not it. There are other sections too. According to devs, there is only half or even lesser portion of the game is set in sands.
Since it’s an RPG action game, there are chances that you may find yourself lost at certain points in the game. In that case, we are here to help you out with the walkthrough to make sure that the fun never stops.
Table of Contents
- Chapter 1 – Another Round
- Chapter 2 – Greatness from Small beginnings
- Chapter 3 – Second Story Work
- Chapter 4 – Run to Ground
- Chapter 5 – London Underground
- Chapter 6 – THE Chateau
- Chapter 7 – Stay in the Light
- Chapter 8 – The Citadel
- Chapter 9 – The Middle Way
- Chapter 10 – Historical Research
- Chapter 11 – As Above, So Below
- Chapter 12 – Abducted
- Chapter 13 – Rough Seas
- Chapter 14 – Cruisin’ For a Brusin
- Chapter 15 – Sink or Swim
- Chapter 16 – One Shot at This
- Chapter 17 – Stowaway
- Chapter 18 – The Rub’ Al Khali
- Chapter 19 – The Settlement
- Chapter 20 – Caravan
- Chapter 21 – The Atlantis of the Sands
- Chapter 22 – The Dreamers of the Day
Uncharted 3 Walkthrough
Chapter 1 – Another Round
Mr. Drake and his friend are there for a deal. After you get control of the character, all you need to do is press the on screen buttons at the right time and your character will counter the attacks in different ways. If you are looking for treasures along with the main adventure then you should refer to our treasure location guide for that.
The fist fight will move to different sections of the building. Keep on pressing the displayed buttons till it’s over.
Chapter 2 – Greatness from Small beginnings
Walk towards the cannons and then climb the staircase ahead. Then walk to the case containing future Drake’s ring in the middle section of the room. A cutscene will start. After you are thrown outside the building, start following Sully and when the road bifurcates, head right.
Like before, there will be some button prompts you need to follow for the whole sequence. Then follow Sully to the building. Move to the back room door and press the triangle button to move through the door. In the next building, Sully will close the door and you will have to look for another passage.
Move left from the closed door and look for a yellow pipe you can climb. Shimmy towards right and then after a couple of jumps, a cutscene will play. After the cutscene, follow the path to reach the next balcony. From here, jump to the next balcony railing and get the “24 Horas Sign”.
Then jump to the next building on the right side and continue along the path till you reach the roof where you will also find “Hotel Arrecife” sign. Head back down the street and pass through the crowd to get to Sully.
Chapter 3 – Second Story Work
You will find a rope after a simple straight section. Leap over it and then get to the roof. Move to the middle section of the roof and you will find a box you can use to climb up further. Head across the roof to the planks section and then jump onto the lamp. Then latch onto the next one. You won’t succeed but you will find yourself at some rooftop.
Drop down to the balcony below and then move through the blue door to the museum. After examining the room, head to the display at the center of the room to activate a cutscene. After the cutscene is over, move the stairs and then use the axe case there to climb the window. Use the next stairs to get to the door at the top. Squeeze through it to loose the enemies behind you.
Jump to the railing and then find the spot across the roof from where you can jump to the adjacent building. Further ahead, you will find more planks you can use to climb higher. Keep moving to reach the roof and then follow on to the next roof section.
You will soon find a dead end (apparently). To your left from here, there will be a yellow object you can use to get back on track. After Drake slips, you need to mash “X” button for the next sequence. Follow the path shown by the camera and then jump off to railing on your left to complete the chapter.
Chapter 4 – Run to Ground
Pursue Sally through the alley and then move over the fence. Use your electricity meter to climb the building to your left. After Charlie opens the door, drop down and then move the yellow object so that you can move up.
After the cutscene is over, head to the green door. There will be a yellow pipe nearby. Climb it and when it breaks, press “X” button to jump off it. Head left and drop down to the roof. Move into the building through the open window. Then leap onto the pipe on the wall and then shimmy to the left. Then drop down to the ground and run to the door to open it.
After your friends are inside, move over to Charlie and investigate the tire tracks. They will lead you to a secret switch. Move through the secret entrance and keep following the tracks that will lead you to an enemy encounter. Deal with those goons before you enter the generator room.
Climb the ladder there and then move across the bridge. Use the vertical pipe and start descending. While you are descending (anti-clockwise), you will find a grate in the wall. Keep on moving till you reach the bottom. Take care of the two enemies in the next section. Wait for them to approach you and then take them out.
In the next room, climb up the pipe and then push the ladders down for your friends. In the next room, Sully will ask you for a ladder boost. Use the yellow box in the room to reach the gate. After you reach the switch, follow the on screen button mashing to enter the caves.
Chapter 5 – London Underground
Move towards the elevator and then observe the counter weight being stuck. Move to the ladder on your left to the wall. You can use it to reach the counter weight. Next, use the rafter and then grab hold of the chandeliers to get down.
There will be a small gunfight in this section. After you have taken care of all of them, move through the railway to enter the library. Follow the instructions and scan the table where Marlowe previously was standing. To get to the central pillars in the room, get to the table with two swords where you also killed a guy before.
You can use the swords and paintings along one side of the pillar to get to the other. Then press the concerned button near the golden dear to activate a cutscene. Eliminate the enemies inside and then head out. You need to be careful here as there is a henchmen down the tunnel. Be safe and enter the big room ahead.
More Gunfight! If you stick to the left side wing then you will be able to stop enemies ambushing you from the back. In the next section, you can shoot the propane tank to get rid of the guy with the shotgun.
As you move up the ladder, there are more enemies waiting for you. Just shoot them and then move to the red train car. Don’t forget to shoot the propane tanks as they can be useful in killing multiple enemies. Follow the path, up the stairs. There will be minor resistance but nothing to be worried about. Finally, shoot the lock and make your way through to the next chapter.
Chapter 6 – THE Chateau
Move along the path and you will get a water stream. Move inside the cave. Now, move along the pathway beside the waterfall and when the road divides, move left to a green wall. From the Pan statue, you can use the column to climb up and them move across the ledge. Follow the path to reach the tower.
Get to the bottom level of the tower and then shoot the lock on the other side of the room to let Sully in. Now follow the path where Sully leads you. You will ultimately reach a room with large staircase. After the cutscene, move out through the window and move into the next room. Move through the door and get yourself ready to solve a puzzle.
The swordsman statue is already in the correct position. You need to re-position the remaining towers according to the journal.In the next section, first learn and then swim through the water till you finally reach outside near the well. You need to stay low here and execute a stealth kill on the person standing beside the well. Take out the enemy beside the truck and then deal with the rest in the courtyard.
Climb up the ladder and you will find a shot gunner waiting for you. If you are quick enough, you can take him out without any problem. Follow the grenade tutorial and then head down. In the next section, you need to provide Sully some covering fire. Clear the area and then head down as recommended by Sully.
Down there is a puzzle you need to solve. Step on the icons (on the floor) shown in the journal from left to right. After you solve the puzzle, move to the altar and then help Sully before moving through the tunnel. The next puzzle is a bit tricky. You need to view all the symbols and find what is
surronding on the wall grid. Here is the key if you can’t figure it out:
Lion = Second row: Second column, Bull = Third row: Fourth column, Horse = Fourth row: First column, Eagle Fifth row: Third column. That will be your last trial in this chapter.
Chapter 7 – Stay in the Light
Don’t loose Sully and find the escape route. As you move to the wall, press the concerned button to help Sully move up. To loose the spiders, you need to run as fast as you can. After you are safe from the spiders, move down through the hole and then follow the path till you make the floor fall.
From here on, next couple of sections have enemy resistance. Clear the areas and then lower the beam for Sully. Be cautious of those men shooting from above. When the room is on fire, there will be a door opened for you to move through. You will have to shoot a couple of enemies along the way.
You move along following the camera hints. Soon, you will have to deal with a stronger foe so take your time and don’t be hasty. Sully will help you through the next section. Another enemy wave will appear here. Deal with them and when the stairs fall apart, make a jump and then move towards Sully. The remaining section is your escape. You need to get to the roof first. Try not to be hit by the enemy fire.
Chapter 8 – The Citadel
As you move up the first tower and follow the path, you will be able to observe that some part of the bridge is damaged. You can grab the coin down there and then get to the next tower. There will be some enemies in this section. Easy trick here is that you stay at top and let them come to you.
After you open the gate for Sully, move towards the courtyard. Shoot open the next door your reach and the one after that cannot be opened. You can jump onto the water basket and then Sully will lower you. Deal with the enemies in the next section. You should climb up the wall in one of the rooms and then once again, open the gate for the old Sully. Get back to join up with him. As you run across the courtyard, a cutscene will play.
Climb up the stairs and get ready for some gunfight. Then follow the path and lift the gate ahead and continue. More enemies will be waiting. When you reach outside, you need to swing the ropes and take out the guards one by one. For the last jump in the next section, you will have to move up the rope a bit. There are some enemies to deal with in this room and a beast which appears when you interact with the door in the center.
After the cutscene, you will be attacked by the men wielding RPGs. You should run across and grab that sniper. Pick them up one by one. After you try to use the zipline, all you weapons will be gone and you will be left will with hand based combat. Well, for sometime atleast (you will have them back soon). There is no need to worry about. You have done this before and the same tactics will apply here. Aim for their heads.
When you reach the storage room, move to the symbol to use the binoculars. Look around and you will find your next destination. After you have taken care of the enemies who spot you here. Move down to get to the destined tower. Snipers will try to annoy you. Ascend the tower as your mentor covers you from below. After Sully creates an opening for you, a cutscene will play.
Go to next page for the Walkthrough of Chapter 9 and onward.
On this page, you will find walkthrough of chapter 9 and onward.
Chapter 9 – The Middle Way
While you fight with Charlie, he will try to finish you off by choking but Sully and Chloe will enter to save the day. Climb the stairs nearby and then light all statues. Other doorway in the level will lead you to another brazier. Your old friends (spiders) are back. Use the torch light and light the other two. Then turn right and grab the hanging chains.
Get to the brazier you just lit. If you are having trouble in lighting them up then try shooting lower than you were shooting before. Jump to the other side now and light another one. If you manage to survive here, it’s time for some swimming.
After you are out of water, you shift the globe to adjust. You can try the image in the bottom right. Head back now to play a cutscene. There will be a couple of more small cutscenes in the remaining section of this chapter. Before you can move on, there is a tough battle waiting for you. It is recommended that you reach the checkpoint before you die or you will have to start over again. You will be able to reach the checkpoint till the middle section of the map. Watch out for the guys carrying shields.
Chapter 10 – Historical Research
Keep on following Elena till you encounter cops. They are not there to greet you so stay low. Someone will help you to move through the gate. After you find cops again, climb up the ladder and get inside. Move up the stairs and then move along the long hallway to play a cutscene.
Follow Talbot and soon, you will come across some enemies. There is that tough dude too so be prepared for that too. After you gather the collectibles in the area, start following your friends again to the end.
Chapter 11 – As Above, So Below
As you move down the ladder, Sully will draw your attention to a puzzle on the wall. Find the etching of a moon on the floor. While you are doing it, take out the map and align it to pillars accordingly. Now use the pillar in the next room on the left side to move up. Observe the the cogs on the back wall while you make your way to the other side.
When you have gathered all the parts, you need to align them so that they can go mobile. The East Wing puzzle involves drawing a figure that stabs the man on the wall. If you explore the right bottom side then you will be able to spot a figure that is almost aligned. Move towards it (till its body is completed) and then press the concerned button (triangle).
Move through the door to activate a short scene. As you get the torch, make good use of it. Spiders are creepy things ofcourse. You can use the shotgun to keep them at bay. When you run out of ammo, get some dropped by Sully for you (you have opening doors for him after all). Head back the way you came from and deal with the enemy resistance just before well entrance.
Then you need to follow Talbot without getting lost. Look for the alternate paths like a nearby window or a door when you are stuck. When you catch him, it’s time to teach him a lesson with your fists.
Chapter 12 – Abducted
The level starts with plenty of fist fight. Hit the popped buttons on the screen. There almost a dozen of those scumbags to deal with. In the next section, you should watch out for the turrets. For the first one, you can grab the RPG on the far end and take it out while you can dodge the second one by staying low.
After you climb up the mast, grab the sniper rifle and take the enemy snipers. There will be more of them to deal with as you make your way up. Then push the box to clear the path. Now you need to jump around the waves. The final jump can be troublesome but you will make it eventually. A
As you move around the giant tanker ahead, there is a big firefight waiting for you. Stay under a solid cover as pick them up one by one. Get to the top and grab the rope you want to climb up. Head back down and then dash towards the gap to make a jump. Head inside the room and a cutscene will play.
In the final section, use the zip-line to get down there and then remove any enemies you encounter. That will be your final action in the chapter.
Chapter 13 – Rough Seas
Either be stealthy or use the aggressive approach, your goal is to kill all the enemies that block your way. By now, picking targets should not be a problem for you. When you ultimately make a move for the wench, you will have to head back to the way you came from.
Here, your goal is not let anyone get away. There is a good chance that you might die in the process so you will have to stay sharp and pick targets quickly. When you have cleared the first boat from all the enemies, you should go grab the RPG beside the cabin door. You will have to fire it three times (provided that your strikes hit the target) to destroy the incoming boat. Watch the cutscene and then use the ladder to enter the ship.
Chapter 14 – Cruisin’ For a Brusin
I hope you are not sea sick, Drake is not. Head for the back end of the ship. There will be occasional resistance so you don’t need to be aggressive here. You can use the life boat to get to the next level. Climb the ladder and deal with the enemies up there silently.
As you approach the open end of the ship, the armored men will make things difficult for you. Shoot the head to get rid of them relatively faster. As you move into the ballroom, there will be more gunfight to handle. There are plenty of treasures to look for in the next section. Move further down the ship for some more action and conclude the chapter.
Chapter 15 – Sink or Swim
You will have to take out the enemies while the ship is sinking. It’s a big battle so keep your cool. Take out the shotgun guy running right towards you. It’s important that you don’t get surrounded by the enemies. The best way to do this is stay in cover in a corner which will keep enemies on the other side.
Soon, the section you are fighting will be flooded with water. Tap the on-screen buttons to get through it. Make your way to the bubbles and then move through the door. Now all you need to do is ascend to the upper sections. Jump to the elevator and then latch onto the red rope ahead. Run through the final section and then jump off the boat.
Chapter 16 – One Shot at This
After the door, climb up using the boxes placed on the right side. When you reach the roof and then to the second roof, you can move through the open window to surprise the enemies inside or you can use the other side. Shoot the door inside to let Elena in. After you shoot the 3 locks at the bottom, a car will be pulled and more guards will enter.
Push the car and after you have taken care of the enemies, you can move through the windows on the left side. It is recommended that you use the stealth approach here as once you are detected, there will be plenty of enemies including armored men and snipers to deal with. Get to the roof of the buildings and then use the ladder to get down again.
After the first cutscene, you have a plane to catch. But before that, you will be spotted by a turret. Climb up the roof and deal with the guards up there. You don’t have any weapons so proceed cautiously. When your run after the plane, Elena will pick you up in the jeep. Get close to front wheel and then make a jump for it. Have a safe flight!.
Go to next page for walkthrough of chapter 17 and onward.
On this page, you will find walkthrough of chapter 17 and onward.
Chapter 17 – Stowaway
Inside the plane, deal with the brute first then move to the left and pull the parachute near the boxes. When you get back into the plane, take out the enemies while dodging the boxes.
You will be sucked out of the plane. Pull out the parachute again on the boxes to survive.
Chapter 18 – The Rub’ Al Khali
A cutscene will play as you move towards the wreckage. Now keep on walking along the sand. Soon, the darkness will prevail. When you regain your consciousness, you will find Sully there. Follow him and you will see the oasis turned into an illusion and then come back to the well.
When you open your eyes for the second time, head to the rock and then move towards the village. Run!
Chapter 19 – The Settlement
After you fall down the dune, there is a ladder that will lead you to the roof on the right side of the gate. Then move out to find the well. Follow the path, a firefight is waiting for you after you break down the door. It’s a shooting practice and there is no serious problem is this area.
After you have cleared the section, head for the open area in the back of the plaza. You will inevitably, fall into the pit. Deal with the enemy down there and then move to the section below him. You can imitate enemy tactics here to shoot the pillars and then get out.
You can use the grenades in the next section to remove the enemies. After clearing the area, move through the gap and then make a jump towards the railing on the balcony. In the next plaza, there is another firefight waiting for you. You can use the pillars to drop the turret truck and remove the hostile threat.
You can open the closed gate by blowing it up with the RPG. Use the ladder to climb and then move along the path. You will be saved and when you get hold of a horse, follow the people who rescued you. Watch out for the sniper along the way and then shoot the gate using the RPG.
Chapter 20 – Caravan
At the start, follow Salim and then take out the guy in the truck to the left. You can now shoot the two other guys on bikes. This exercise will continue for some time as more trucks and motor bikes will spawn in the next sections.
After blowing up the three motorcycles, a cutscene will play and then Sully will need your help. Ride your horse close to the truck and take out the brute and like multiple times before, get back to your ride again. In the next section, first dodge the two guards walking and then take out the one on the right stealthily to grab the sniper.
Once you have the sniper, start picking enemies one by one. The turrets in the next section might give you a headache. You should grab the RPGs on the top of a house to take them out fast. After the firefight, head through the central door and then further ahead, climb the ladder in the next room.
As you try to pull the lever, you will find that this is broken. Let it go and Sully will handle the proceedings. You can use the mobile buckets to get to the higher ground. After you jump on a platform and climb along the wall, use the chandeliers to get to the other lever. Head back to the second Chandelier and then go for the ladder by the door.
Chapter 21 – The Atlantis of the Sands
Move down the staircase till you activate a cutscene. After the cutscene, you will face enemies that can teleport. If you aren’t quick enough, they can be a trouble so make sure that your aim doesn’t miss much. Then enter the building. Inside, you can use the RPG and Hammer to deal with the hostiles.
Follow Talbot and then run away from the spiders. You will have a chance to shoot Sully and then the nightmare will be over. Then, head for the gate on the left. You will have to deal with more enemies. After you have cleared the area, all gates will open.
Things are going to be tougher here as we are approaching the finale. Watch out for those fire balls and use your grenades and RPG shots to take out those demons fast. Then move through the door to enter a room with empty pool. If you press Triangle on the other side, it will fill up. Now you need to follow your reflection correct sequence. Turn a couple of gears and the drug effect will be nullified.
Chapter 22 – The Dreamers of the Day
Move down the stairs and then take cover behind the pillar. First knock the regular enemies and then turn your attention towards the armored guy and then the snipers. Move up the ladder and grab the sniper rifle to blow off some heads from the bridge.
After moving to the building, pull the lever and proceed further. Move up the stairs and then take out the two guys down there. Jump down and then make your way through while killing anyone that comes in your path. In the next section, there will be an enemy with hammer and an armored guy to deal with.
Further, in the next room, eliminate any enemy threat you encounter and then silent the sniper and the RPG user above you. Move out and pick the sniper. Shoot the enemies heading towards and then follow the path they came from. A couple of more enemies to take care of before you can open the gate. Move across the bridge to activate a cutscene.
After the cutscene, you should take out the RPG user above using the sniper. Rest should not be a problem for you. As you move down the bridge, there will another enemy wave to deal with. You can head back and start shooting again. After the area is clear, you can head towards the elevator. When you are about to climb the ladder, make sure that you clear the enemies around. Also lookout for the guard at the top of the stairs.
After the next cutscene, start moving from one platform to another. Finally, you will go one-on- one with Talbot in a fair fight. It will end like it started. You need to press the on-screen buttons in time so keep your eyes focused on the screen.