Call of Duty’s legacy is in the diversity of its multiplayer. Every recent title in the series boasts a huge weaponry arsenal and allows players to choose their favorite items from that lot and make loadouts. For that purpose, we made this Black Ops 2 Multiplayer Class Loadouts guide to help you make the most of this system.
Players familiar with the Call of Duty series should have enough experience to familiarize themselves with most weapons, perks, etc. offered. However, here are some of our favorite ultimate custom loadouts for those unfamiliar players in BO2.
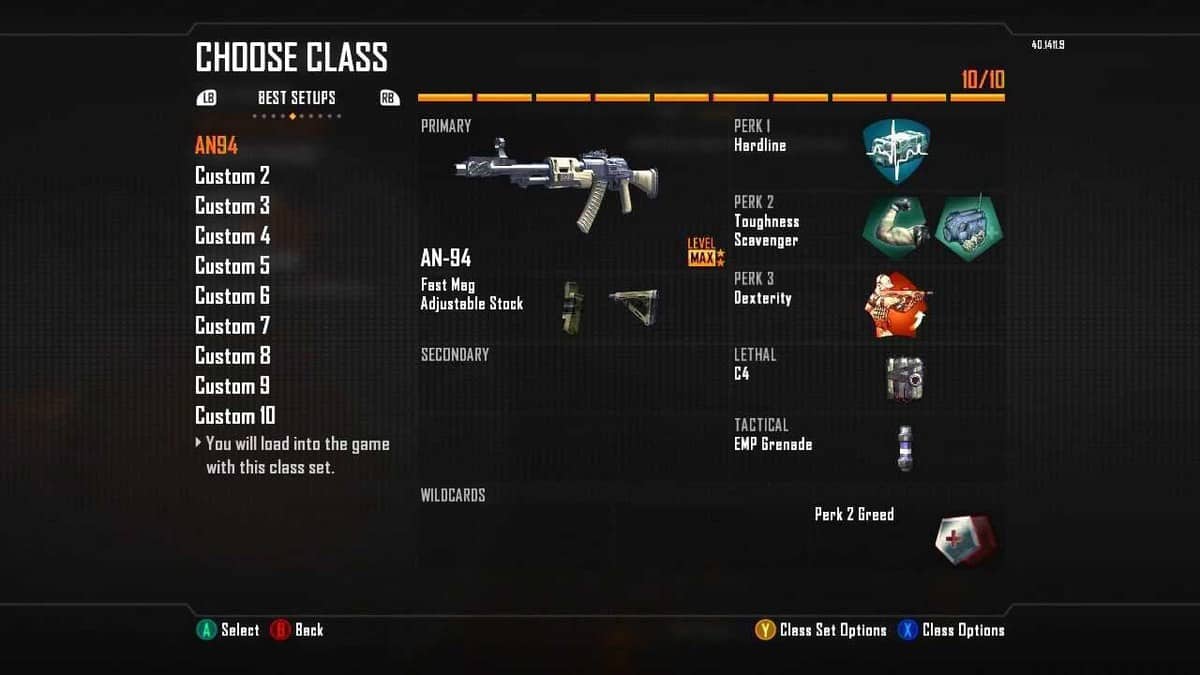
1. The Defensive Assault Rifle Class
- Primary Weapon: AN-94
- Primary Attachment 1: Select Fire
- Primary Attachment 2: Reflex Sight (With Wildcard)
- Secondary Weapon: Raging Judge
- Lethal: Claymore
- Tactical: Flashbang
- Perk 1: Flak Jacket
- Perk 2: Hard Wired
- Perk 3: Awareness
- Scorestreaks: UAV, Lightning Strike, Sentry Gun
The AN-94 has very high damage, and you can take down an enemy with a short burst (Select Fire) from a long range. The gun has low recoil when used in short bursts, and it is very easy to remove an assortment of enemies.
The problem is that you have to settle in a good location with a line of sight to the rush of enemy players. The Claymore and Sentry Gun will provide good cover against enemies who might try to flank you. That said the Awareness perk will further help you detect any scurry of footsteps and nail those targets.
When played right, you’ll be practically a ghost. It’ll take a lot of deaths for them to realize where exactly you’re situated, and by that time, you would have racked your share of the kills.
2. Rushing SMG Class
- Primary Weapon: Vector K10
- Primary Attachment 1: Extended Clip
- Primary Attachment 2: Laser Sight
- Secondary Weapon: Beretta 23R
- Lethal: Frag
- Tactical: Bouncing Betty
- Perk 1: Lightweight
- Perk 2: Toughness
- Perk 3: Extreme Conditioning
- Scorestreaks: UAV, Lightning Strike, Death Machine
Those wanting to rush into the battle will need excessive mobility to surprise enemies. Lightweight and Extreme Conditioning will help you boost right into their lines and with the low recoil of Vector, it will be easy for anyone to take down a bunch of players. Even if they half-heartedly fire their weapons, Toughness will enable you to get the better of them.
3. Invisible Sniper Class
- Primary Weapon: DSR 50
- Primary Attachment: Ballistics CPU
- Secondary Weapon: KAP-40
- Lethal: Claymore
- Tactical: Smoke Grenade
- Perk 1: Ghost
- Perk 2: Cold Blooded
- Perk 3: Awareness
- Scorestreaks: Counter-UAV, Sentry Gun, Orbital VSAT
Everyone opts for the Sniper class in any FPS game. The DSR 50 is the ideal choice for snipers in this game. The bolt-action rifle will guarantee a confirmed kill every time you shoot an enemy above the chest. The Ballistics CPU will help reduce the sway of your crosshair. I wouldn’t recommend you go for an ACOG scope. I don’t know why most people opt for it, but I find it annoying.
Claymores are always important in covering your flank while you focus on locking down an area. First, two perks will help you be invisible to the enemy on their radar. Awareness will always help you to listen in on any enemies running about. As long as your aim is true, and you take down your enemies in a single shot, no one can find your position.
4. Offensive Assault Rifle Class
- Primary Weapon: Scar-H
- Primary Attachment: Millimeter Scanner or Foregrip
- Secondary Weapon: RPG
- Lethal: Grenade
- Tactical: Flashbang or Concussion
- Perk 1: Hardline
- Perk 2: Scavenger
- Perk 3: Engineer
- Scorestreaks: Escort Drone, Lightning Strike, Stealth Chopper
SMG holders are not the only ones who can get into the red zone. A charging assaulter is deadlier than an SMG wielder because of the increased range. The Millimeter Scanner can help alert you of oncoming enemies behind obstacles or walls. However, the Foregrip will increase weapon stability, making you spray people down.
If you’re about to go down, then a blast from an RPG can always take some enemies with you to the hereafter. Ammo might be a problem, and the Scavenger will help you there. Hardline will get you those offensive score streaks in quick time. Consider this class probably becoming a standard when the world jumps into every map.
5. Ninja Class
- Primary Weapon: PDW-57
- Primary Attachment: Suppressor
- Lethal: Combat Axe
- Wildcard 1: Perk 1 Greed
- Wildcard 2: Perk 3 Greed
- Perk 1: Lightweight and Ghost
- Perk 2: Cold Blooded
- Perk 3: Extreme Conditioning and Dead Silence
- Scorestreaks: UAV, Hunter Killer, Counter-UAV
As the name suggests, this class will make you a mouse scurrying around the map. The equipment and weapons are focused on mobility and staying undetected.
Dead Silence and Extreme Conditioning will help you flank enemies easily, while the suppressor is, of course, a necessity in such a loadout. Depending on your gameplay style, you can go for Wildcards for additional perks from both tiers (Extreme Conditioning and Dead Silence or Lightweight and Ghost).
6. Fortress Class
- Primary Weapon: Assault Shield
- Secondary Weapon: KAP-40 with Extended Clip
- Perk 1: Flak Jacket
- Perk 2: Toughness
- Perk 3: Tactical Mask
- Lethal: Bouncing Betty x 2
- Tactical: Shock charge
- Wildcard: Danger Close
- Scorestreaks: Guardian, Sentry Gun, Death Machine
This is considered the ultimate camping class. Search for a location that can be defended easily; you can go on your map and find it there. You next want to drop your Bouncing Bettys into the entrance while using shock charges as a cover for your flanks. Lure the enemy towards your trap by using the assault shield, and once you’ve got some kills for a Scorestreak, use the Guardian and Sentry Gun for extra protection. This way, anyone crossing your territory will end up dead.
7. Knifing Class
- Primary: none
- Secondary: Ballistic Knife
- Perk 1: Lightweight
- Perk 2: Scavenger and Fast Hands
- Perk 3: none
- Lethal: Combat Axe x2
- Tactical: Shock Charge x2 or Concussion Grenades x2
- Wildcard 1: Danger Close
- Wildcard 2: Perk 2 Greed
This loadout works as a cheap shot, but it’s worth the try. Throw grenades at the enemy to make them dizzy, and once they’re open for a shot, throw every knife and axe available to take them down. Once they’re down, walk over their corpse with the Scavenger perk and continue this process.
8. Head Quarters Class
- Primary Weapon: M8A1
- Attachments: Quickdraw and Red Dot Sight
- Secondary Weapon: KAP 40
- Attachments: Extended Clip
- Perk 1: Ghost
- Perk 2: Scavenger
- Perk 3: Engineer
- Lethal: C4
- Tactical: Trophy System
This is a loadout made for the headquarters. You can select your desired weapon, and this loadout helps you load up on explosives and trophy systems.
9. Shot Gun Loadout
- Primary Weapon: R870 MCS
- Attachments: Laser Sight and Long Barrel
- Secondary Weapon: Five-Seven Pistol
- Attachments: None
- Perk 1: Lightweight
- Perk 2: Toughness
- Perk 3: Dexterity
- Lethal: Semtex
- Tactical: Concussion X2
- Wildcards: None
It’s a loadout mainly made for Hijacked, but you can use it for any game type. You have to use Shotguns, especially the initial pump action shotgun, which can be useful on smaller levels. Once you’ve encountered your opponent at long range in the cabins and lower decks of the ship, you can use the pistol, the five-seven, to take them down.
10. Domination Defense Loadout
- Primary Weapon: MK 48
- Attachments: Grip and Target Finder
- Secondary Weapon: R870 MCS Shotgun
- Attachments: Laser Sight and Long Barrel
- Wildcards: Primary Gunfighter, Secondary Gunfighter and Overkill
The main purpose of this loadout is to protect objective points in domination and hardpoint. You’ll need the MK48 (Light Machine Gun); a big gun for big boys! Use this weapon and its three attachments: target finder, grip, and quickdraw. Now, let’s talk about close-range weapons. Use the R870 MCS shotgun; second primary, with the long barrel attachment, and the difficulties you’re having in close range will be solved.