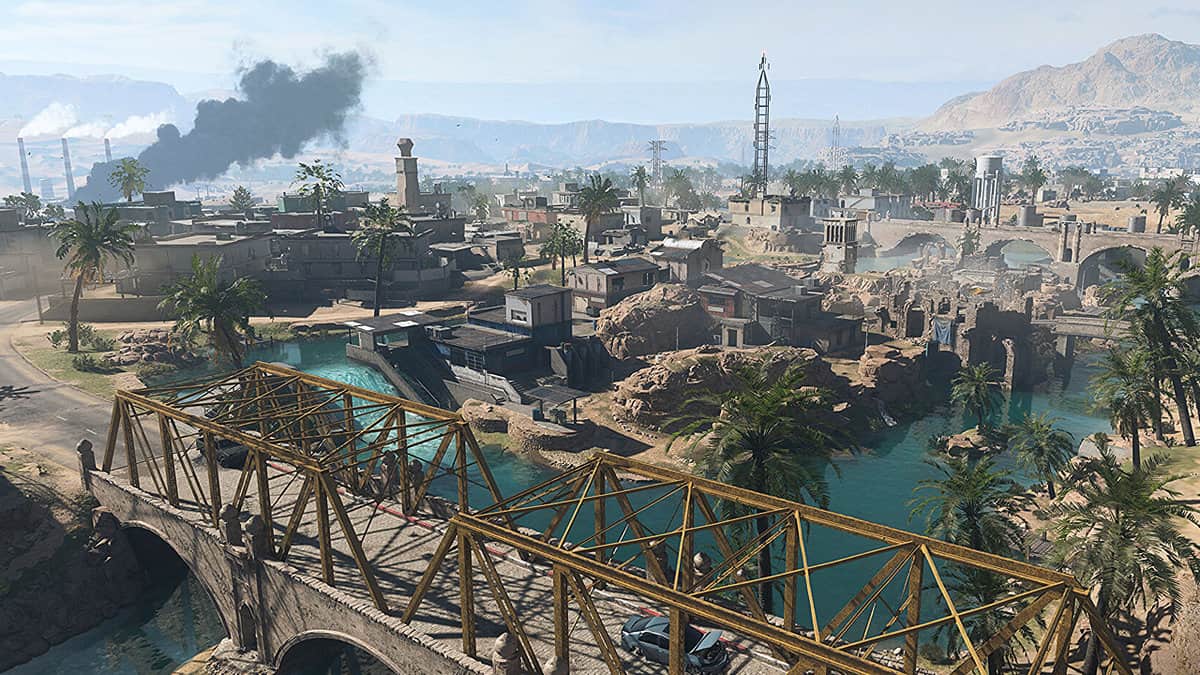
Call of Duty: Warzone 2 features an all-new map called Al Mazrah which is based on the city of the same name from Modern Warfare 2.
Al Mazrah is the biggest map ever made for Warzone and contains several, popular locations from the previous Call of Duty games.
There are 18 locations in total which are further divided between several points of interest. However, you cannot just land anywhere at random. You need to consider the risk-reward factor when choosing your drop point.
Higher-risk zones will have more loot and vehicles but will also be swarmed with more opposing players. Lower-risk zones will have less loot and in turn lesser opposing players, making them favorable for slower-paced players.
The following guide will tell you the best locations to drop in Warzone 2 for the most loot and gear.
Best drop locations with the most loot in WZ2
Sa’id City (Police Armory and Shopping Center)
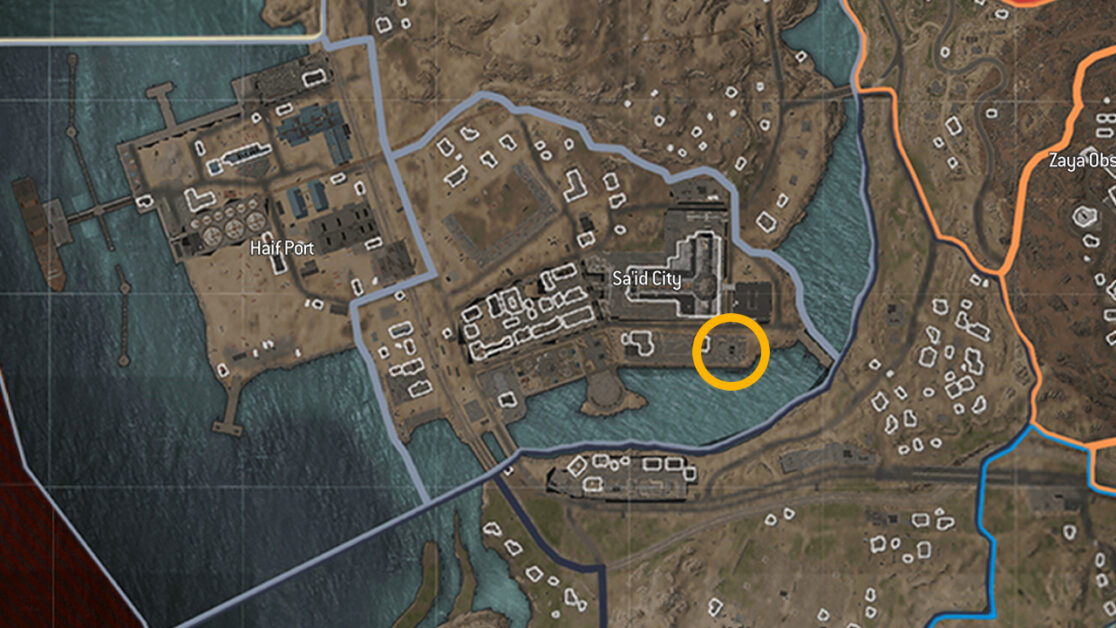
Sa’id City is one of the best locations to drop if you are looking for a ton of quick loot. There are a number of buildings here that contain enough loot for an entire squad. There are also plenty of vehicles here, including a boat on the south side.
The main focus here, though, needs to be on the Police Armory that contains several weapon lockers to loot. The Police Station is located south of the Shopping Center and is the first building from the right as marked on the map above.
You can always use the main entrance but for quick access, land on the southeastern balcony of the building. There will be only one window there. Break it and you will enter the Police Armory. There are enough guns here for an entire squad.
You can then loot the other rooms and offices of the Police Station for armor plates and such. The looting does not stop just there.
Make your way to the Shopping Center across the street. It has over a dozen cash registers and several duffle bags that contain cash. You can easily get enough cash to call in a loadout drop.
Sattiq Cave Complex
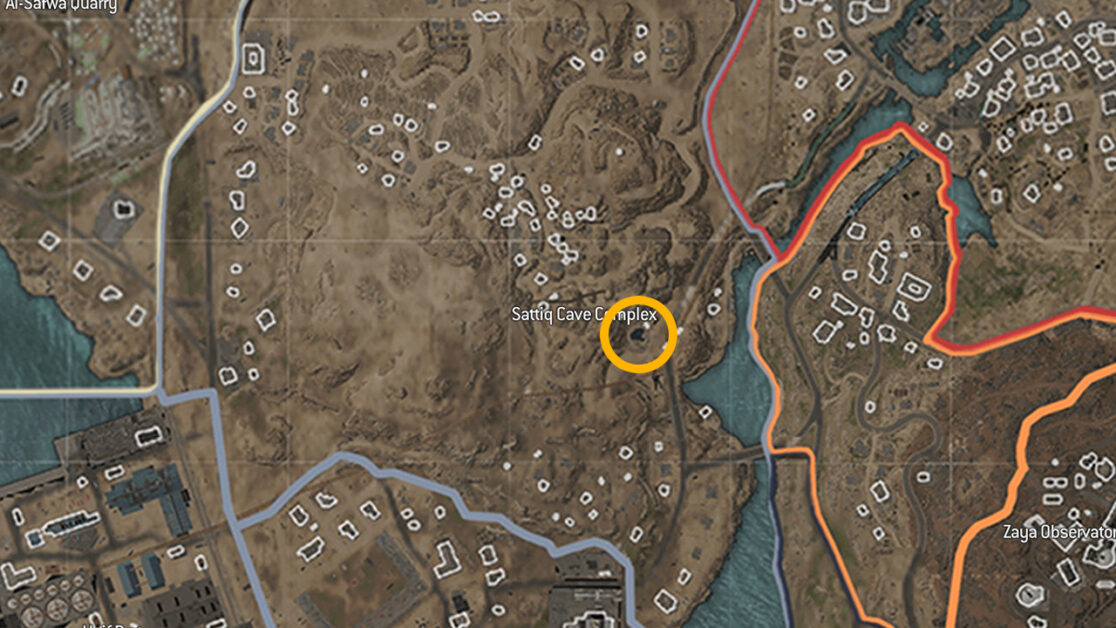
While you will only see small outposts and huts on the surface, there is a whole network of underground caves and tunnels running beneath the Sattiq zone. These are filled to the brim with loot and normally, no one ever comes here because of its out-of-the-way location.
After jumping from the plane, you need to dive straight through the opening to enter the caves. The marked location on the map above is actually a massive hole in the ground. You can go right through and land anywhere to get some guns quickly in case you have been followed.
You can then take your time to loot the cave before using the zipline to reach the upper levels, all of which have containers and duffle bags to loot as well as weapons on the ground.
Taraq Village (Oasis)
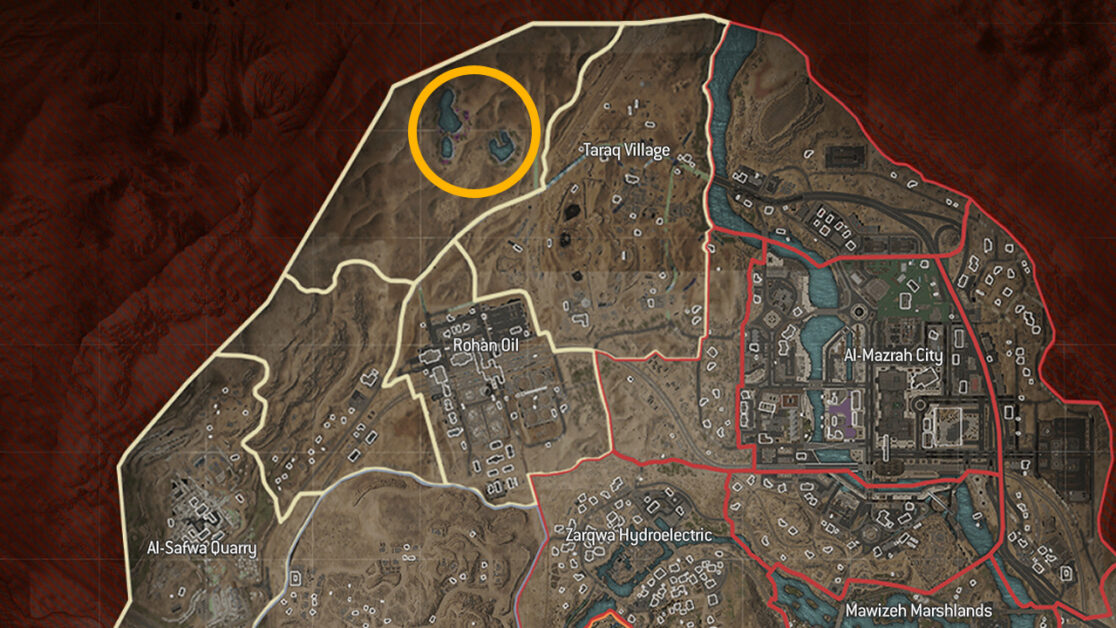
In the northwest corner of the map, next to Taraq Village, lies the Oasis. This is a barren area with nothing but a few ruins and a ton of sand.
No one ever lands here which makes it even better because the Oasis has the best high-level loot in Call of Duty: Warzone 2. You can not only get golden guns with multiple attachments but also killstreaks, three-plated vests, Lethals, and thousands of dollars.
Drop near the Oasis and start searching the ground near the water (the shores) to find hidden caches. These loot caches always have the best loot in the game and are black drums buried in the ground, so spotting them can be tricky.
There are several hidden caches around the Oasis and you can quickly loot high-level items that you would normally purchase from a buy station.
Al Sharim Pass
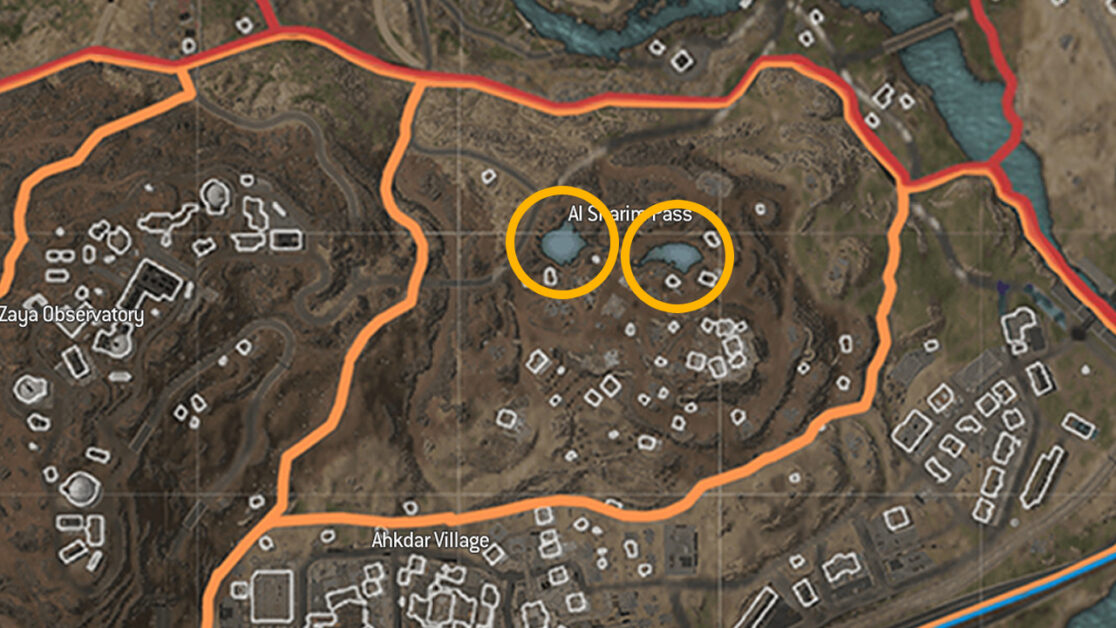
The two lakes in Al Sharim Pass contain more hidden caches to loot. They are underwater though, so you will need to swim your way down to find the loot caches.
Note that you can drop from the plane into the water without dying. You will lose your armor and almost all of your health, but you will not die.
Al Shamman Cemetery
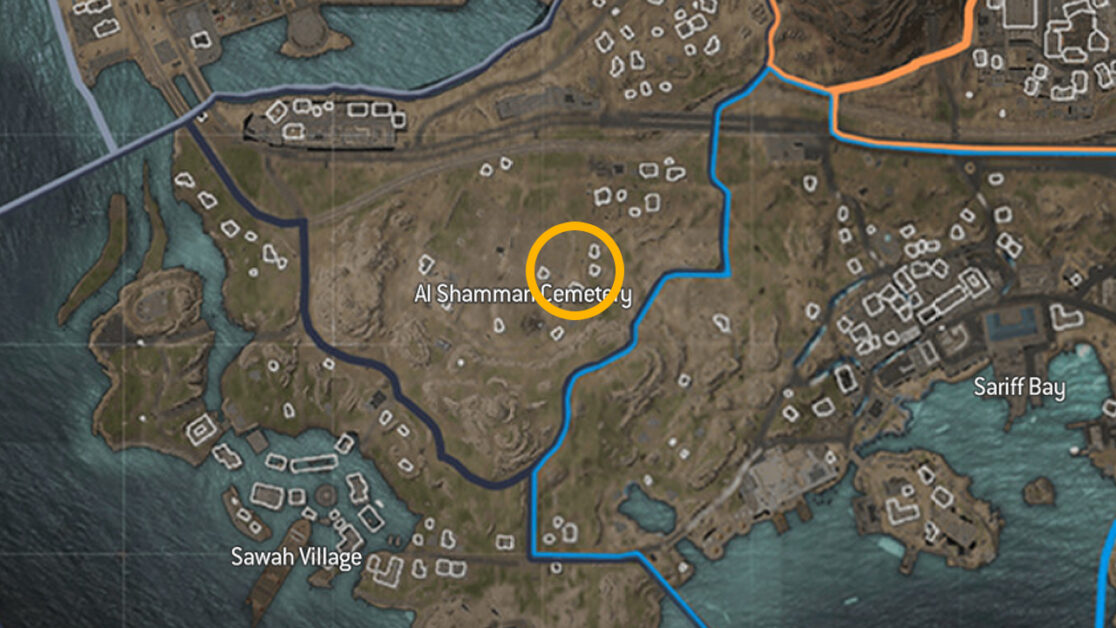
The Cemetery is another location where anyone hardly drops in Warzone 2. That is purely because the location hardly provides any cover and there are almost no buildings to loot. There are, however, a couple of hidden caches here to gear up.
The first loot cache is in the right corner of the Cemetery, behind a gravestone near the boundary wall. The other loot cache is behind a car right outside the Cemetery. The third loot cache is in the trees that you can spot from the car.
Do take note that all of these loot caches are inside the location marked on the map above.
Zarqwa Hydroelectric
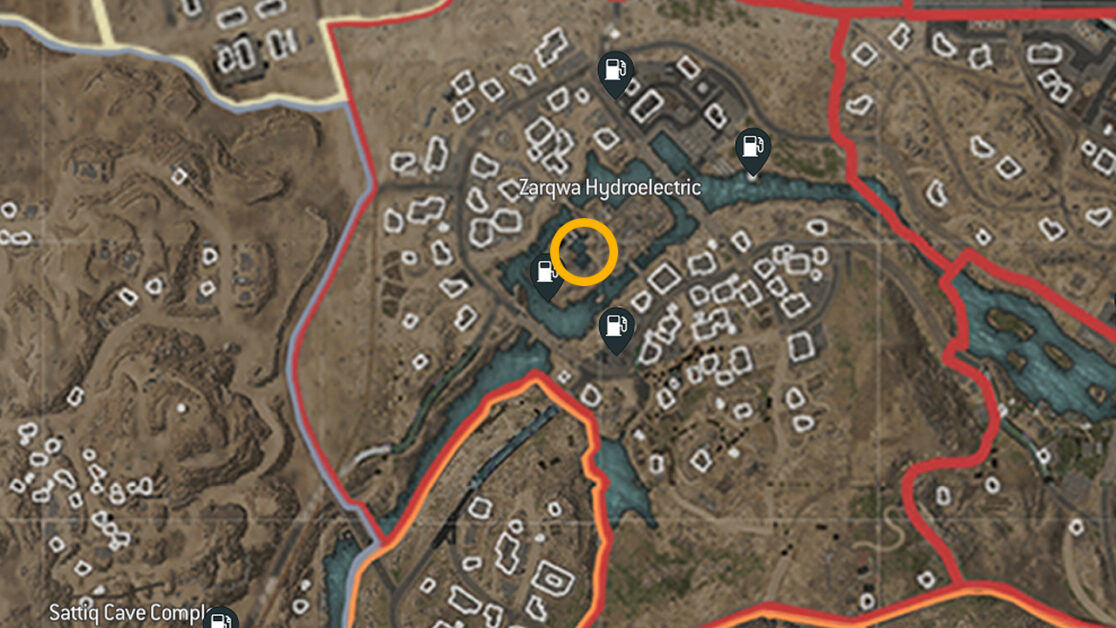
Dive straight through the little water body in the center of Zarqwa Hydroelectric area as marked on the map above. You will find one hidden cache underwater.
There will also be an underwater tunnel that links to the outer stream. Get some air and go through the tunnel. You will find another loot cache when you exit.
Al Malik Airport

If you are looking for enough hidden caches for an entire squad, look no further than the landing strip of the Al Malik Airport. There are a total of eight loot caches here which are going to give you more loot than you need.
Start from the northern side of the airstrip and make your way west. The loot caches are on the land between the airstrip and the water.
When you reach the point where the landing strip breaks, head into the water and make your way around to the other side to start searching again. You will then find the remaining loot caches.
Al Safwa Quarry
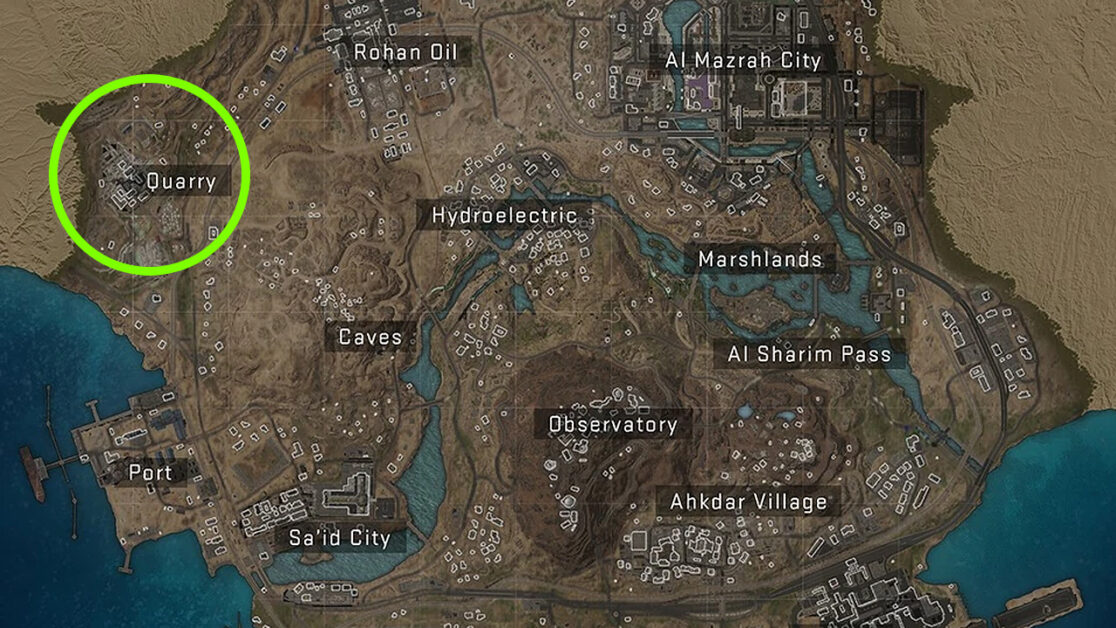
The Quarry has returned after its rework from Modern Warfare 2. This is one of the best drop locations for quads as the area is spread out with plenty of structures that provide cover.
Quad teams can easily loot before getting straight into the battle. The area is large enough for a few teams to use it as a drop location however there is sufficient loot for multiple teams.
The loot itself is sufficient to get you started before you progress to more risky spots.
Al Mazrah City
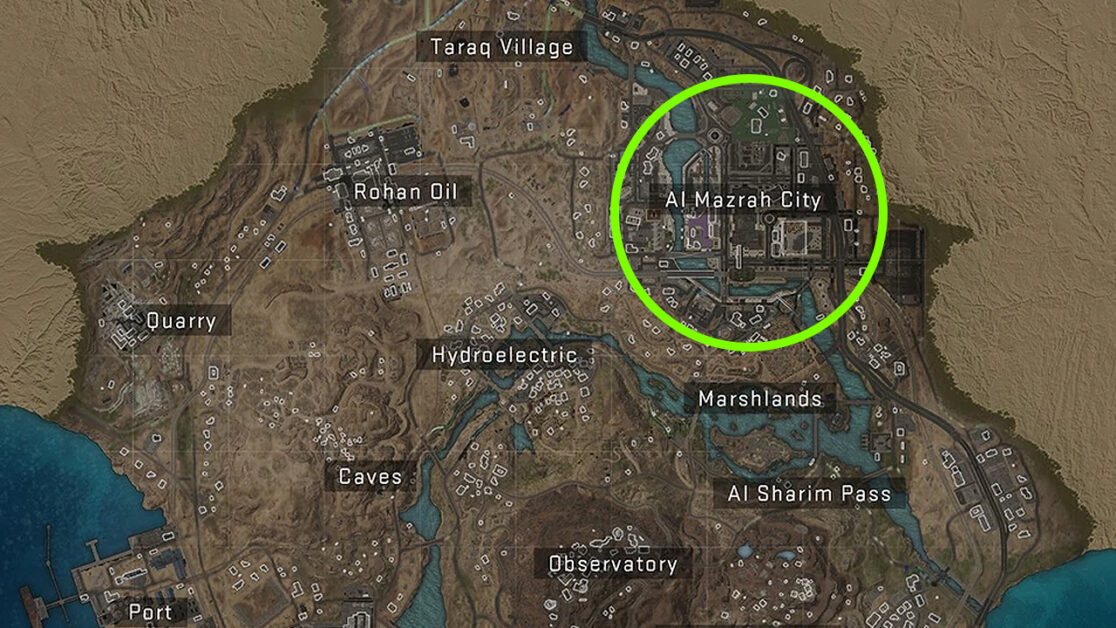
Al Mazrah City, the busiest spot on the entire map, also has the best loot on the entire map. Once you drop here be ready for instant action as numerous squads would be fighting to claim this loot.
As great as the loot is, this spot is very risky as the snipers posted on the skyscrapers leave no safe spot to land. Unless you want a challenge we recommend dropping at some safer spots.
Note that the north side of the city consists of the most loot. That becomes a hotspot for the entire lobby. If by chance you notice that everyone is heading elsewhere, make sure to go to the north side of Al Mazrah City for some high-level loot.
Zaya Observatory
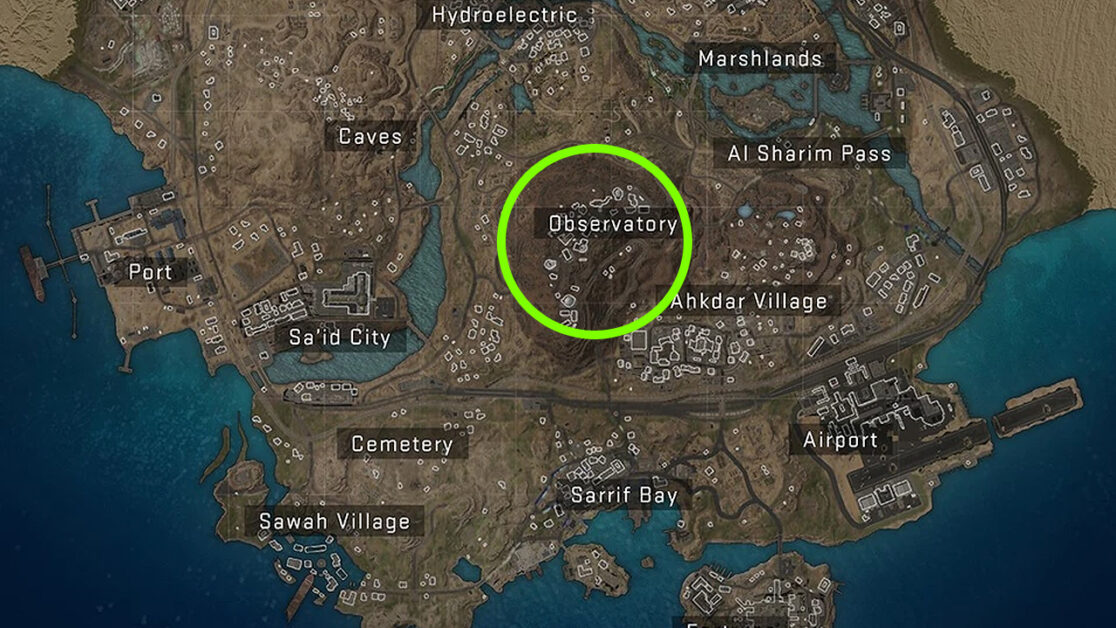
The Observatory sits in the center of the map giving players a great strategic advantage in terms of circles. However, it is risky to drop here as numerous squads will be looking to exploit the loot, elevated land, and positioning advantage.
The best way of taking control of the Observatory is to secure the rooftops and elevated positions in the area. This location can give an advantage in both quads and solos but is more so tailored towards the former.
East Suburbs
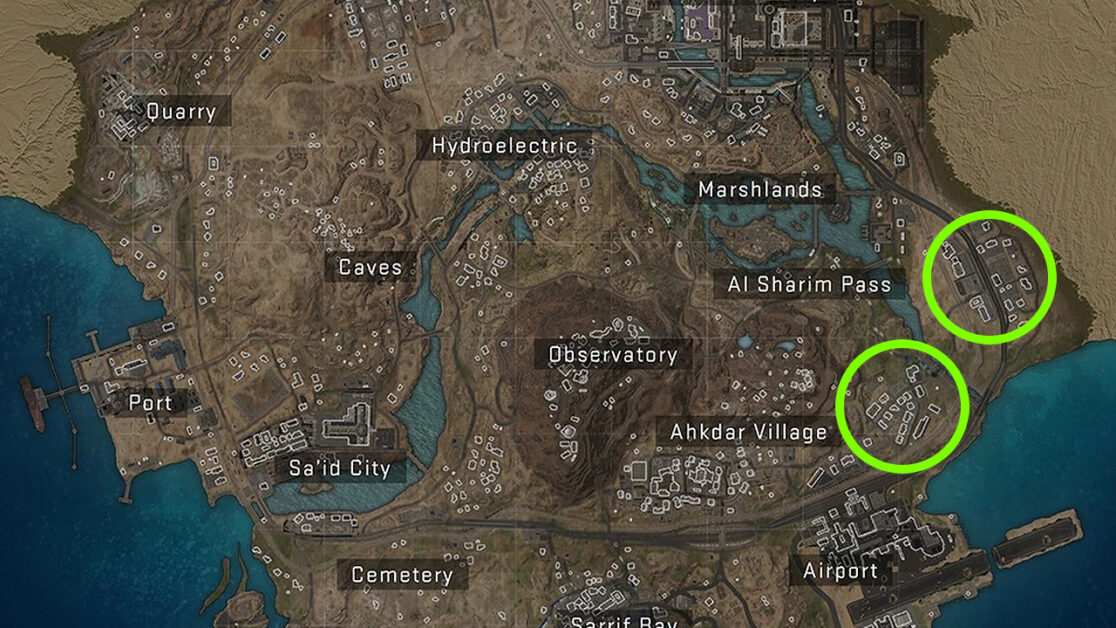
The eastern part of the map is a place no one actually goes to. Players will most often jump over there at the start to catch the incoming train. Beyond that, no one really goes over there, which makes this a good starting point for you in solos.
The east suburbs of Al Mazrah are huge. They are filled to the brim with every necessity from fuel, guns, and armor. You can also make your way down, east of Ahkdar Village, and continue looting your way west before going north to the Observatory.