With the Germans rallying up their forces, you’ll be tasked to neutralize enemy defenses in Mission 6; Liberation. There are three enemy defenses that must be neutralized. They include an enemy sniper guarding the main entrance, an enemy 222 tank guarding the bridge, and an enemy communications station.
There are several vantage points here to make use of. While you can still snipe most of them from far away, it is up to you if you’re more interested in going all in guns blazing. The following guide will guide you through the entire process.
Enemy Sniper (1/3)
The first defense you need to neutralize is a sniper at the top of the main tower. He will be guarding the entrance to the main area from the southern side.
This tower will be clearly visible when you approach the main search area. If you’re still confused, just spot the tallest tower on the horizon.
Depending on your position, you’ll be able to see the glint from the scope of the sniper.
You’re recommended to snipe him from range, which you’ll be easily able to do from the starting area. There’s no need to risk exposure by moving close to him.
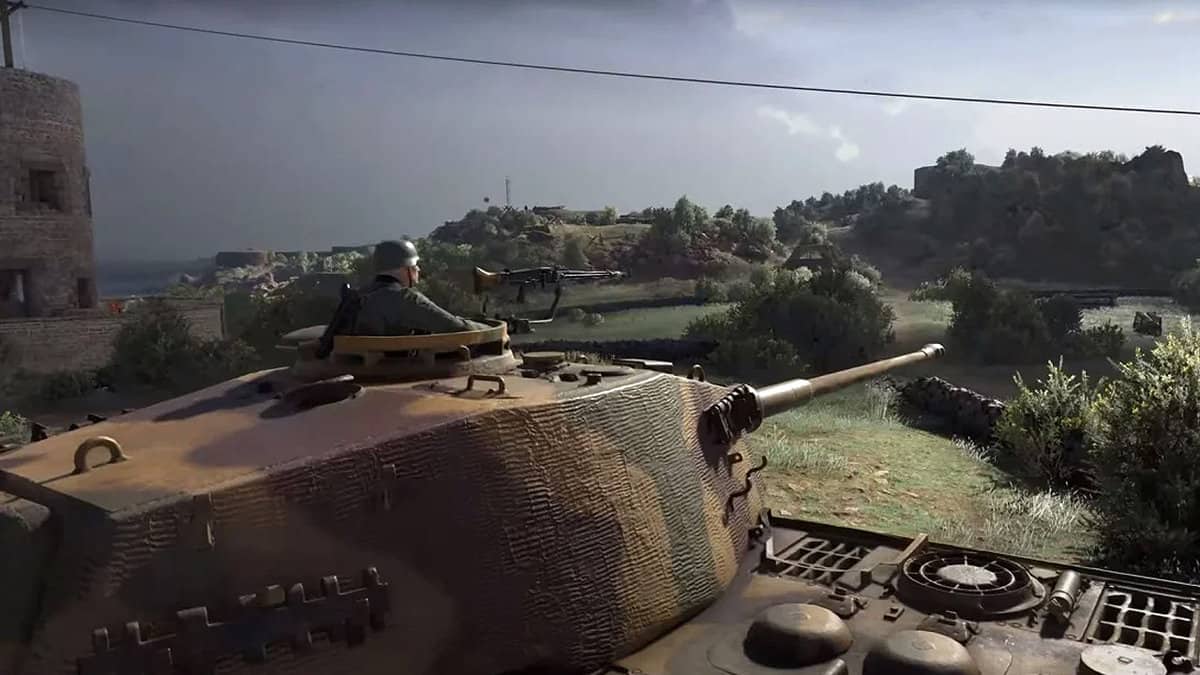
Enemy Tank (2/3)
The second defense you need to neutralize is a tank near the bridge that crosses over to the main area. This bridge will be heavily guarded with a 222 tank on the right side.
You can either approach the bridge head-on and kill all the enemies guarding the bridge along with the tank, or you can approach the tank stealthily through the water.
You can blow up the tank by using TNT or Satchel Charges. You can also blow up the tank by shooting the red barrel right next to it. Satchel Charges are located in a small shed near the first AA gun.
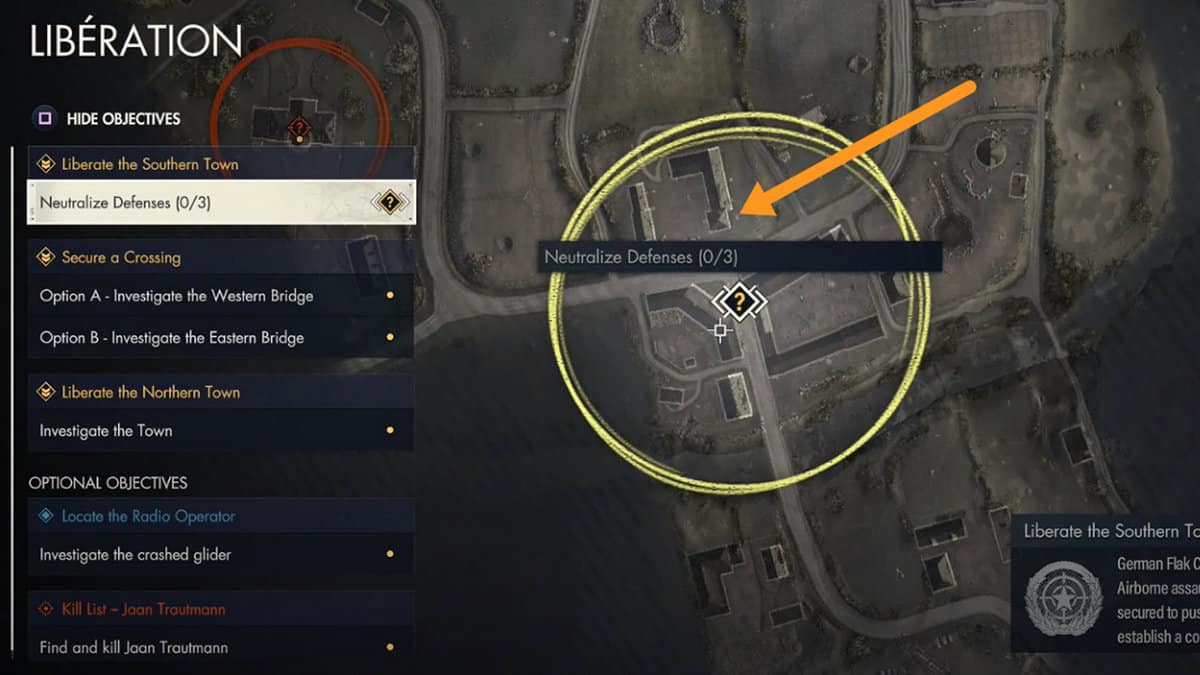
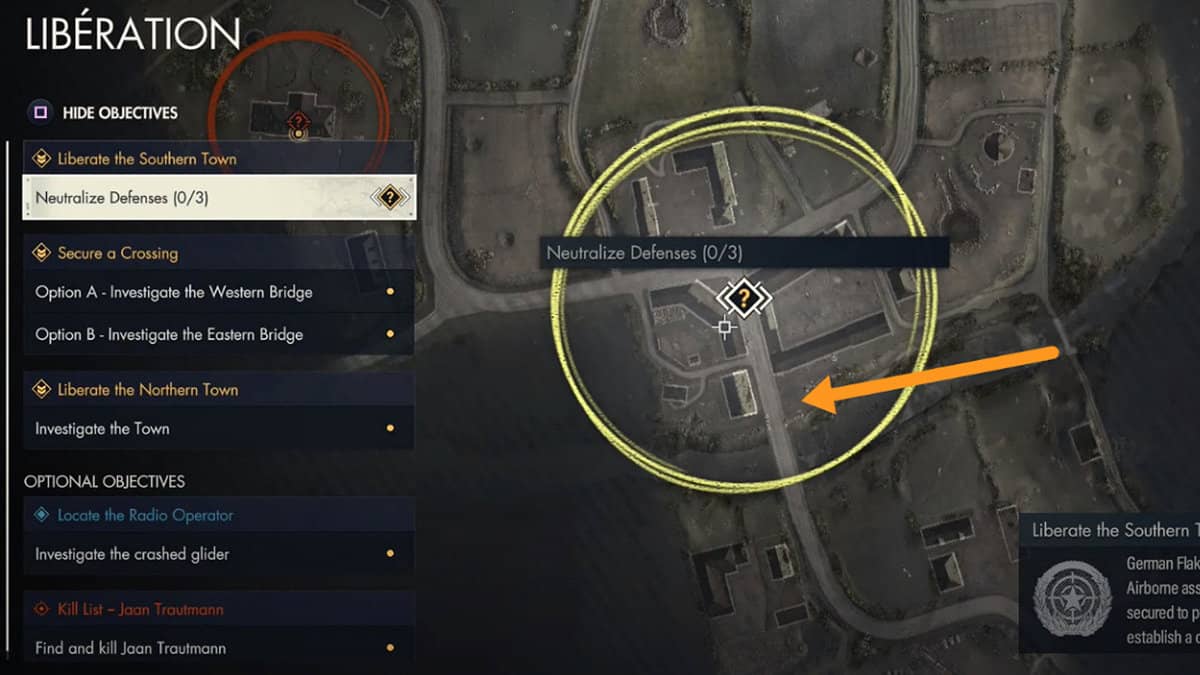
Enemy Radio System (3/3)
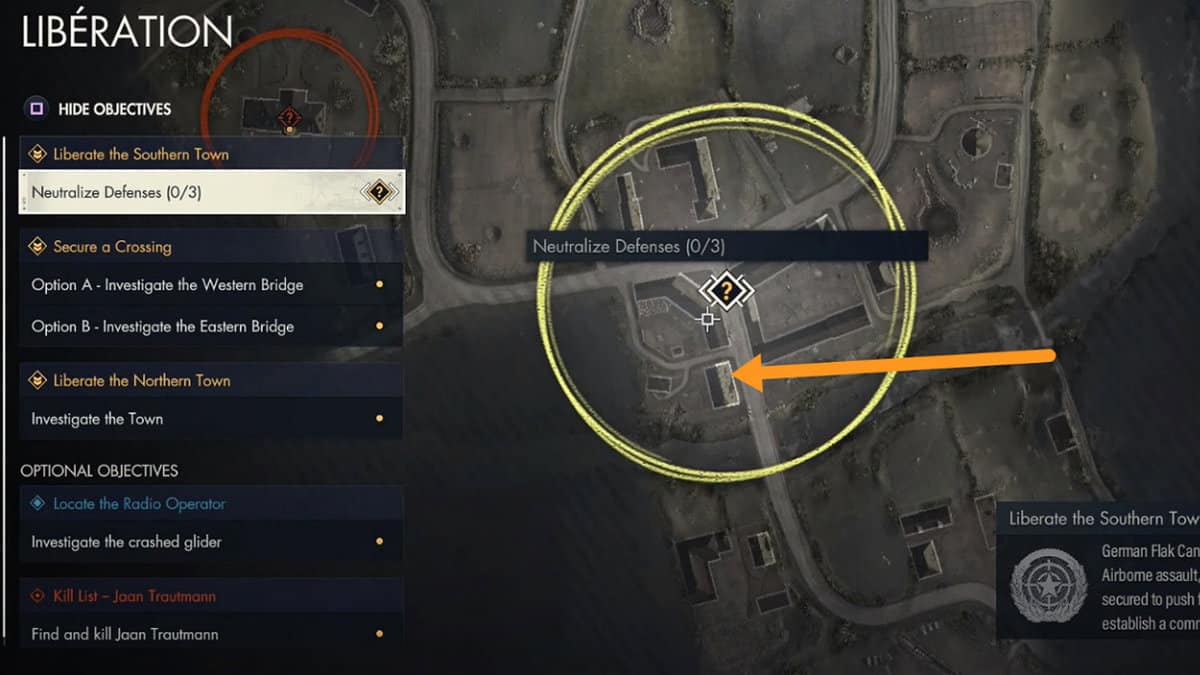
The third and final defense you need to neutralize is the radio system. This enemy radio system is located inside a compound on the left side of the bridge just as you cross over, on the first floor.
To disable this radio system, you’ll need a crowbar which is located on the same floor in the adjacent room. The arrow in the image below shows the precise location of the room in the compound where the radio system is located.
Finding this Defense can be slightly difficult as it’s not out in the open like the others but do note that this is not a bug and you need only follow the location highlighted above to locate it.