The Engineer is one of the many classes you can select in Risk of Rain 2. This class emphasizes bombastic damage and support abilities, making him an invaluable asset to any team. Given the Engineer’s reliance on turrets and mines, he can quickly turn the tide of battle in your favor.
In this guide, we’ll go over the basics of the Engineer in Risk of Rain 2, as well as two extremely powerful builds that draw on the innate strengths of this class in two very different ways. We’ll also review the best items to use with this class and how to unlock it.
How to unlock Engineer in Risk of Rain 2
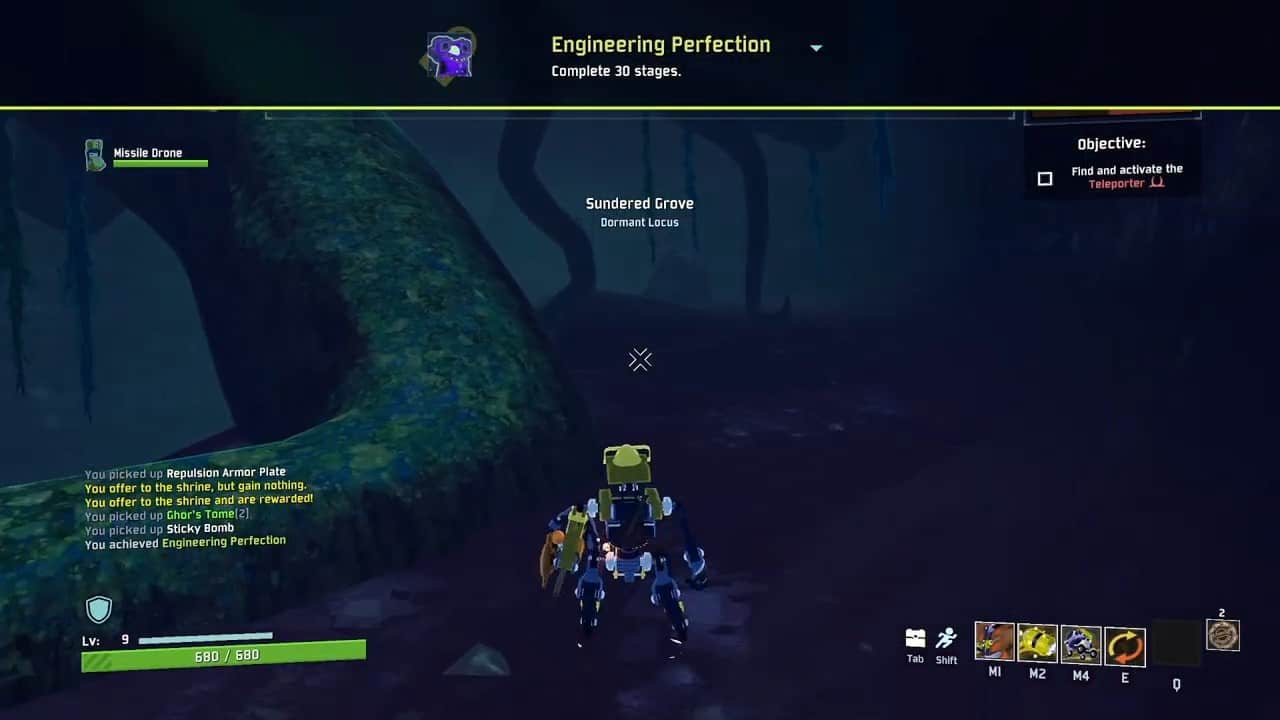
To unlock the Engineer in Risk of Rain 2, you’ll have to complete the Engineering Perfection challenge, which simply requires you to complete 30 stages. We recommend attempting this challenge on the Drizzle difficulty level to make it easier on yourself.
Furthermore, we also recommend sticking to early game stages as they tend to be smaller and easier to complete. It is also important to note that this challenge can be completed over multiple runs.
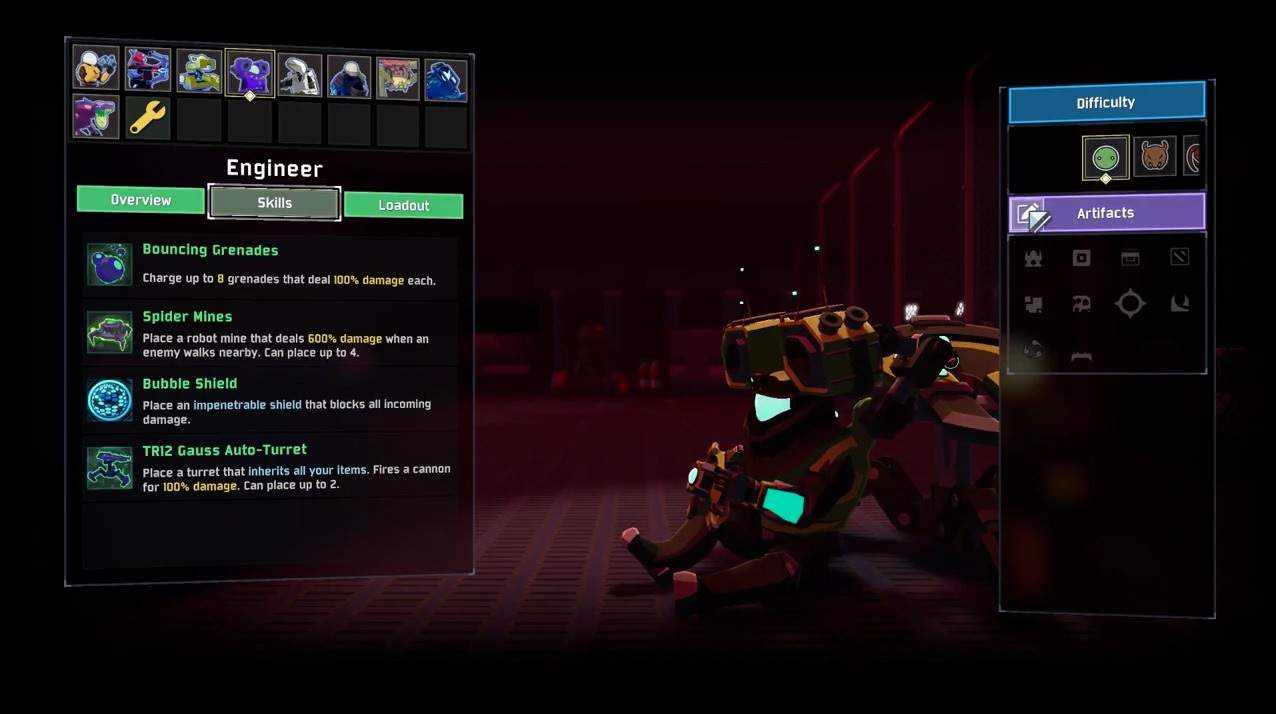
Engineer Abilities in Risk of Rain 2
The Engineer is a powerful short-range character who uses a Grenade Launcher as his primary and throws mines as his secondary. Though the Grenade Launcher isn’t very practical, it completely works well for swiping off enemy waves. The Engineer does not have a passive ability.
Primary Ability – Bouncing Grenades
For his primary ability, the Engineer unleashes bouncing grenades at his foes. Each shot has eight grenades that deal 100% damage. If all shots connect, this ability can potentially deal 800% damage.
Secondary Abilities – pressure Mines or Spider Mines
You can choose from either the Spider Mines or Pressure Mines for the engineer’s secondary abilities.
- Pressure Mines: Pressure Mines deal damage in two stages. They can either be armed or disarmed. For the former, the damage is 900%. For the latter, it’s 300%. You can set up a total of 4 mines at a time.
- Spider Mines: Spider Mines only have one damage stage and deal 600% damage across a limit of 4 mines.
Utilities – Bubble Shield or Thermal Harpoons
For his utilities, you can choose from two abilities: Bubble Shield or Thermal Harpoons.
- Bubble Shield: Bubble Shield allows you to spawn a shield around you that negates all incoming damage for 15 seconds. The radius of the shield is 9.75 meters.
- Thermal Harpoons: On the other hand, the Harpoons allow you to launch up to 4 that automatically target enemies. Each harpoon deals 500% damage.
Special Abilities – TR12 Gauss Auto Turret or TR58 Carbonizer Turret
The Engineer has two special abilities and both of them are turrets, each turret is unique in its makeup, though they do function somewhat similarly.
- TR12 Gauss Auto Turret: You can place down two turrets. Not only does the TR12 do 100% damage, but it also stores all your items, making it easy to grab whatever you need.
- TR58 Carbonizer Turret: The Carbonizer Turret also inherits all your items but has the bonus of being mobile, doing 200% laser damage while also slowing down your enemies. You can place down two of these turrets at once.
Best Engineer Builds and Loadouts in ROR2
When Playing as the Engineer in RoR2, you can go two routes: either make a high-damage dealing Bustling Fungus build or a pet build with the TR58 Carbonzier Turret.
Engineer Bustling Fungus & N’Kuhana’s Opinion Build
The engineer has a unique and powerful N’Kuhana build, which no other class can use. For this, you will need two items known as The Bustling Fungus and the N’Kuhana’s Opinion. The Bustling Fungus is an item that shines only when an Engineer has it. It creates an AOE of healing if you stay still for 2 seconds. The healing and the AOE grow with the number of stacks of fungus.
The N’Kuhana’s Opinion is also a legendary item that will spawn skulls that deal as much damage as much healing as you or your turrets have received. So, in short, both N’Kuhana and Bustling fungi have quite high-functioning health healing and damage-dealing abilities, respectively, and you must use them when you get the chance.
You can also use Aegis to give yourself extra protection and Bandolier to have extra ammo for your grenade launcher and turrets.
Since this build is more on the defensive side, pair it with Pressure Mines for your Secondary ability, Bubble Shield for your utility, and use the TR12 Gauss Auto Turret as your special.
Engineer Pet Build
The key focus of this build is Mobility. Since it is an essential practice for avoiding damages and proceeding further, and given the Engineer’s lack of movement, this build works well to mitigate that weakness. The main ability makes this build is the TR58 Carbonizer Turret, as it can move around instead of being stationary.
Use Aegis and Bandolier for extra protection and ammo like the previous build. Furthermore, the Rejuvenation Rack can be used to heal yourself should you get hurt on the battlefield. For this build, use Spider Mines as your secondary and Thermal Harpoons for your Utility.
How to play with Engineer

The Engineer works as both a support class and a ranged class. For the former, you’ll have to use your turrets and your mines heavily. For the sake of damage, always pick the TR12 Turret and the Pressure Mines (fully armed). Additionally, select the Bubble Shield for your utilities, as it provides you and your allies a quick respite in the heat of battle. Since you can place down two bubble shields simultaneously, it is an excellent support maneuver.
You can also take a more aggressive approach, by playing on the Engineers explosive side. For this, you can make use of the TR58 Carbonizer Turret, as it can move and shoot Thermal Harpoon. These deal massive amounts of damage to your enemies, should they connect. The Bouncing Grenades are a perfect complement to this setup.
The Engineer is also the most Tanky class in the RoR2 roster, meaning he can take some serious damage before dying. However, this does come at the cost of movement, as this character severely lacks in this department.
Best Items for Engineer Build (Tier List)
Risk of Rain 2 has several items to use with each character. However, only some fit certain characters in RoR 2, like the Engineer. The tier list below presents the best items to use with the Engineer in descending order.
- Bustling Fungus
- Aegis
- N’kuhana’s Opinion
- Shattering Justice
- Harvester’s Scythe
- Bandolier
- Hardlight Afterburner
- Hoopoo Feather
- Unstable Tesla Coil
Tips and Tricks for playing RoR2 Engineer Build
- You can place down two Turrets at a time. Make sure you always do so to increase your damage output.
- Turrets can also revive themselves; don’t fret too much once they go down.
- Pressure Mines can be armed to deal additional damage
- You can attack while running when playing as the engineer
- The engineer has some of the worst movements in the entire game. Circumvent this by using the bubble shield and constantly being on the move.