Epic Boss fights are one of the iconic features of the Resident Evil series, and the latest entry in the franchise keeps up the tradition with several challenging and lengthy battles. With that in mind, we have compiled this Resident Evil 6 Boss Battles guide to help you defeat all the ferocious zombie monsters of the game.
For more help on Resident Evil 6, read our Serpent Emblems Locations, Mercenaries Unlock and Weapons Locations Guide.
Resident Evil 6 Boss Battles
Leon
Mutated Deborah
Location. Found at the end of Chapter 2: Cemetery and Cathedral
Deborah is the first boss you face in Leon’s campaign and there are some things you need to know to defeat her. She has three main attacks; the first is called ‘Breast Caress Strike’ in which she jumps at you from a higher level and tries to impale you with the weird things on her back, complete the quick time event to grab the thing and shove it into her own abdomen.
The second attack is called ‘Claw Swing’, it’s pretty obvious what this does; she will basically just swing one of her claws at you horizontally. The final attack of note is the ‘360 Spin Attack’, here Deborah will jump into the air and land near you while slashing her claws around. Watch out for this attack as it’s got a pretty significant range.
Just as you begin the fight, unload a few rounds into her to trigger a scene. Once the scene is over, you will arrive in a new area. Be mindful of her attacks as the fight resumes and try to aim for the orange mutated parts on her body as they are her vulnerable spots. There are also a few explosive barrels around here but only shoot these when Deborah is near them, or it’s just a waste.
A few zombies will spawn every now and then, kill them if they get in your way but focus mostly on Deborah. Keep in mind that they drop ammo. After this small fight, you will board a mine cart where you fight Deborah once more. Make sure to duck at the proper intervals and shoot whatever debris is on the tracks before you crash. The fight ends after a couple more cut scenes.
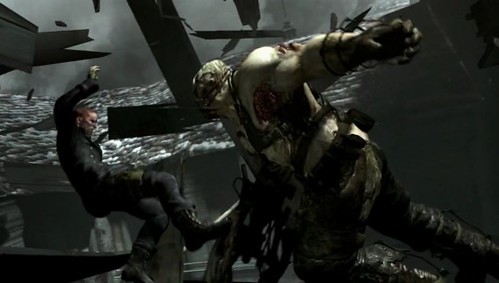
Ustanak
Location. Found at the end of Chapter 4: The Simmons Investigation
You encounter Ustanak alongside your partner, Jake Muller and Sherry Birkin after the incident with the airplane and the Lepotitsa. As a result, the fight is a 4v1. However, Ustanak is capable of occasionally snaring your friends, when this happens, approach them and press the partner button to help them out.
Ustanak has a fair number of attacks; ‘Kick’ is just a basic short-range attack that isn’t really much to worry about, just stay at a distance, and you can go the entire fight without seeing this even once. Watch out for when he switches to his grenade launcher, as his Grenade Blasts can really hurt. Try to stay mobile.
Ustanak has four attacks he can use to take you out of the fight temporarily. His ‘Grab/Throw’ attack will pick up one of your allies and throw him at another, knocking them both down. His ‘Foot Crush’ will trap you under his foot for a few moments, which is then followed up with his kick.
Watch out for his ‘Claw Grapple’ as this will snare you with his claw arm for a short time until you can wriggle loose or are freed by someone else. Finally, ‘Encapsulate’ will see him snatch one among your party and stuff them into the capsule on his back. You will not be able to break free, and this will last throughout the fight unless one of your allies frees you.
As soon as the fight begins, take note of a number of explosive crates around this area. Make sure to use these properly and as soon as possible, as they make the fight a lot easier.
First of all, lower the forklift in the area and use it to get to the top of the nearby containers where you’ll find two crates with explosives inside them; you can push down.
Across from the forklift is a ladder that takes you to the top of another set of containers where there is another box with TNT inside. From here you can jump to another container that has some wooden crates with goodies inside.
When Ustanak’s health gets low enough ho retreats temporarily, there is a short lull in which your party splits up. You’ll encounter him again before long, and he’ll use more of the attacks I listed above.
Near the truck, you’ll find some more wooden crates with stuff inside, but look around, and you’ll see another forklift that can be used to access four more explosive crates. You can also jump over to the cage which houses another wooden crate on top of it, as well as another explosive crate.
After you’ve damaged Ustanak enough, he will swap his grenade launcher for a spare claw. Damage him more and he’ll amputate the claw and all he can do now are normal Grab/Throws and his kick.
Mutated Derek Simmons
Location. Found in Chapter 5: City under Attack
You should notice various fuel tanks strewn around the area. Lure Derek towards these and then shoot them to injure him. Once you have exhausted all three, plant remote bombs near the obelisks and then lure Derek over to them while taking cover from the explosion.
When He takes a chunk of damage, Derek will revert back to his human form. Dash at him and hurt him more to make him kneel, then press the melee button for a special type of melee.
After the fight, when cutscene plays, you must get into a vehicle and use its mounted weapons to fight Derek further. More cutscenes and eventually the fight moves to the roof with Simmons in his final form.
Be aware that there are a couple of zombies wandering around here that Derek will eat to recover his health. You’ll notice a lightning rod nearby, impale a zombie with it and then watch what happens when Derek tries to eat the zombie.
The orange bulbs on Derek’s back can be shot to inflict a lot of damage. This is the prime time to unload your entire arsenal of Magnum rounds, but other weapons such as the shotgun and machinegun also work fine. Repeat the Lightning Rod treatment a couple of times until you are able to escape and dash to the heliport.
Search around the Heli and you will be very happy to find a Rocket Launcher. Aim it at Derek’s head when you see him again, and you’ve completed Leon’s Campaign.
Chris’ Campaign
Ogroman
Location. Found near the start of Chapter 2: Drama in Edonia
Alright, this fight can be won in two ways. Either you just survive for five minutes, at which point reinforcements arrive. Alternatively, you can kill the dude. If you pick the latter, you need to damage him until he leans over against the building in pain.
When this happens, you need to quickly run up, climb onto him, and complete the quick-time event This might take a couple of tries, and every time you fail the thing will grab you and squeeze, so either wriggle free with the quick-time event to shoot him in the face to make him drop you.
The Ogroman has a number of attacks he’ll use to try to kill you. The first is called ‘Striding Swipes’. In this Ogroman walks along the road with its arms swinging by its side, hitting everything nearby. ‘Stomp’ will make you stagger and take a bit of damage if you are anywhere nearby him when he does this.
The ‘Pick-Up’ attack involves him picking you up and squeezing you for a good amount of damage. Complete the quick-time or shoot him in the face to escape. His ‘Punch’ does exactly what it says, and is rather east to avoid due to the long windup. ‘Bile’, Shooting Ogroman in the crotch will cause bile to spill out. The only way you’ll get his by this is if you stand directly below it.
While you fight the behemoth, keep in mind its weak areas; you can shoot it in the mouth, at the large growth on its neck and finally, its crotch. If you want a clear shot at the growth, get in the building on the right side of the streets via a flight of stairs.
Iluzija
Location. Found in the middle of Chapter 3: The B.O.W Chase
Iluzija is a giant snake B.O.W you see right in the beginning of the chapter but don’t face until a bit later. It has active camouflage on the outside of its body (this means you can see it when it opens its mouth). Besides that there are a few ways to find and hurt it.
Firstly, your laser sight from your gun will distort when aimed through the snake, making it easier to spot. Secondly, it knocks over debris as it passes through, though this method becomes less reliable as the fight progresses and there’s less rubbish for it to knock down.
When hurt, the snake will become visible and look to snap its jaws at you. Shoot its mouth as this is its weak spot. Iluzija will also try to wrap you up squeeze the life out of you. When this happens, complete the quick-time event quickly or get your partner to free you or its game over.
The fight will shift into one of the other rooms if either the snake takes too much damage, or you start to run out of ammo. If this happens, crawl through the small vents on the floor connecting the rooms (be aware that the snake can appear here and attack) and in the new room, you can grab more ammo from the boxes.
Eventually, you’ll drive the snake back into its lair. It will endlessly circle the square arena, and you’ll notice a puddle with electricity sparks along the way. There’s a lever up and above it. Pull the lever as the snake passes through to kill it.
Haos
Location. Found near the beginning of Chapter 5: Underwater Facility
After you and your partners flip four switches, you will see a short cutscene after which there is a chase sequence. Rush up the ladder and dash over the catwalk until you can boost Piers up. Quickly tell him to pull Chris up as well, and proceed onwards.
Jump off the platform and unload on the creature. Now sprint over the catwalk, slide underneath the obstacle at the end and climb the next catwalk. Keep heading upwards and into the double doors and Haos will reappear. You have to alternate between sliding under the closing doors and shooting the creature when it attacks you, so it moves its hands out the way.
In the next section, if playing as Chris, you need to wait for Piers to do his thing. When you try to open the door, Haos will come back to life. Shoot it until it’s cocooned, and you’ll notice a big bulge on its back. Shoot that and get close while it’s thrashing about to stab its heart.
You have to repeat this pattern until it dies but during the last repetition, Chris is hurled away, putting him into ‘dying’ status while Piers struggles with the creature for the last hit. Quickly crawl towards the boss and use the partner command to deliver the final blow. You’ve just completed the Chris Campaign.
Jake’s Campaign
Ustanak
Location. Found in Chapter 1: Escape from Ustanak
Ustanak isn’t as difficult a battle as it might seem at first. You just need to keep a sharp eye out as most of his attacks –while damaging- can be pretty easily avoided. Ustanak’s most powerful attack is Dash Ram.
Whenever you’re fairly far away from him yet in clear sight, Ustanak will charge at you and slam you into a wall. This is an almost guaranteed down, so avoid it at any cost. His Surgery Grapple can be initiated in two ways, at a short and long range. You know he’s preparing this attack when his arm device opens up.
At short range, he’ll try to grab you with that arm, which you can prevent by moving towards the side of Ustanak or by ducking. His long range variant drags you in his grip from a long distance. If caught, you’ll have to complete a QTE to escape. Alternatively your party member can move in and perform a melee attack on Ustanak to free you.
Ustanak’s kick attack is a short-range attack and isn’t very dangerous. You’ll want to avoid getting too close to Ustanak to prevent him from hitting you with it. Similarly, his one-arm punch is also a close-range attack that’s fairly easy to dodge.
Finally, we have his Smash. A powerful short-range attack, Ustanak lifts both of his arms and smashes them into the floor (While you’re standing on it). Try not to experience this.
The strategy we’re going to use is fairly simple. Run the hell away, and lure him to explosive barrels you can blow up in his face. There are six explosive barrels on the ground level and five on the upper walkway, which is more than enough to defeat Ustanak.
If you miss a couple of barrels, keep in mind that you can still defeat him with good old-fashioned lead. Try to aim for the head, and avoid shooting the metal arm as it takes less damage as compared to the rest of his body.
Some J’avo will appear from the ropes hanging from the ceiling, but don’t be distracted by them as they actually do very little. The biggest threat they pose is by attracting your attention while Ustanak prepares to charge you.
Ustanak
Location. Found in Chapter 4: Learning the Truth
You encounter Ustanak again, this time alongside your partner, Leon and Helena. As a result, the fight is a 4v1. However, Ustanak is capable of occasionally snaring your friends, when this happens, approach them and press the partner button to help them out.
Ustanak has a fair number of attacks; ‘Kick’ is just a basic short-range attack that isn’t really much to worry about, just stay at a distance, and you can go the entire fight without seeing this even once. Watch out for when he switches to his grenade launcher, as his Grenade Blasts can really hurt. Try to stay mobile.
Ustanak has four attacks he can use to take you out of the fight temporarily. His ‘Grab/Throw’ attack will pick up one of your allies and throw him at another, knocking them both down. His ‘Foot Crush’ will trap you under his foot for a few moments, which is then followed up with his kick.
Watch out for his ‘Claw Grapple’ as this will snare you with his claw arm for a short time until you can wriggle loose or are freed by someone else. Finally, ‘Encapsulate’ will see him snatch one among your party and stuff them into the capsule on his back. You will not be able to break free, and this will last throughout the fight unless one of your allies frees you.
As soon as the fight begins, take note of a number of explosive crates around this area. Make sure to use these properly and as soon as possible, as they make the fight a lot easier.
First of all, lower the forklift in the area and use it to get to the top of the nearby containers where you’ll find two crates with explosives inside them; you can push down.
Across from the forklift is a ladder that takes you to the top of another set of containers where there is another box with TNT inside. From here you can jump to another container that has some wooden crates with goodies inside.
When Ustanak’s health gets low enough ho retreats temporarily, there is a short lull in which your party splits up. You’ll encounter him again before long, and he’ll use more of the attack I listed above.
Near the truck, you’ll find some more wooden crates with stuff inside, but look around, and you’ll see another forklift that can be used to access four more explosive crates. You can also jump over to the cage which houses another wooden crate on top of it, as well as another explosive crate.
After you’ve damaged Ustanak enough, he will swap his grenade launcher for a spare claw. Damage him more and he’ll amputate the claw and all he can do now are normal Grab/Throws and his kick.
Ubistvo
Location. Encountered at various points in Chapter 4: Learning the Truth
This is really more of a mini-boss as he doesn’t have enough varied attacks to qualify as a proper boss fight. All he has is a sizable health pool and only one attack (though that attack can put you in the downed state really fast). His slash attack with his chainsaw arm is his only move, and to top it off, he doesn’t move very fast at all.
You encounter this guy a couple of times, but this is really all you need to know to fight him. He never changes (except maybe he has higher health) and you basically just need to outmaneuver him and use stunning attacks such as flash grenades to lock him up. Oh and I almost forgot; his weak area is the point where his chainsaw meets his arm, for some reason.
Ustanak (again)
Location. Found in Chapter 5: To Save the World
For the first stage of this fight, take the path to the right and run away. You need to drop down to the ledge and push the skip off the end. When you drop down to solid ground, shoot until Jake shouts for Sherry to attack Ustanak.
There isn’t much to look out for here except Ustanak slamming his fist into the ground and causing lava to erupt. This will leave behind the ammo though. When Sherry runs up him for a melee prompt, Jake should follow in order to do the same. You then have to complete a QTE to take off his metallic hand.
The third part of the battle takes place on a single catwalk between Jake and Ustanak. This is a melee-only fight. Jake should be sure to use his charged-up combo attacks to drive Ustanak backwards. Stamina isn’t an issue here, so keep using your charged up combos until Ustanak is driven as far back as he can go, then follow the onscreen button prompt to start a quick-time event. Soon you will drive him off of the catwalk.
Now there will be a QTE on a transport cart. The event is tricky, but it makes up the majority of this fight with Ustanak until the end, when you fire a magnum round into its heart to finally kill it.
Ada
Derek Simmons (T-Rex)
Location. Found in Chapter 5
This is pretty much the same fight from Leon’s campaign, except Ada’s perspective. Most of it involves you trying to keep Leon and Helena alive while Derek tries to munch on them.
Keep your distance as in his T-Rex form, Derek will jump around a lot. His weak spot is in its mouth, but you can also use explosives dotted around the arena to do damage if Derek gets close to them. Save your missiles in case the T-Rex gets too close to Leon or Helena. Hold it off and eventually, a truck turns up so Leon and Helena can fight back, so defend the truck.
Again, you need to hold off the T-Rex for a certain period of time, and you should save your missiles for emergencies. When the truck flips and Leon and Helena are vulnerable, shoot the explosive barrel between them and Derekzilla.
Now Ada has to save nearby civilians. There’s no friendly fire here, so you don’t have to be too careful with your aiming. When you’ve cleared out the helipad, make sure you grab all the ammo from the boxes underneath before grappling across and reload everything you have in order to prepare for.
Derek Simmons (Rhino)
Location. Found in Chapter 5
You’ll now face the ‘rhino’ version of Derek Simmons. He has a spike projectile attack and a charge. Try to avoid both as they can really hurt, try using long-range weapons (sniper rifle or Bear Commander works well here) so you have more time to react to the attacks. Aim for the face or neck area as these are his vulnerabilities.
You need to hold him off until Leon and Helena turn up to offer support. When they do, shoot Derek until he falls to his knees. At this point, run-up to him and melee for a QTE. Repeat this until a cut scene kicks in.
When you regain control, quickly snipe the zombies ahead of you for herbs and ammo. Now you need to protect Leon and Helena as they climb up the side of the burning building. Simmons will be climbing up below them.
When you shoot Simmons, he falls a few metres before climbing again, so you’ll want to keep on shooting. You need to hold him off until Leon and Helena reach the gap ahead. Be aware of your surroundings. However, as zombies do spawn behind you occasionally.
When Leon and Helena are safe, Simmons will turn his attention towards you instead and Leon will jump to save Ada.
When you regain controls, repeat the first pattern of avoiding charges and spikes. Eventually, a cut scene kicks in where Leon is in trouble. Immediately, run-up to Simmons and perform the last QTE in Resident Evil 6. You have now completed the game.