Joloo Nah Shrine in Zelda Breath of the Wild is an ancient Gerudu Region Shrine. This is one of the longest shrines in BOTW and cannot be accessed until and unless you complete the Shrine quest “Test of Will.” As you complete the quest, the Shrine will appear in the Gerudu highlands, consisting of three rooms with Gyro control puzzles.
You must complete these puzzles to reach the Monk’s room. This Shrine offers you two chests, Golden Claymore and a Gerudu Spear, but both require a cumbersome effort.
In this Zelda BOTW guide, starting from the “Test of Will” quest, we will discuss in detail the Gyrocontrol puzzles inside each room of the Joloo Nah Shrine.
Joloo Nah Shrine location
Joloo Nah Shrine in Zelda BOTW is Gerudo Region Shrine in Gerudo Highlands. You can find these highlands in the northeast corner of Kuokot Plateau, and on reaching the location, you will find three Goron’s blood brothers standing near a hot surface.
As you talk to these blood brothers, they will give you a quest, “Test of Will,” completing which you can access the Joloo Nah Shrine in Zelda Breath of the Wild.
Test Of Will quest
In Zelda BOTW, as you head towards the Joloo Nah Shrine, you will find three Gorons there. As you speak to them, a quest will be triggered, called a “Test Of Will.”
The location is the homeland of Goron Blood Brothers, and they have come here to train themselves against the scorching heat of Goron City. Link has to join Goron Blood Brothers in the endurance contest in this quest.
Once Link steps in the ring, he has to be there until and unless he has won the ultimate endurance. The endurance contest is simple; Link will be in the ring with three Goron Blood Brothers. Whoever survives the scorching heat there longer will win the Test of Will contest in Zelda BOTW.
After Link has defeated Goron Brothers, they will challenge Link to take part in another round where he will stand in the ring with even more difficulties. This ring is hot like the previous one and surrounded by fire too.
Link here will catch fire if he loses his focus; therefore, during all this time, you have to be very careful. Link has to do this contest without heat-resistant gear; thus, always drink a potion or elixir before you participate.
On completing the Test of Will in Zelda BOTW, the Joloo Nah Shrine will finally appear from a nearby ground.
Zelda Breath of the Wild Joloo Nah shrine walkthrough
Joloo Nah Shrine in Zelda BOTW has three rooms with different gyro control puzzles that Link has to solve to complete the Shrine.
First Room
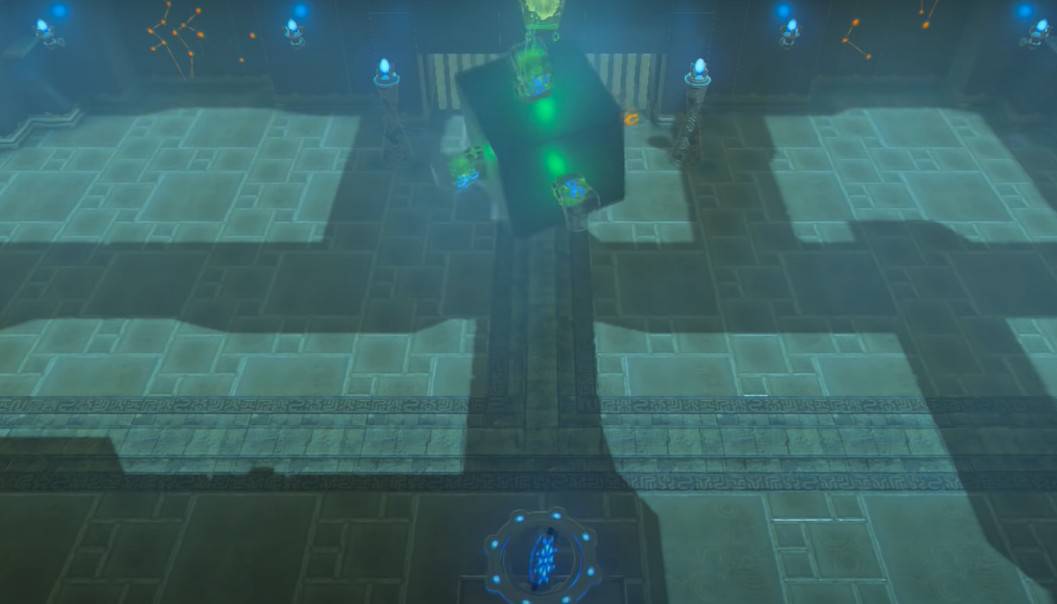
As you enter the Joloo Nah Shrine, the gyro control puzzle of the first room is comparatively more straightforward, and all you need to do is make electrical terminals contact the power supply at least once.
For this, go to the control terminal and move the cube from there. Cube must be moved so that all the electrical terminals connect with the power supply once. Completing the puzzle will open the gate to the second room of Joloo Nah shrine in Zelda Breath of the Wild.
Second Room

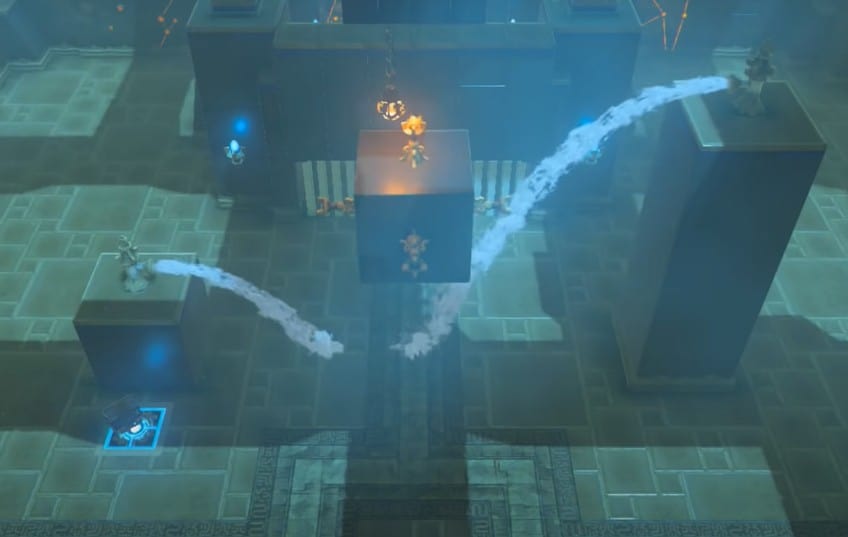
As you enter the second room, you will see a chest hanging on the left side of the room. The primary purpose is to solve the gyro control puzzle and get to that chest. The gyro control cube in this room has four wind streams coming out of it.
Here, you need motion control so these wind streams make an X shape. The position of X, however, should be such that the wind streams hit the fans. There are four windmills, and out of these four, one is a little lower than the others. As you arrange the wind streams in X, the lower windmill will not get any wind.
You only need to lower the Windstream and align it with the chest in Zelda Breath of the Wild to get the chest. After it, jump to the ramp and paraglide to the chest. This chest will reward you with a Golden Claymore.
The next thing is to open the gate to the third room. To do this, you need to line up all the fans so that the wind streams pass through all the fans at once. The fourth fan is slightly lowered because of the metal block over it.
Here you need to make use of Magnesis and move that metal block. After picking it up from above, places it over the switch. As you do this, the fan will elevate and reach the same level as the other fans.
The Windstream from the gyro control will now pass through all these four fans, and the gate to the third room in the Zelda BOTW Shrine will open.
Third Room
As you enter the third room with the final puzzle of Joloo Nah shrine, you will find yourself familiar with a puzzle as it resembles the first puzzle. Here, all you need to do is go to the control terminal and rotate it so that all the torches on the gyro control cube light up without making them touch the water streams.
As you do this, the door to the room with the Monk in the Zelda Breath of the Wild Joloo Nah shrine will open. But before entering that room, don’t forget to get the chest in this room. Standing on the control terminal, as you see above the cube, you will see a chest resting on a wooden platform.
Hit the wooden platform with a fire arrow to set it on fire and destroy it. As the platform destroys, the chest will fall, and you can now collect your reward. This chest offers you a Gerudu Spear.
Once you have collected the chest, enter the Monk’s room and speak to her. This will finish the Joloo Nah Shrine, and you will be rewarded a Spirit Orb in Zelda BOTW.