
In Bloodborne, certain items are only designed for Arcane-specialized characters. The specialized items dubbed ‘Special Hunter Tools’ are scattered in the game world, and finding them all unlocks the Hunter’s Craft Trophy.
The game lacks magic, but players can use Hunter Tools to compensate. These magical weapons consume bullets and perform similar to spells. There are nine Special Hunter Tools in Bloodborne, and this guide will cover all their locations.
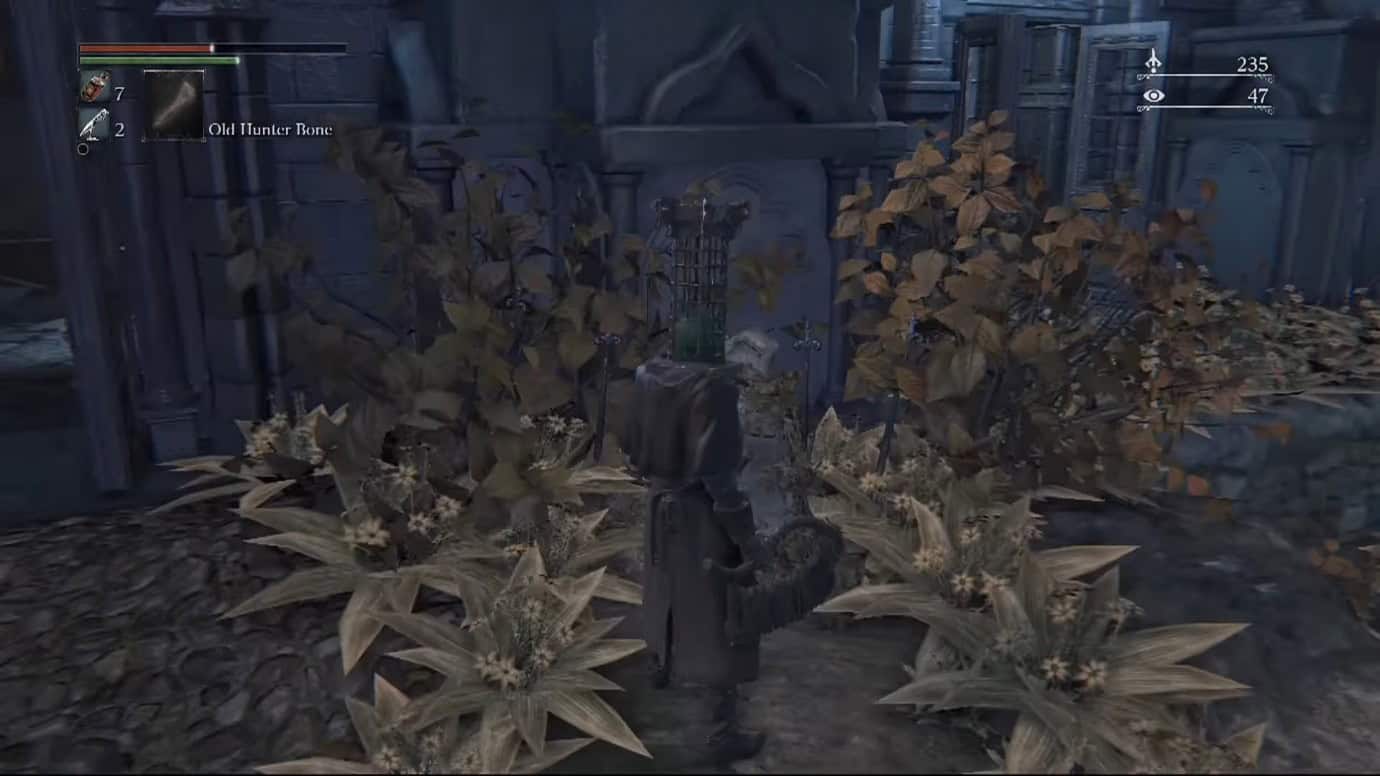
Old Hunter Bone (Abandoned Workshop)
The first of the Special Hunter Tools is found inside the Abandoned Workshop, which is only accessible once you defeat the Blood-Starved Beast in Bloodborne.
Head right from the Cathedral Ward Lamp and use the lever to bring up the elevator. Ride it up then take make an immediate right.
Journey across the bridge until you reach the Healing Church Workshop. You’ll notice that it has a ledge surrounding the main complex. Go right and drop down then follow the path until you come upon a stone archway.
Beyond the archway, you’ll find the inner part of the healing church, a series of wooden planks and platforms leading down to the Abandoned Workshop.
Here, you’ll have to be meticulous about how you drop down because if you take too much damage, you’ll have to start over.
Once you’re at the very bottom of the structure, proceed down the hallway to your left, and you’ll find yourself in the Abandoned Workshop.
Go to the main building (where Gherman usually is and activate the Lamp) and exit through the side door to find the Old Hunter Bone next to the gravestone closest to the door.
Beast Roar (Forbidden Woods)

The next Special Hunter Tools is located in the Forbidden Forest and is accessed after defeating Vicar Amelia in Bloodborne. Proceed forward from the first lantern in front of the stone bridge while sticking to your left.
Follow the path until you come upon a hill covered with flowers to your left. Go up the hill and continue until you encounter a gate on your right.
Do not go inside it. Instead, press left once more until you arrive at a house with a red lantern hanging outside it.
Make a right here and go through the gate to find another house with a bonfire. The Beast Roar is inside this house on a corpse.
Augur of Ebrietas (Lecture Building)

To acquire the Auger of Ebrietas, you must progress the game until you reach the Lecture Building in Cathedral Ward. You’ll also need to find a key that unlocks the room that contains the chest that holds the item we’re after.
From the second-floor lamp, exit the room into the foyer, take a left, and continue until you reach the end. Next, take a right and use the hatch directly before you lead down.
Once at the bottom of the stairs, emerge into the main hallway and enter the first door on your left. You’ll find the key to unlock the door with the chest inside the lecture hall. Exit this lecture hall and enter the one on the opposite side of the main hall.
Between the row of seats, you’ll find a locked door. Use the key to open the door and open the chest inside to acquire the Augur of Ebrietas.
Messenger’s Gift (Nightmare Frontier)

The next Hunter Tool, Messenger’s Gift, can be found in the Nightmare Frontier. Exit the cave from which you enter the frontier, head left, follow the path up, and stick to your left until you reach a chasm. Drop down into the poison lake and press forward.
Stay to the right and you’ll come upon a half-buried tombstone behind which is a cave. Enter the cave and go to the end to pick up the item. There will be several Winter Lamps in the cave that can quickly Frenzy you, so make sure you come equipped with plenty of sedatives.
Executioner’s Gloves (Cainhurst Castle)

The Executioner Gloves are found in Cainhurst Castle. From the Forsaken Cainhurst Castle Lamp, enter the small building on your right and use the lift to reach the main library hall. Run across to the opposite end and take the stairs up.
On the right side of the top floor, you’ll notice an open window. Exit through that window and drop down onto the terrace. Enter the building on your left to locate the chest containing the gloves tucked behind a couple of bookshelves on your right.
Empty Phantasm Shell (Byrgenwerth)

To acquire the Empty Phantasm Shell, you must head over to Byrgenwerth. From the Byrgenwerth Lamp, take the path directly before you and go straight until you cross a gate. Make an immediate left here and enter the tower.
Now, go up the spiral staircase and go to the top to locate the chest containing the item you’re after.
A Call Beyond (Upper Cathedral Ward)

The next Hunter Tool, A Call Beyond, is found in the Lumenflower Gardens in the Upper Cathedral Ward area. To access it, you’ll need to defeat the Celestial Emissary. Once you do, a Lamp will appear in the boss arena.
Directly in front of the Lamp, there will be a window that you can break through. Drop down onto the catwalk after smashing through the window and go right. You’ll find the item on a dead body along the railing.
Tiny Tonitrus (Yahar’gul, Unseen Village)

The Tiny Tonitrus is located in Yahar’gul, Unseen Village. From the Yahar’gul Chapel Lamp, take the stairs up and follow the path until you reach a circular podium. Right in front of it, there will be a shallow flight of stairs, towards the left of the stairs there will be an opening in the fence.
Drop down from this opening to reach the bottom. Enter the stone archway leading to a small room. The Tonitrus can be found in a chest here, surrounded by several enemies.
Choir Bell (Mergo’s Loft)

The final of the Special Hunter Tools, the Choir Bell, is in Mergo’s Loft in Bloodborne. Start at Mergo’s Loft Middle Lamp and take the path until you reach the cage lift by a ledge. Drop down into the first opening while going down and follow the narrow path to reach a bridge.
There will be several Winter Lamps on this bridge, so bring some sedatives should you get Frenzied. Follow the bridge until you reach an opening. Enter it then take the stairs leading down on the opposite end.
Press forward and continue till you spot an opening on the floor. Drop down, and you can spot the chest containing the item on the opposite end of this room. Once again, several Winter Lamps will be here, so be prepared.