This Subnautica Guide will tell you all the Beginners Tips and Tricks from where you can find food and water. With these various Subnautica Beginners Tips and Tricks, you can survive in the depths of the ocean. The tips covered include Blueprints, Scanner Room, and the different tools that you will need in your quest
Subnautica Beginners Tips and Tricks
Finding food and water can be a massive problem for newer players, especially ones who have come from games like DayZ and Just Survive. However, it is actually not that difficult to locate stuff which you will consume.
The first thing you will need is the GravTrap. Get your hands on a scanner and scan the Plateaus near the Aurora and the way leading up to it. Stuff that you need is a Battery, Copper Ore and Titanium. Once you have these, you can craft a GravTrap.
You’ll find titanium in Kelp Forest, and copper ore by breaking Limestone Outcrops or Barnacles.
Once you have a GravTrap, you need to go to the shallows where there are a lot of fish waiting to be devoured by you.
Once you throw your GravTrap at the fishes, you will notice the fishes are immediately pulled in with some other stuff as well. Bladderfish are lethargic and easy to lay a trap on.
Now all you need to do is to take the fishes back to your life pod. After this, you can find the water down towards the hatch or dig in to find it.
Beginners Tips and Tricks
Before we move ahead, you should know how to use the Scanner Room. You need 3 Solar Panels to power it at all times. Find a panel where you can recognize some of the objects and begin scanning. It is best if you get the HUD upgrade, as it will automatically tell you the location of the items that you have found.
The Scanner bots can save you some valuable time by searching for the materials without wasting your own oxygen. However, if they do get near a Stalker, they will almost certainly die.
Just remember that the room only shows you fragments of stuff that you do not have the blueprints for, and will ignore it for the blueprints you already have.
Blueprints
Certain Blueprints are absolutely essential if you want to succeed in the game. The Repair Tool is very easy to find and very important. All you need to do is to find the Crashfish, go to the plant it was living in after it blows up and pick up the sulfur to unlock the blueprint.
The Radio can also be easily acquired, simply use the Repair Tool to fix it in your life pod. The radio will give you plenty of useful information by broadcasting news from other life pods.
After that, you can focus on the Scanner Room. You need to find some fragments near the grassy plateaus in the biomes. After building a Scanner Room, you will need a Beacon.
Try to find it as soon as you can since it will allow you to go back to the places where you can find food and other important objects much more easily.
These Beacons can be used to forgo the small range of the Scanner Room, as you can mark the locations of wreckages which are much farther away from your Life Pods. You can also use them to mark routes to your secondary bases, which will be very helpful as you move on further into the game.
Add to this the Cutting Tool, which can be crafted through fragments found in pretty much every nook and cranny of the shallows, and you have the necessary blueprints needed for survival.
The Cutting Tool can be used to cut through wreckage but requires a lot of power, so remember to bring some batteries for it if you plan to use it for elongated periods.
All of the copper and acid mushroom batteries in the game could be recharged. Acid mushrooms are found on the ocean floor. Stay safe from their acid while harvesting them.
Vehicles
From the vehicles, The Seaglide is by far the most important, as it will allow you to get away from predators. Try to have it on your hotbar for quick deployment. The Seamoth will be used by you the most. It is the fastest and is quite easy to build. It will provide you with oxygen so use it for exploring as much as you can.
If you are looking for an alternative, then The Cyclops can be a good mobile base for your operations. It has a lot of chargers and lockers. It can be easily attacked by predators so only use it if you have to, or if you are in a safe area. Lastly, we have The Prawn; it is not that good unless you have the Drill Arm for it. I would advise you not to build it unless you do have the Arm for it, as it is useless without it and you will be better off with other vehicles.
Aerogel and Polyaniline
To finish our Subnautica Guide, let’s take a look at Aerogel! To make it, you need a Ruby which can be found deep underwater. They are bright red in color so you will probably not be able to miss them if you saw them.
Apart from this, you will need Gel Sacks will be found in caves deep underwater. They have a purple glow so you should be able to find them quite easily. To make Polyaniline, you need 3 Deep Shrooms and 1 Salt Deposit; this will make Hydrochloric Acid which you can combine with Gold to make Polyaniline. Deep Shrooms can be found in other life pods near the really deep water.
Salts Deposits are easier to locate as they are quite similar to Quartz, just a little blockier.
Game World
The map/world is set in stone and not procedurally generated. This means it can be learned and mastered.
However, the resources found in Lime, Sand, or Shale outcrops may vary. The location and content of databoxes won’t change.
Orientation
You can see up to kilometers above water, however, the vision under the water is quite limited.
The compass-bearing system gives you your current depth and the distance from Lifepod 5. You can set up more waypoints as well by crafting more beacons.
Or you can plant an Exterior Growbed with bioluminescent Creepvine. You can further customize the waypoints using PDA, by changing their colors.
Frustration Takes Away the Fun
If you are a man without a plan, chances are that you would keep getting distracted, dying and ultimately getting frustrated and losing interest in the game.
First of all, you need to pick a game mode that suits your gaming temperament. Secondly, you need to avoid predators.
Other than that, you need an empty inventory if you are going scavenging, and a full inventory if you are going to set up a new seabase.
Beacons are indeed the guiding lights, but you don’t want the unnecessary virtual icons spamming your surroundings. Only place them in places that you feel like are worth visiting again.
Crafting
You can craft anything you like using the raw materials in your inventory and Habitat Builder.
And if you feel like hitting the rewind button, all of your resources will be sent back to your inventory while deconstructing.
Storage
You’ll have sufficient space in your inventory during the gameplay, given that you utilize it properly.
Don’t go on stuffing it with anything and everything that you find. Gather some resources, get back to the base to craft them and go hunting again.
Getting started with Survival Mode
If you decide to stick with survival mode, you’ll respawn every time you die, but you’ll need to keep food and drinks handy.
That’s the whole point of survival mode. You will respawn in your last habitat, with the inventory you had at that time.
When the game begins, you’ll be sitting on the following stats:
- 81% health
- 51% food
- 90% water
Your lifepod will be equipped with two nutrient blocks, two filtered water, and two flares, but to your dismay, it will be in flames that have to be extinguished.
You can avoid this by skipping the intro, but then you’ll be missing out on learning basic game mechanics.
Next, start gathering food, water, and raw materials as per your PDA instructions. PDA could be brought up by pressing tab and it will give you blueprints for a few basic tools.
You need to get your hands on these materials as an utmost priority:
- Scanner Tool
- Standard O₂ Tank
- Food, especially Cooked Peepers
- Survival Knife
- Filteredor Disinfected Water
- Repair Tool
- Fins
- 6 Titanium
- 4 Silicone Rubber
- 1 Battery
- 1 Bleach
- 1 Cave Sulfur
Getting Necessary Supplies
Quartz could be found on the ocean floor, as well as on cave walls and floors.
Creepvine Seed Clusters could be found in Kelp Forest. Stay clear of stalkers and give them peepers or metal salvage to stop them from causing a problem.
Coral tubes are found in the vicinity of Safe Shallows.
The Lifepod
This will be your safe havens earlier on in the game, and you will often find yourself looking for it because of the fabricator.
Fabricator will help you with the crafting and Medical Kit Fabricator will keep you healthy once it regenerates every 30 minutes.
You can also use Lifepod for its storage behind the ladder.
Scanner Tool
This is one of the most crucial tools in the game and it will help you scan fragments.
Oxygen Tanks
A good oxygen tank is the key to survival in the game. you can build an oxygen tank at least three pieces of metal salvage on ocean floor and then crafting titanium using Fabricator.
You can craft a Standard Oxygen Tank using 2 Creepvine Seed Clusters, 2 Quartz and, Titanium.
Food
Peeper is fast and difficult to catch, however, it gives you +32 food points. Bladderfish and Garry fish on the other hand are easier to catch. The downside is, Garry fish will only give you 18 food points.
Other than these, you can devour Holefish and Boomerang in Safe Shallows. Gasopod, Rabbit Ray and Crashfish are inedible.
Eating Peeper will take 15 water points off your stats. Eating a preserved fish will make you lose more water points as it has more salt. So its better to cook it and eat in immediately before it rots.
Survival Knife
It will improve your chances of survival. To craft it, you need to look for Limestone Outcrops in enclosed areas.
They’ll give you titanium. titanium and a Creepvine Seed Cluster is used to craft Survival Knife.
Water
First of all, you need Coral. Once you have extracted that using your Survival Knife, you can craft Bleach using Coral samples and Salt Deposits. Bleach is then used to craft drinkable water. It gives you 30 water points.
20 water points can be extracted from Bladderfish as well. Creepvine can also be a life saver by giving you a hefty amount of 1 water point.
Radiation is Harmful
You need a Radiation Suit to survive the disaster once Aurora explodes. To craft a Radiation Suit, you require 2 Fiber Mesh. Fiber Mesh requires 4 Creepvines and 2 Lead. Lead can be harvested from Sandstone Outcrops.
Radiation suit, radiation helmet, and radiation gloves will keep you safe from harmful radiation.
Flashlight
Crafting it during the beginning of the game could be a lifesaver at will help you explore dark caves.
But it has its limitations, you cannot simply light up all the dark waters around you, use it in a comparatively closed location.
Building the First Base
Pick a space near the lifepod. This way you won’t have to build your own radio and fabricator.
To begin with, equip the habitat builder and build a T compartment. Then attach solar panel for power, and later, wall lockers for storage.
Add basic compartments and more wall lockers if you seem to run out of storage.
Stay Safe
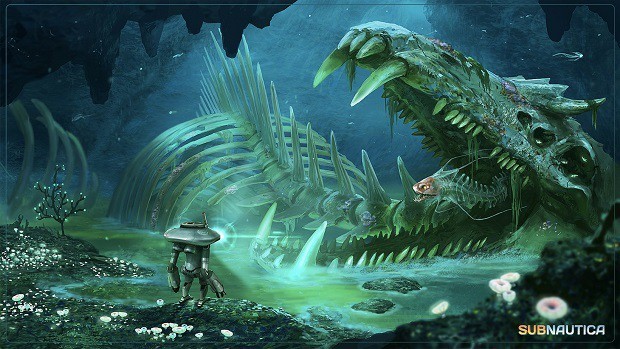
There are three deadly creatures you need to stay clear of. The first one happens to be Stalker. As mentioned above, they can be put down with metal salvage. And they are easy to outswim.
Secondly, there are Gasopods. They are huge creatures and they like to mind their own business if you don’t trigger them on purpose. In case they do feel threatened, stay clear of the exploding algae pods they send your way.
Lastly, there are Sand Sharks. They hide under the sand, and the best way to escape them is to keep changing directions.
Scan every other species as you approach them to know about their threat level.