
Just like any other zombies map in Call of Duty: WW2 zombies, Shadowed Throne hides more Easter Eggs to unpack that provide details of what happened after the events of the Darkest Shore in Berlin.
In this guide we’ll go over everything you need to do in order to complete the Easter Egg for the Shadowed Throne and unlock the trophy/achievement.
How to complete the Shadowed Throne easter egg in WW2 Zombies
Before we begin with the Easter Egg, it is important to know that unlocking the Pack-A-Punch isn’t necessary for the completion of the Easter Egg. However, if you plan on going to complete the Easter Egg on higher rounds, then it’ll be quite handy.
Step 1 – Turn on the radio
To begin with the Easter Egg, players must head over to the main street and look for the radio placed on a small table in the corner. The radio will have a small sticker placed on top of it with a code eg: LS3
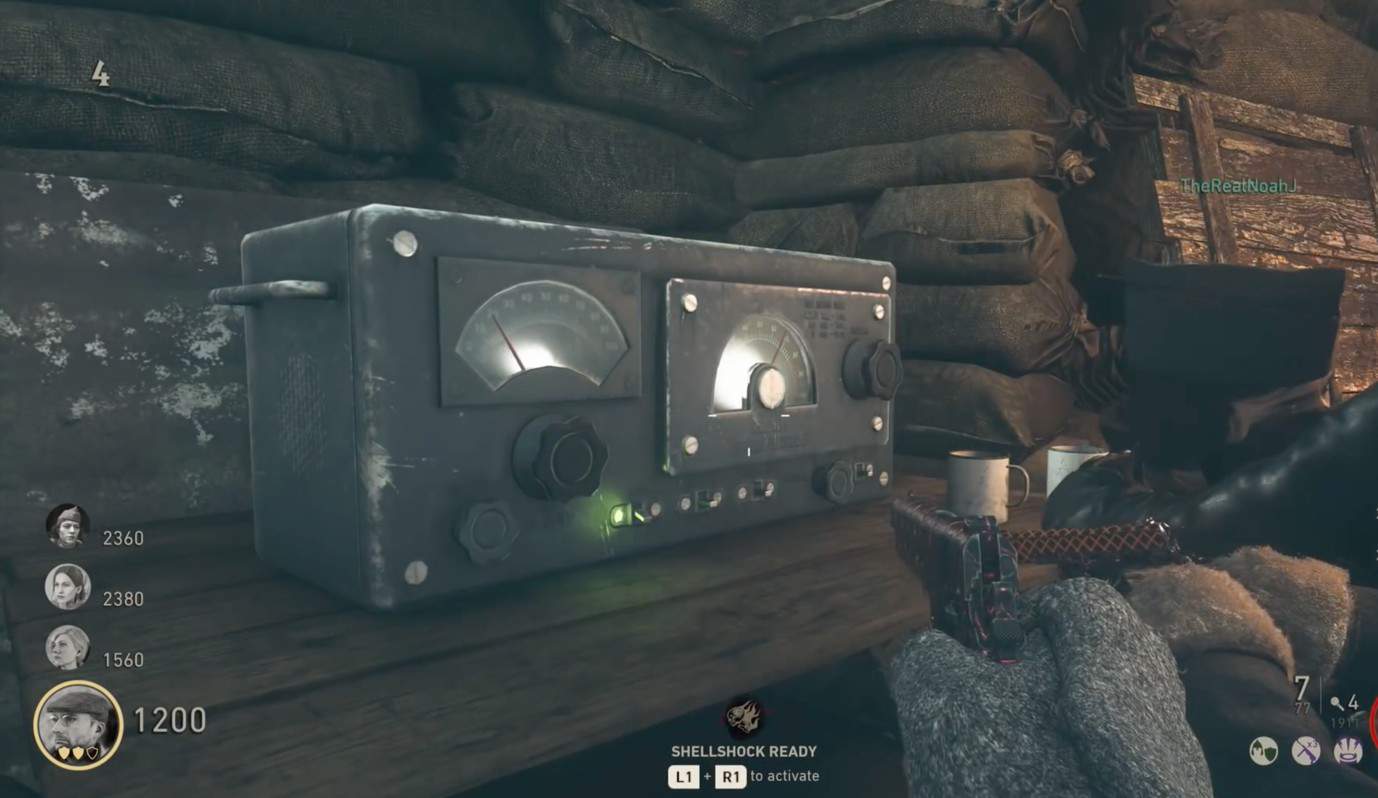
Note those codes down and travel to the Church. Look at the map placed on the eastern wall to spot a red pin placed on a designated area. Now you need to look at the other chart and search for the frequency that matches both the coordinates from the radio and the location on the red pin.
The next step is to head back to the radio and match the frequency on the radio with the frequency you just discovered. In doing so, you’ll have contacted the Russians who’ll send a box of flares to you.
Step 2 – Fire the flares
Once the Russians have been contacted, it’s now time to signal them. Head over to the staircase for the entrance of the Museum to spot a wooden box placed on the side. Melee the box to open it and then shoot at the opened box to send out a signal for the Zeppelin.
As soon as the Zeppelin arrives, you’ll see that it has dropped four Tether pods around the map that you need to interact with. But before we do that, the Easter Egg for the Shadowed Throne requires you to create the Wonderbuss wonder weapon in WW2 zombies.
Step 3 – Build the Wunderbuss
To craft the Wunderbuss, players must look for two parts, the Wunderbuss Battery and the Geistbolt. The battery for the wonder weapon is quite easy to find, simply head over to the Museum and look under the debris to spot the battery. If it doesn’t spawn there, the other location to find it is the Theatre.
Now that you have the battery at your disposal, travel to the spawn area and head inside the basement to find a machine inside a caged room.
Insert the battery part in the machine and melee a Fiery zombie near it to acquire the Geistbolt. Remove the battery from the machine and insert it in the Wunderbuss workbench in the caged room with the Geistbolt to craft the wonder weapon.
To get out of the room, shoot the Wunderbuss at the caged door to open it. Now all that’s left to do is find the Tether pods of the Zeppelin and charge them with the help of the wonder weapon.
Step 4 – Find and charge the Tether pods
Out of the four pods, you’ll only need to charge three to complete this step of the Easter Egg. The Tether pods act as soul boxes that require killing zombies near them to be charged.
The first Tether pod is found in the Plaza. Simply stand near the pod and begin killing zombies with the Wunderbuss you just crafted in WW2 zombies. The second pod is placed inside the Museum and in the Destroyed Building respectively.
Once you’ve charged all three of the pods, your next step for the Easter Egg is to scout for a painting.
Step 5 – Find the painting
The painting is placed in the bedroom of the dead woman which also gives you one of the audio logs. Simply enter the bedroom and interact with the painting on the wall. A notification will pop up reading, “Found the Dancers Painting”.
Now head to the Theatre and shoot the film reel placed above the pillar of the projector. Place the painting you just acquired on the projector and shoot the Wonderbuss at the projector to charge it.
If done correctly, a map of the sewers will be projected on the main stage and this step for the Shadowed Throne Easter Egg will be marked complete.
Step 6 – Find and arm the Smuggler
The next step for the Easter Egg will require players to locate and arm the Smuggler. To do this, you need to head over to the basement area where you crafted the Wunderbuss and look for a cash register.
The cash register is placed on top of a locker. Shoot the register to view a code written underneath its drawer. Just like done in Step 1, you need to note down the code and insert it in the radio to contact the smuggler.
A short audio clip will be heard if done correctly. Then travel to the Plaza and look for a gas panel on the ground. It is shaped like a bunker’s door. Throw a frag at the door to hear an audio where the Smuggler asks for you to get him a weapon.
The Smuggler is quite selective about the weapon so be prepared to spend some jolts to satisfy his needs. Purchase wallbuy guns and bring them to the smuggler to see if he likes them or not. If the smuggler accepts the weapon, you’ll see a notification on your HUD, “Armed the Smuggler” appear.
Step 7- Pay the Smuggler and get the Smuggler’s Bat
In the previous step we armed the Smuggler, now it’s time to pay him to progress through the Easter Egg. After arming the Smuggler, you’ll have to melee the same gas panel on the ground to open it. You can also lure a bomber zombie near it and then explode it to open up the panel.
Once the door opens, you’ll have to throw some Jolts inside the bunker until another notification, “Paid the Smuggler” appears.
Now that the smuggler is paid, head over to the basement in the spawn area and look beside the caged room to find a wooden door. What you’ll have to do is melee the door three times to receive the Smuggler’s bat.
The Smuggler’s bat is a special melee weapon that extends the melee range and even shoots a charged bolt at the undead in WW2 zombies.
Step 8 – Find the Dancer’s Dagger
This is one of the hardest steps to complete for the Shadowed Throne Easter Egg. To begin this step, players must first head over to the Theatre and look at the map projected on the screen. The map will show a green dot indicating a location that players will need to visit and find the Clown Doll.
You need to locate the doll and kill zombies around it using your melee weapon until the doll is destroyed. However, it is important to know how many melee kills you performed until the doll is destroyed as well as the location (first, second, third, or fourth). For example, if it took you 4 melee kills to explode the Clown Doll on the first location, you must remember four and one.
This process must be repeated four times. To find the locations of the dolls use the green dot on the projected painting in the Theatre and remember the format of the locations and the kills as they’ll serve as a combination for the next part of this step.
After destroying all four clown dolls, head over to the dead woman’s apartment and look for the safe next to her vanity. It is important to note that the number of kills it took you to kill one Clown Doll is the safe combination and the area number where you killed is the order.
- To open the safe, you’ll first need to reset the dial to zero which is done by turning the handle to the right.
- Once done, continue to turn right and enter the first number (The melee kills it took to destroy the first clown doll).
- Then turn to the left to insert the second number
- Turn right to enter the third number
- Lastly, turn left again and insert the last number.
Successfully entering the combination will open up the door and you’ll be awarded with the Dancer’s Dagger
Step 9 – Find the Nazi Axe
The last melee weapon that you need to acquire is the Nazi Axe for the Easter Egg in WW2 zombies. To find the axe, players must find the frequency coordinates for the radio just as they did in Step 1. The coordinates can be found in three locations.
- Museum’s wall (directly below the M1 Garand wallbuy)
- Apartment’s elevator,
- Back-right area of the stage in the Theater (check the side of the dresser).
Once the frequency has been found, head over to the radio and insert it to play an audio. In the audio, there will be a Morse Code that you need to translate. A small beep in the audio will represent a dot (.), a longer beep will represent a dash (-) and a pause will be ().
You can use a Morse code Translator and insert the codes to find a set of numbers. But before we do that, you’ll have to find the magnifying glass placed on the sofa on the second floor of the Theatre.
Collect the codes with the magnifying glass and head to the Church where the map is located. Use the coordinates from your finding and look at the first map to see which area the codes represent. When that’s done, head to the second map and place the magnifying glass on the area you just located.
If done correctly, a drawer in the corner of the room where the map is will open revealing a scale bowl. What you need to do is head over to the Museum and place it on the statue near the staircase.
To proceed further you’ll have to melee kill a Sizzler near an armour machine and then purchase it for 1000x Jolts. Do that and then carry over the Sizzler’s head to the scale in the Museum.
In doing so, you’ll find a small rabbit appear next to the scale. Simply kill zombies’ around it until the rabbit disappears and the drawer below the scale opens revealing the Nazi Axe.
Step 10 – Find the Hidden Courtyard
Once all three melee weapons are with you, head to the gate at the Church’s entrance to spot three frames with symbols of the melee weapons you acquired for the Shadowed Throne Easter Egg.
Place all of them in their respective order and then begin charging them by killing specific zombies for each weapon.
- Regular Zombie kills charge the Dancer’s dagger
- Pests zombie kills charge the Smuggler’s Bat
- Sizzler zombie Kills charge the Nazi Axe
Charging all three melee weapons will open up a Hidden Courtyard next to the entrance of the Church. What you need to do is head inside the hidden courtyard and begin shooting the fourth and last Tether pod stuck inside the Barbarossa statue using the Wonderbuss.
Step 11 – Solve the Hidden Courtyard Puzzle
After entering the hidden courtyard, you’ll be welcomed by a few statues that are facing in different directions. What you need to do is make them all face the golden statue of Barbarossa. However, moving one statue will cause the others to move in other directions.
This can become quite tedious and annoying to solve, which is why we are mentioning a link that can help you with this puzzle. Once all of the statues are facing the Barbarossa statue, they’ll become golden ravens and will be available to pick up.
Pick those ravens up and place them at the base of the Barbarossa statue at their specific slot to proceed further. Placing the raven correctly will reward you with the Barbarossa’s blade.
Now all that’s left is to gear up and charge your Wonderbuss to 100% as it’ll be necessary to battle the Stadtjager in COD zombies. To exit the hidden courtyard, simply place the sword on the frame of the staircase to open up the door.
Step 12 – Board the Zeppelin
Once you’re all geared up, simply shoot the Tether Pod that is glowing red to be propelled toward the Zeppelin we called earlier in Step 1.
After boarding into the Zeppelin, your task is to defend against the hordes of zombies coming your way and use the control panels to open up the gates that lead you toward Straub.
As soon as you reach Straub, you’ll experience an epic moment where Straub is overrun by zombies and you’ll be teleported back to the ground where the main showdown with the boss Stadtjager is about to take place.
Step 13 – Defeat Stadtjager
After arriving back to the ground, shoot the tether pod to call the boss and begin the fight. The fight will be simple however it can become overwhelming if players don’t take the right measures.
Try to avoid the regular zombies and use your guns to take them out. Keep on dodging the boss until you hear a loud roar and yellow markers begin appearing on his back. As soon as the markers appear, begin shooting until phase 2 begins.
In phase 2, Stadtjager will stop taking damage while rushing at you. What you need to do is wait until he fires Geistbolts and then begin shooting at him. Repeat this a few times until phase 3 commences.
Lastly, in Phase 3, the Stadtjager will deploy a red smoke in which your regular weapons won’t do any damage. Instead what you need to do is take out your Wonderbuss and begin spraying until the boss goes down and a cutscene appears.
Defeating the Stadtjager will mark an end to the Shadowed Throne Easter Egg in WW2 zombies and you’ll be awarded the Stadtjager Down Trophy/Achievement.
The Shadowed Throne mini Easter Eggs
Play the Hangman
Outside of the main Theatre, you’ll spot a zombie who is hung by a rope. Next to the zombie is a golden template with a few buttons. What you need to do is shoot the buttons on the top and bottom to reveal a letter.
If the letter has been selected, shoot the middle button to insert it. If the answer is correct the zombie will stay as it is, if it’s incorrect the zombie will start to develop body parts and come after you.
There are a few words that can be created and they provide secret rewards such as:
THEJACKBOX- Jack in the BOX
WONDER- Free Wonder Weapon
GEISTKRAFT- Powerup
DAMNATION – Nuke
REAPER- Insta Kill
FAMISHED- Max Ammo
GLUTTONY – Double Points
Free Power Ups
There are five hats placed around the map which can reward players with certain powerups. After collecting all five caps, players must place them on the Cheetah found in front of the projector in the Theatre. They must be placed in a specific order which is Fedora, Pilot, Garrison, Officer and then the red hat. The locations for the hats are:
Fedora
Next to the wonder weapon box inside the Church.
On the base of the Barbarossa statue in the Hidden Courtyard.
Pilot
Inside the small brief of the Underbelly.
Besides the Schnellblitz.
Garrison
On the model head on the second floor of the Museum.
In the Cabaret, on top of the guitar.
Officer
One of the desks inside the Museum.
In the Dead Woman’s apartment.
Red
Inside the Museum
In the bus outside of the Cabaret