There are many foes you will have to face in order to save the world from the forces of evil. Simon Belmont, Alucard and Trevor Belmont must all face their fears and stand strong to fulfill their destinies. Feeling the pressure of the grand task? Well, you need not worry because this boss guide will help you deal with the worst of the worst.
Castlevania: Lords of Shadow – Mirror of Fate Boss Battles
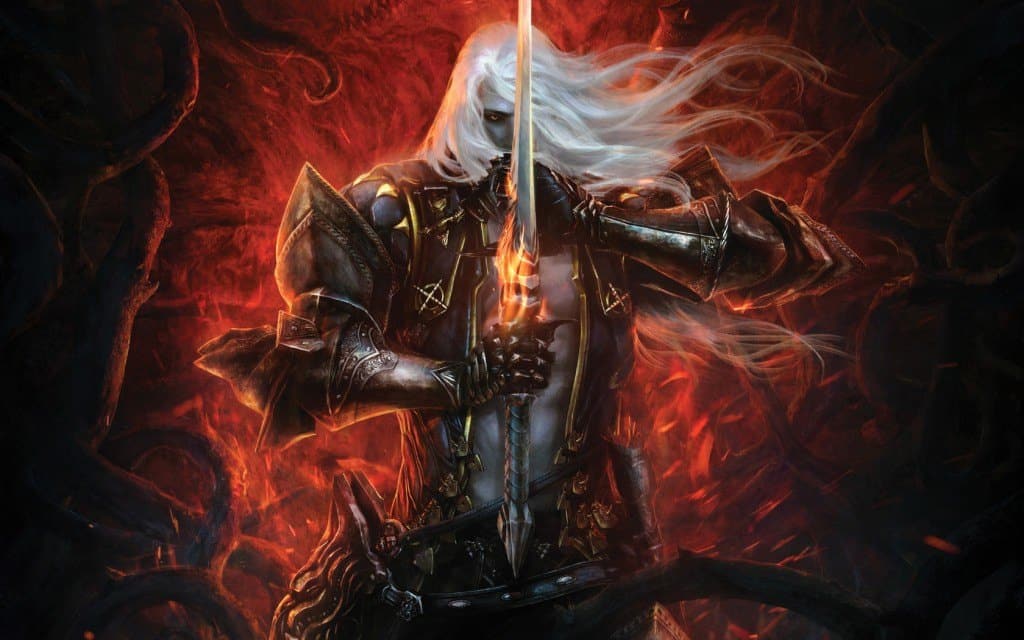
Simon Belmont
Night Watchman
The Night Watchman is the first boss you will face in the game. He is easy to defeat and uses beasts and magic to attack you. After you have taken him low enough, you can grab him. This will trigger a quick time event which once completed end in you defeating the boss.
His moves are as follows:
Attack Combo: The watchman does a combo of three direct attacks. The first two can be blocked but the third one needs to be dodged.
Summon Beasts: The watchman calls for help. Some beasts will attack you, kill them off and the watchman returns to battle. If he grabs you with his staff after coming back, hit B repeatedly to get out.
Magic Attack: Later on in the combat, the watchman will start using this move. He moves out of battle and uses his staff to throw magical blue waves across the screen. Avoid the waves by timing it according to their motion.
Necromancer
The necromancer can be tricky to deal with because he summons a lot of additional obstacles for you to deal with as you fight him. Also, the necromancer has additional protection while he is down. He get this protection two times in the fight.
The first time he gets low, the Necromancer summons two rings to circle him for protection, wait for them to align so that you can cross both at once.
The second time he gets low, and this is nearly the end of the fight, he summons three rings. Again, wait for them to align so you can get in and grab the Necromancer to end the fight.
The Necromancer’s moves are:
Summon Minions: The necromancer summons minions to aid him battle. He summons skeletons and zombies, usually on both end of the screen. Kill them off if you get the opportunity but your priority should be the Necromancer himself.
Scythe Attack: Two basic slashes of the Scythe. The Necromancer might not do the second follow up depending on how much room he has to execute the attacks. The first attack will be an overhead sweep while the second one will be an upward swing. Both of these attacks are not blockable and must be dodged.
Scythe Throw: This attack is not that effective and it is at this moment that you really want to lay it in to the Necromancer. He throws his scythe and it travels in a circle around the screen, the Necromancer is fully vulnerable till it comes back to him.
Acid Drop: From time to time, the Necromancer would make acid fall from the sky. The acids travel downward slowly so you need to position yourself in between them.
Blade Attack: Near the end of the battle, the Necromancer will start teleporting across the map. He will then summons blades to attacks you. Dodge them and lay some damage before the necromancer teleports again.
Succubus
The first phase of the battle will have you dodging shots from the Succubus with some other abilities from time to time. Get her low and you will progress to the second part of the battle.
She will gain a protective force field which needs to be broken before attacking the Succubus itself. She will try to get help from her slaves, use the B Y grab to stop her. Keep her away from her slaves, all the while attacking her and eventually you will get to the final stage of the battle.
The Succubus will now try to fool you with three copies. You need to attack the right one to defeat her. Once you attack the right one, the force field will turn red. Continue attacking the one with the red force field until she is low, at which point grab her while she is on the ground to end the fight.
Her abilities are:
Magic Attacks: The Succubus attacks you with a magical projectile. She shoots three of them in each burst; dodge them to keep your health up.
Whirlwind Attack: The Succubus starts spinning in a whirlwind and charges at you. Get away from the whirlwind until it stops. Learn the range on the attack so that you can stand just outside the range and attack right away.
Barrier Burst: If you stand close to the Succubus for a long time, she will create a barrier and explode it out towards you. This ability is used more often once the Succubus loses her force field.
Shockwave: While the Succubus has her shield up, she will strike the ground with a wave of energy, sending shockwaves towards you. Jump over them to avoid taking damage.
Kiss: After breaking away from her second kiss, the Succubus will start using this move often. You can see it coming as she has a blue glow before she is about to teleport. Dodge her grab if she gets near. If she does grab you she will start dealing damage, press the B button to get her away from you.
Alucard
Reaver
The main problem in this fight is getting cornered. Keep applying enough pressure to the Scaven so they never get a chance to corner you. If cornered, mist dash through the Reaver instead of trying to go over him, you will be attacked by Scavens if you go over.
The fight pauses from time to time as the screen scrolls up to reveal a lever. You need to grab and pull on the lever to drop acid on the Reaver. When the Reaver starts doing throwing bombs at you from the air, he cannot be reached, dodge his attacks and try to keep away from him during this time.
Here is the list of moves the Reaver uses:
Bite: The Reaver makes vicious snaps towards you. He can follow this up to three times even when you are cornered. The attack has quite a range so make sure you dodge it.
Summon Scaven: Summons small Scavens to attack you.
Tail Swipe: The Reaver will do a typical boss move by moving back a little, lifting his tail and swiping it at you. Jump over it or get out of range. You can prepare for the attack once you see him moving back and lifting his tail.
Bomb Attack: The Reaver will fly up and bomb the area beneath. The bombs explode after a while. Dodge the bombs by stepping in between the gap between to consecutive ones if he is above you but try to remain out of range.
Bone Spit: The Reaver will burp and spit bones at you when you are close to him.
Hungry Charge: Eventually at one point in the battle, the Reaver will charge at you in an attempt to eat you. Press the B button if he catches you. You can throw a bat projectile to stop his charge early or you can try to dodge it.
Daemon Lord – The fight with the daemon lord has several stages. The first big part of the fight you will need to damage the daemon lord and take down both the lasers. After taking down both the lasers, the fight gets more hands-on. Remember to make use of the slide bar at the top to dodge attacks, you cannot make do without it. The daemon lord has several moves but they are easy to counter:
Attack Combo: this is a combo of three of Daemon lord’s basic attacks. The first to attacks are quite normal punches but the third one is a bite. They cannot be blocked so you will have to go out of your way to dodge them, they have quite a range too so make sure to make use of all the space you can.
Tail Attack: The Daemon Lord raises his glowing head and does a flip slamming his tail on the ground in front of him. Keep a look out for the signs and you can dodge this easily.
Tail Laser: The Daemon Lord brings his tail forward. The tail radiates and fires a big laser. Use the slide bar to avoid it throughout the duration.
Back Attack: When you are behind him the Daemon Lord will usually perform this move. His tail glows for a moment and he dashes back into you.
Shockwave: The Daemon Lord will produce shockwaves at certain times in the fight. The first time he uses it is when he returns after you damage the laser, it can be blocked. Later on he uses it when you have destroyed the lasers. It is best to use the stopwatch at this moment.
Lasers: In the first part of the fight, when the Daemon Lord retreats, the lasers attack you instead. One of them goes counterclockwise while the other clockwise. Use the slide bar to dodge the attack and damage the lasers.
Lord Dracula
It is time to face Alucard’s father, Dracula himself. You will get help from Simon which will make thing a lot easier. However, in the later part of the fight Dracula will knock Simon out and you will be left alone to fight. Then Dracula will retreat and posses Simon to do his fighting instead, you cannot attack Simon but need to pacify him instead by blocking successive attacks and performing a grab.
Finally, in the last phase of the fight, Simon will join you again as you put the hurt down on Dracula. After dealing enough damage you will be able to grab Dracula and press the appropriate buttons to execute the finisher.
Here is a list of Lord Dracula’s moves which keep on adding as the fight progresses:
Whip Attack Combo: A combo of three of Dracula’s whip attacks. The first two can be blocked but the final one must be dodged. Keep in mind the range of the whip while attempting to dodge the attack.
Shockwave: Dracula rises up in the air and slams down with a force that sends a red shockwave in both direction. Jump above the shockwave to avoid it.
Projectiles: Dracula will rise up and burst out several projectiles which spread around him. They travel in a fixed direction so you can position yourself or jump as appropriate to avoid them.
The following moves are added after Simon is knocked out cold:
Dash Punch: Dracula dashes towards you from across the screen and performs a punch which cannot be blocked. This attack is very fast and you cannot afford taking too much damage from it.
Rising Strike: This move is added in after Simon returns to normal. Dracula rises up and performs an attack similar to your own rising strike.
Whip Grab: Dracula uses his whip to grab you when you are in range. Tap B to get out of the grab.
Trevor Belmont
Executioner
The executioner has some quite powerful attacks, luckily they can be predicted and dodged easily. Here is the list of moves, some of which the executioner adds as the fight progresses:
Shockwave: Another shockwave attack similar to what you have been facing so far. The execution gives it away as it is long and easily recognizable. He charges his axe and spins it above his head to create the shockwave. Jump to avoid it.
Axe Swing: The executioner brings his axe behind him and a split second later swings it down in front of him. Look out for the animation and dodge keeping in mind the range.
Axe Grab: The executioner loosens his axe and swings it outward to grab you. Dodge backwards, if he grabs you tap X.
Dash: The executioner loosens his grip on the axe, his face gets red and he dashes towards you. Dodge the dash with a double jump and use the long recovery time to punish him.
Body Slam: The executioner’s face gets red and he dashes forward to perform a body slam. Perform a forward roll to dodge the attack.
Lady of the Crypt
This fight should be quite easy as it has a lot of quick time events and the Lady has only three attacks:
Clawing Attack: The lady jumps out of the ground and claws at you. Block and perform a counter-attack.
Dash Attack: The lady will jump out and perform an attack which cannot be blocked after which she dashes across the screen. Jump at the appropriate time to dodge it. The recovery time is long, so punish her thoroughly.
Grab: The lady comes out underneath you and tries to grab you. If she does grab you, keep in mind that you will have to quickly get free or she will pull you under the ground, instantly killing you.
Executioner #2
This executioner is exactly similar to the first one, including all the moves. This time you have even more powers so it should be even easier.
Shockwave: Another shockwave attack similar to what you have been facing so far. The execution gives it away as it is long and easily recognizable. He charges his axe and spins it above his head to create the shockwave. Jump to avoid it.
Axe Swing: The executioner brings his axe behind him and a split second later swings it down in front of him. Look out for the animation and dodge keeping in mind the range.
Axe Grab: The executioner loosens his axe and swings it outward to grab you. Dodge backwards, if he grabs you tap X.
Dash: The executioner loosens his grip on the axe, his face gets red and he dashes towards you. Dodge the dash with a double jump and use the long recovery time to punish him.
Body Slam: The executioner’s face gets red and he dashes forward to perform a body slam. Perform a forward roll to dodge the attack.
Gabriel Belmont
At last, you face your father in the final battle of the game. This fight is very special in many ways. First off, you have to switch between light and dark magic at appropriate times to be effective.
You have to use Light attacks when Gabriel is using Dark and Dark when Gabriel is using Light to hurt him. Also switching to dark and taking dark damage would reduce the effect, same goes for light magic. Switching between the two types is key in this battle.
Another unique thing about the fight is that you have unlimited magic, which means that you can indeed use light magic to heal yourself as much as you want.
Here is a list of all the moves you will encounter:
Sword Attack: Gabriel’s combo sword attack. The first two strikes can be blocked but the third and fourth cannot. Also the attacks have a lot of range especially the final swing which enlarges his sword, so it might not be that effective trying to dodge them every time. Instead, aim to block one of the first two strikes and perform a counter attack.
Rising Assault: Gabriel will perform charge up for a moment before executing an attack similar to your rising assault. Dodge it backwards, however, if you do get caught, he will follow up with the sword attack combo.
Phantom Swords: Gabriel will step backwards and summon a number of phantom swords which shoot towards you. If you jump over him, he will stop the attack early. You will usually have to jump over the first two and roll under the third to dodge them all.
Energy Column: Gabriel punches the ground causing the ground beneath you to shoot out a column of energy. You can damage him while he is doing this and then dodge at the appropriate time. You have to be quick on your feet for this one.
Shockwave: Gabriel rises in the air, followed by quickly descending and striking the ground with a force that sends a red shockwave in both directions. Jump over the shockwave to dodge it.
Punch Attack: Gabriel’s three hit combo attack. The first two punches can be blocked but the third one cannot. Try to block and counter him early, if he executes his third attack, however, jump to avoid it.
Energy Wave: Much later on in the fight, Gabriel will perform this attack. He will rise up in the air and send out a wave of energy. It will either be light or dark, match accordingly to get through the wave unharmed.