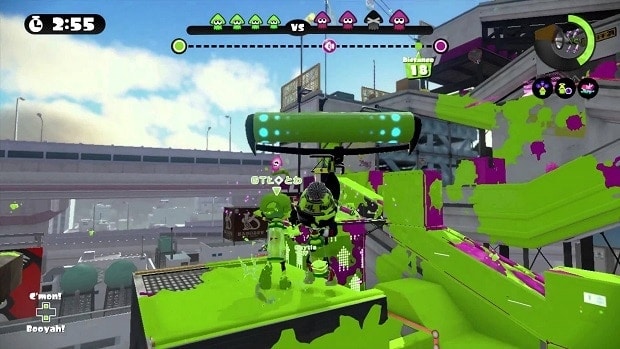
These Splatoon 2 Moray Towers Map Tips and Strategies will help you learn all about the Moray Towers, its key locations, & recommended weapons to use on the map.
The Moray Towers is all about snipers & long-ranged engagements. As a team, try to maintain a height advantage to secure an easy win. Moreover, the roller-based weapons tend to work incredibly well on this map because of ramps.
For more help on Splatoon 2, check out our Musselforge Fitness Map Guide, Inkblot Art Academy Map Guide, & Humpback Pump Track Map Guide.
Splatoon 2 Moray Towers Map Tips and Strategies
In our Moray Towers Map Tips and Strategy Guide, we’ve detailed everything you need to know about Moray Towers, its key locations, & recommended weapons.
Recommended Weapons
Carbon Roller
As mentioned earlier, roller-based weapons work incredibly well on Moray Towers Map. The weapon has decent rolling speed that you can use in Turf War.
E-liter 4K Scope
Since long-ranged weapons tend to work good on this map, this recommendation is basically a no-brainer.
Splat Dualies
In almost every game mode in Splatoon 2, you must reach the center of the map before other players. Use Splat Dualies to do so that works better than squid-jumps.
Jumps & Spots
Central Area
Since this area is surrounded by elevated platforms & ramps, you need to avoid spending too much time here. Therefore, if you want to ink the place, try to do it from elevated platforms. When inked, you should’ve no difficulty in reaching the other side.
Sniper Positions
The two opposing platforms overlooking the central area are excellent for snipers. From this area, you’ll not only have excellent coverage of the map’s center but also surrounding platforms & ramps. If you don’t have a long-ranged weapon, try to avoid this area. There’s a platform on the side that you can use in order to avoid it.
Pipe Ramps
Since it’s hard to get on top of opposing team’s ramps, you must pay attention to the quarter-style pipe ramps. Simply ink these ramps to head up. With all the contention in the center of the map, no one usually pays this area a whole lot of attention. In Turf War, a lot of people usually leave this place out – something you can use to your advantage.
Ranked Battle Terrain
Splat Zones
Two splat zones can be found on Moray Towers, found on the either ends of the ramp. They’re pretty small, so you might want to be a bit careful before you go on squeezing in there.
Tower Control
The tower is found in the center of the stage on a raised platform. The sides retain the smaller design from the previous layout but there are extra walls as a contrast from the other modes.
Checkpoints
- The first checkpoint can be found in the end of the alley at the bottom-most area.
- The second checkpoint is found on the platform just one below the goal.
Rainmaker
The Rainmaker is found in the center of the stage on the inclined plane. The goal can be found just outside the enemy team’s base, just below the opposing team’s drop off.
Clam Blitz
The baskets are located past the first ramp. It’s pretty tangled up, and to be fair, Moray Towers isn’t considered an ideal map for Clam Blitz.
