Risk of rain 2 is a beautiful game and a great experience for players. With the immersing environments of the games, players can also find many secrets hidden in the world of Risk of Rain 2. In this guide, we will help you understand what are artifacts and how to use them
Risk of Rain 2 Artifacts
Similar to Risk of Rain, Risk of Rain 2 also allows the player to find and use different artifacts. These are special types of modifiers that will drastically affect and change the gameplay.
These game-changers can be used and equipped in the character select screen once they have been discovered.
They may either make the games easier or more difficult for you, depending on what artifacts you select while starting the game.
How to Find Artifacts
First of all, you need codes to access the artifacts in the first place. These codes are hidden out in different levels on tablets.
These tablets may or may not contain the full code or even incorrect orientation. However, make sure you write these down.
If the complete code is not on a single tablet, the remainder can be found on another tablet somewhere else on the level.
Also, if the code is not incorrect orientation, try rotating the code 90 degrees to get the right one. don’t worry, we have provided all the codes incorrect orientation below.
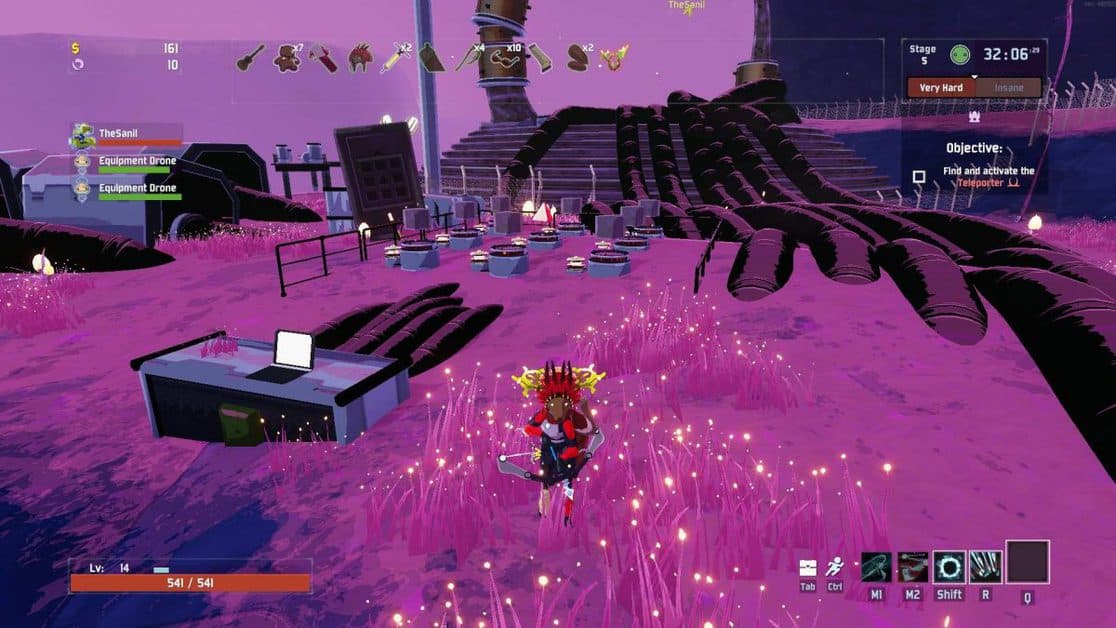
Once you have found codes for different artifacts, you just can’t use them yet. You’d need to get to the 5th level in the game, Sky Meadows.
Ignore all the monsters here and just get to the bottom island of the level, where you will find the machine you can use these codes in, its just 9 slots attached to a laptop and a portal device.
Just put in the codes you found and interact at the laptop. If you have the correct code in the right orientation, a portal will open.
How to get the Artifacts in Risk of Rain 2
Before we get to the codes themself, let us look at what you need to do once you get the portal to open. Head in and you’ll find yourself in a large empty area.
Make sure you DO NOT head straight for the artifact in the center but take a look around the level ad grab all the power-ups you need as you will have to fight lots and lots of monsters soon.
You may also find bonus codes here, but it is not guaranteed.
Now you need artifact keys to unlock the artifact. You get one as you enter the level. Pick it up to start the encounter.
Get the key and head to the orb in which the artifact is contained.
Once you do this, you are pushed back and a battle starts. The boss is in the center and hordes of monsters spawn.
Leave the boss alone and keep on defeating the monsters. Elite monsters will drop more keys. Take them and again unlock the artifact orb.
This will damage the boss, taking away a quarter of his health.
Keep doing so until the boss is dead. The orb locking the artifact will now be gone and the artifact is yours to take. Once you take this, you get to know what it does.
The Artifact’s effects/modifiers will also remain active as long as the fight lasts, so watch out for any possible mishaps.
This means the if the artifacts causes only Elite enemies to spawn, only elite Monsters will spawn until you kill the boss.
A few of these modifiers may help your progress in Risk of Rain 2, though many will also pose additional challenges and difficulties.
The shapes that you would need are as follows
- Square ■
- Diamond ♦
- Triangle ▲
- Circle ●
Artifact of Metamorphosis
Effect: Players always spawn as a random survivor.
Location: Titanic Plains. The rightmost pillar in the distance; not present in the alternate version of the stage.
Combination:
- Diamond, Square, Circle
- Diamond, Square, Circle
- Diamond, Square, Circle
Artifact of Kin
Effect: Monsters will only be of one type per stage.
Location: Distant Roost. The edge of a cliff at the top of the stage; not present in the alternate version of the stage.
Combination:
- Circle, Triangle, Triangle
- Diamond, Circle, Triangle
- Diamond, Diamond, Circle
Artifact of Death
Effect: When one player dies, everyone dies.
Location: Wetlands Aspect. Inside the cave/Altar to N’kuhana.
Combination:
- Circle, Circle, Circle
- Square, Triangle, Square
- Circle, Triangle, Circle
Artifact of Chaos
Effect: Friendly-fire is enabled for players and monsters.
Location 1: Abandoned Aqueduct. One of the pillars near the Ancient Gate/tar pits.
Location 2: Abandoned Aqueduct. Inside the Ancient Gate’s cavern where you fight a couple of bosses.
Combination:
- Circle, Triangle, Circle
- Circle, Triangle, Circle
- Circle, Triangle, Circle
Artifact of Soul
Effect: Wisps emerge from defeated enemies.
Location: Scorched Acres. On the large floating island in the distance.
Combination:
- Circle, Square, Circle
- Circle, Diamond, Circle
- Square, Diamond, Square
Artifact of Swarms
Effect: Doubled monster spawns, but monster health is halved.
Location: Rallypoint Delta. On the distant island in the middle of the lake.
Combination:
- Circle, Circle, Triangle
- Triangle, Diamond, Triangle
- Triangle, Circle, Circle
Artifact of Dissonance
Effect: Monsters can appear outside their usual environments.
Location: Abyssal Depths. On one of the floating islands reached by traversing the giant chains.
Combination:
- Circle, Square, Square
- Square, Square, Square
- Square, Square, Circle
Artifact of Frailty
Effect: Fall damage is doubled and lethal.
Location 1: Siren’s Call. The cliffs on the left-hand side of the map.
Location 2: Void Fields. At the lower end of the slope that leads to the portal. The Void Fields can be accessed by going through the Bazaar Between Time. This is also where you unlock Acrid.
Combination:
- Circle, Circle, Circle
- Triangle, Circle, Triangle
- Triangle, Triangle, Triangle
Artifact of Honor
Effect: Enemies can only spawn as elites.
Location: Sky Meadow. The tablet is right in front of the Compound Generator.
Combination:
- Square, Square, Square
- Square, Triangle, Square
- Square, Square, Square
Artifact of Command
Effect: Choose your items.
Location: Bazaar Between Time. The glass behind Newt.
Combination:
- Square, Square, Square
- Square, Square, Square
- Triangle, Triangle, Triangle
Artifact of Sacrifice
Effect: Monsters drop items on death, but chests no longer spawn.
Location: Gilded Coast. Hidden in a small pond in the middle of the area; you won’t need to beat Aurelionite so don’t worry.
Combination:
- Triangle, Triangle, Triangle
- Triangle, Triangle, Triangle
- Triangle, Diamond, Triangle
Artifact of Enigma
Effect: Spawn with random equipment that changes each time it’s activated.
Location: Bulwark’s Ambry. Behind the giant floating cube in the distance.
Combination:
- Diamond, Square, Square
- Triangle, Square, Triangle
- Circle, Diamond, Diamond
Artifact of Glass
Effect: Allies deal 500% damage, but have 10% health.
Location: A Moment, Fractured. Behind the obelisk.
Combination:
- Diamond, Diamond, Diamond
- Diamond, Diamond, Diamond
- Diamond, Diamond, Diamond
Artifact of Vengeance
Effect: Your relentless doppelganger will invade every 10 minutes.
Location: A Moment, Fractured. Pick up the Environmental Log on the floating island below your starting point. Open it from the main menu. You’ll find the code at the bottom of the item once you rotate it.
Combination:
- Diamond, Square, Square
- Diamond, Circle, Square
- Diamond, Square, Square
Artifact of Evolution
Effect: Monsters gain items between stages.
Location: A Moment, Whole. On the body of the Twisted Scavenger boss.
Combination:
- Diamond, Diamond, Diamond
- Square, Square, Square
- Circle, Circle, Circle
Artifact of Spite
Effect: Enemies drop multiple exploding bombs on death.
Location: Risk of Rain 2 main menu settings screen. Open your settings and you’ll spot the code during the screen transition before part of it becomes hidden.
Combination:
- Triangle, Circle, Triangle
- Circle, Circle, Circle
- Triangle, Circle, Triangle