
The following guide will help you collect all of the hidden stories in West Luterra to complete your adventure tome in Lost Ark.
Lost Ark’s Hidden Stories for West Luterra Adventure Tome
What Makes a Hero
Our first hidden story location is What Makes a Hero, and it is separated into four parts.
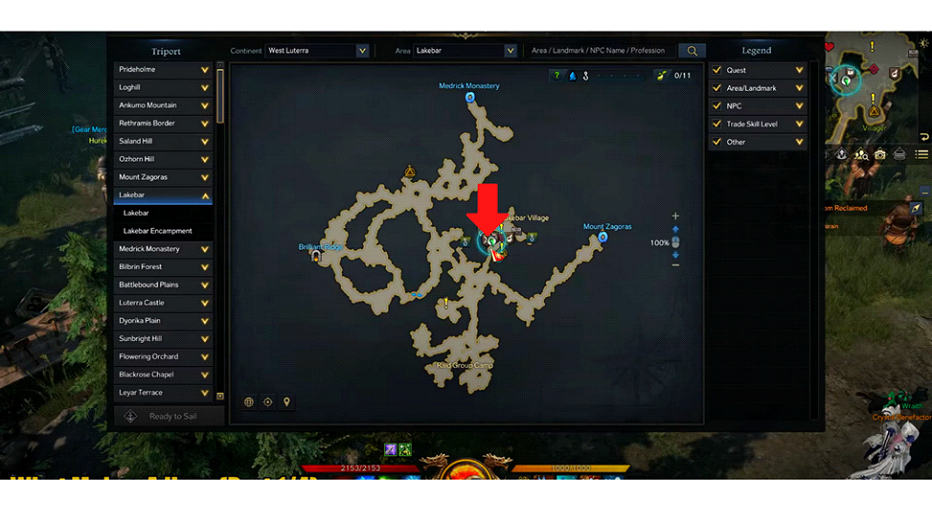
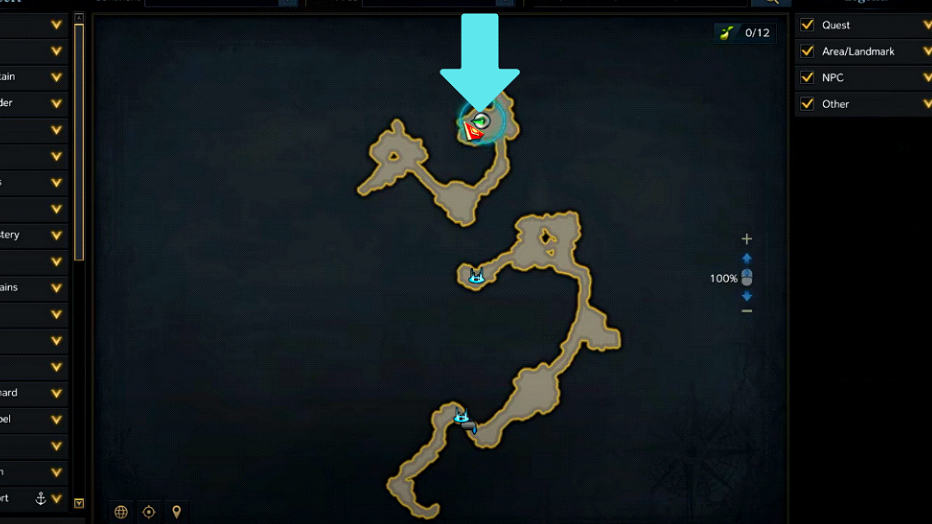
Lakebar Village (1/4)
To get here, you need to select the triport of Lakebar Village from the map of Lakebar. You need to jump on your mount and start going northwest. You will pass a villager standing in front of a house. Stop at the apple tree next to the villager, and there you will find the first story of What makes a Hero. You need to wait twenty minutes before you can collect the following story.
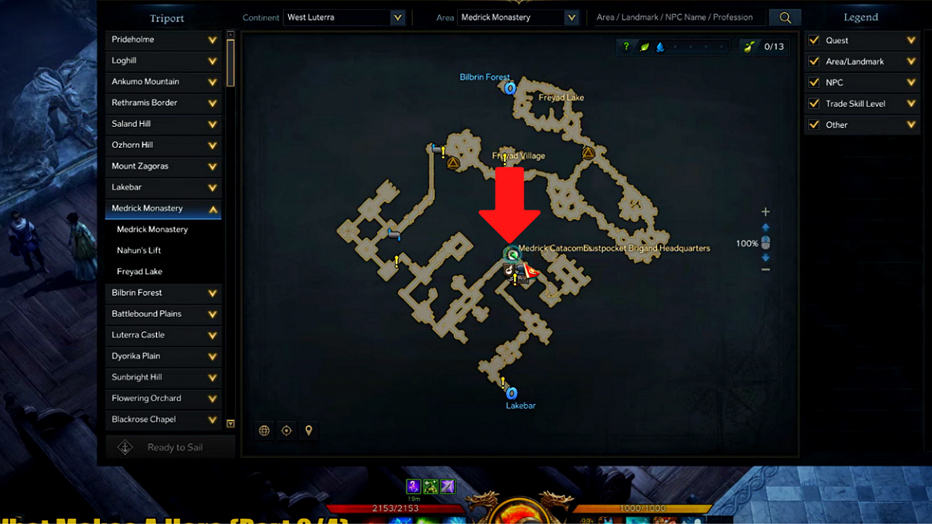
Medrick Monastery (2/4)
To get here, you need to select the triport of Medrick Monastery from the map of Medrick Monastery. After reaching there, you need to head southeast down the hallway, and at the end, on the right side, you will find your second story of What makes a Hero.
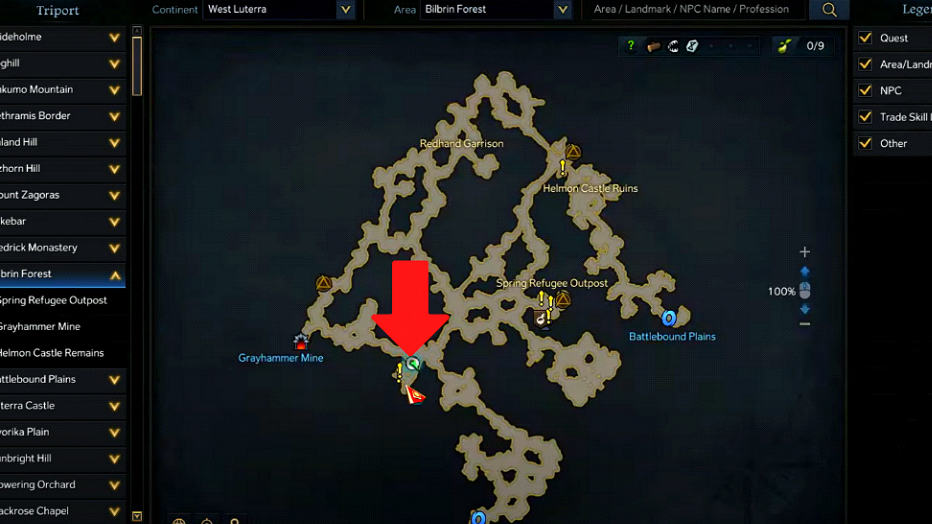
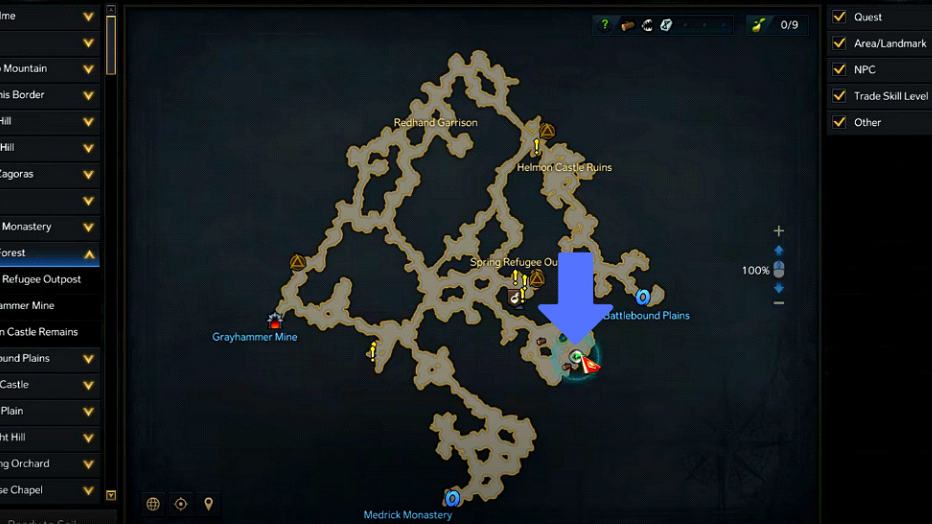
Bilbrin Forest (3/4)
To get here, you need to select the triport of Grayhammer Mine from the map of Bilbrin Forest. After getting there, you need to run southeast towards the mine. You are going to pass a well on your way there. In between the two houses and behind the wheelbarrow in front of huge boulders, you will find your third story of What makes a Hero.
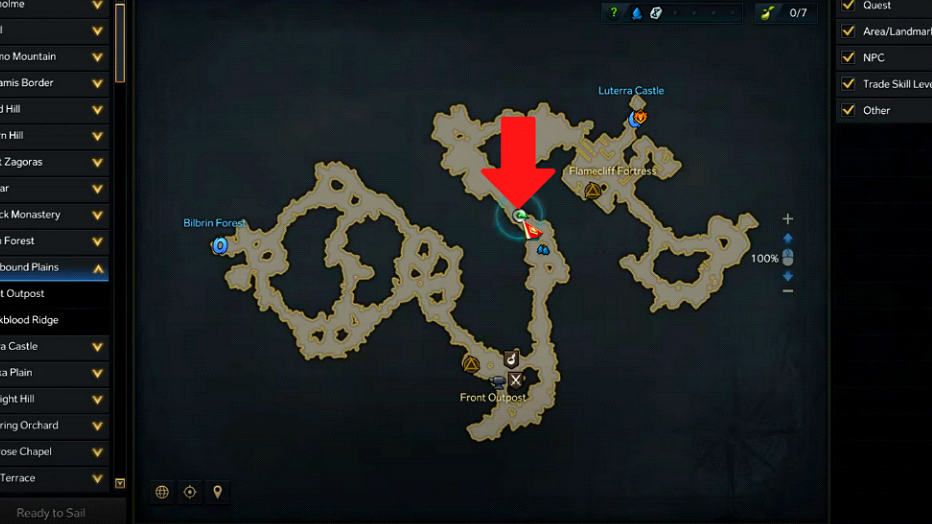
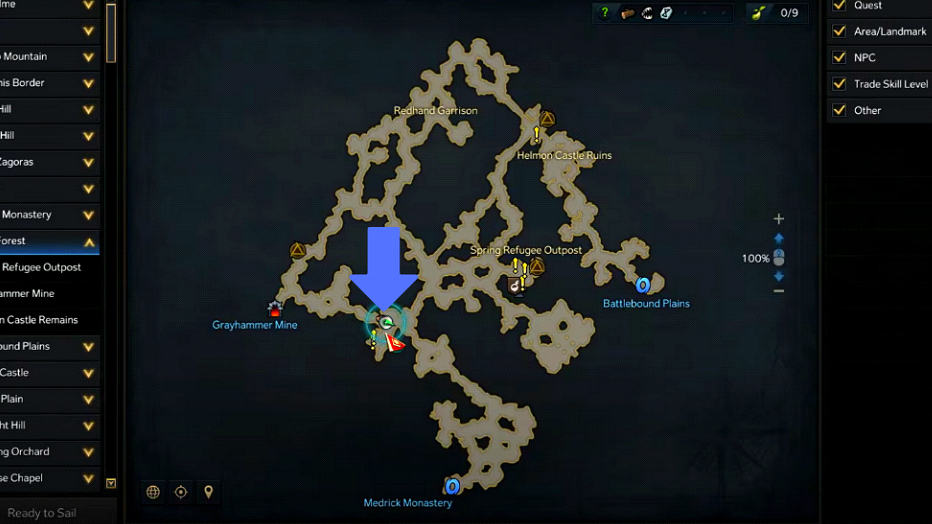
Battlebound Plains (4/4)
To get here, you need to select the triport of Blackblood Ridge from the map of Battlebound Plains. You need to jump on your mount and start going northwest. You need to follow the cliffside path bending towards the southeast. After a little while, in front of dead trees in the bush, you will find your fourth story of What makes a hero.
Lost Letter
The second hidden story is Lost Letter, and it is separated into two parts
Bilbrin Forest (1/2)
To get here, you need to select the triport of Grayhammer Mine from the map of Bilbrin Forest. You need to jump on your mount and start going south. You need to follow the path curving towards the east, then head south after passing a huge house. In front of the house, you will find the apple tree, and there you will find your first story of Lost Letter.
Bilbrin Forest (2/2)
To get here, you need to select triport of Spring Refuge Outpost from the map of Bilbrin Forest. You need to jump on your mount and start going southeast. At the map boundary right in front of an old well, you will find your second story of Lost Letter.
Knight’s Oath
The third hidden story is Knight’s Oath, and it has only one part.
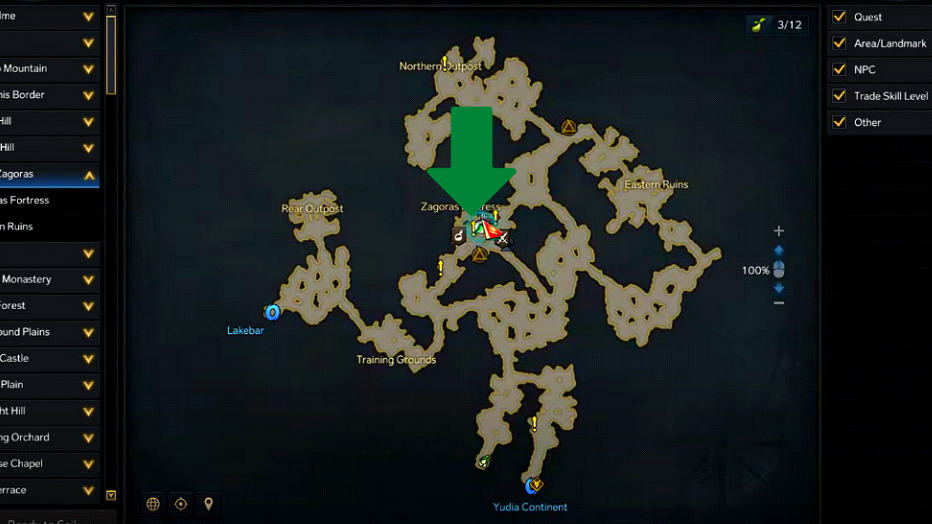
Mount Zagoras (1/1)
To get here, you need to select triport of Zagoras Fortress from the map of Mount Zagoras. You need to jump on your mount and start going north. You need to pass the four soldiers and climb the stairs. On your right, you will find the only story of Knight’s Oath.

The Tiger of Bilbrin
The fourth hidden story is The Tiger of Bilbrin, and it has only one part.
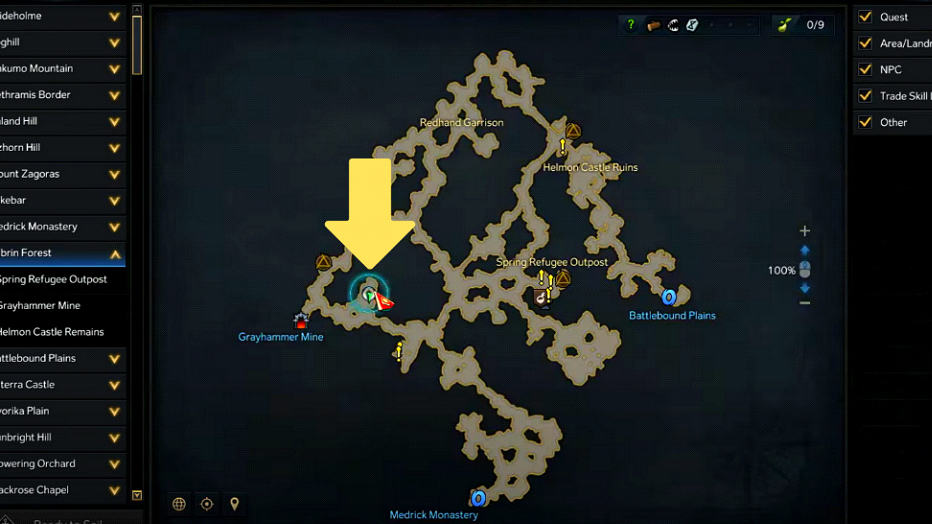
Bilbrin Forest (1/1)
To get here, you need to select triport of Grayhammer Mine from the map of Bilbrin Forest. You need to jump on your mount and start going southwest and east following the map. You need to follow the path bending toward the northeast. At the end of the map, under the pages lying on the ground, you will find the only story of The Tiger of Bilbrin.
Regent’s Donkey Ears
The fifth hidden story is Regent’s Donkey Ears, and it has only one part.
Battlebound Plains (1/1)
To get here, you need to select the triport of Blackblood Ridge from the map of Battlebound Plains. You need to jump on your mount, start going northeast, and then turn south. You need to follow the map bending towards the west. In front of the river, you will find the only story of Regent Donkey Ears.
Well Ghost Story
The sixth hidden story is Well Ghost Story, and it is separated into three parts.
Mount Zaogras (1/3)
To get here, you need to select triport of Zagoras Fortress from the map of Mount Zagoras. You need to jump on your mount and start going northeast. On the right of four soldiers, you will find your first story of Well Ghost.
Mount Zaogras (2/3)
You need to head southeast from your first story. Behind the general goods vendor, you will find your second story of Well Ghost.
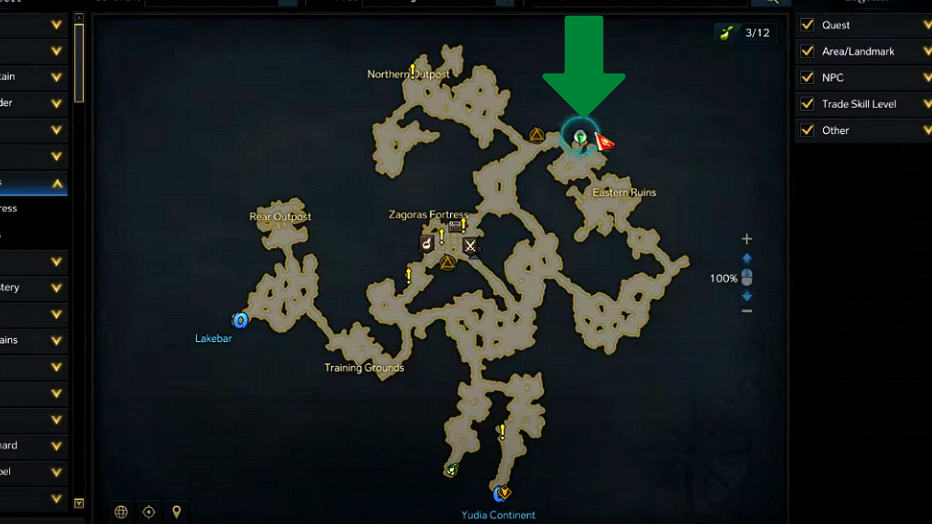
Mount Zaogras (3/3)
To get here, you need to select triport of Eastern Ruins from the map of Mount Zagoras. You need to jump on your mount and start going east and then north. Underneath the tree, you will find a skull. There, you will find your third story of Well Ghost.
Sleight of Hand
Your seventh hidden story is Sleight of Hand, and it is separated into five parts.
Grayhammer Mine (1/5)
To get here, you need to select the triport of Grayhammer Mine from the map of Bilbrin Forest. You need to head south to the Grayhammer Mine. Once you enter the dungeon, you will find your first story of Sleight of Hand on the left side.
Grayhammer Mine (2/5)
Head northeast into the elevator. In the open area, you will find your second story of Sleight of Hand.
Grayhammer Mine (3/5)
After opening the map of the Grayhammer Mine, you need to triport to the upper part of mine. Behind the tree, you will find your third story of Sleight of Hand.
Grayhammer Mine (4/5)
Head north towards the top of the map. Behind the old broken boxes in front of the cliff, you will find your fourth story of Sleight of Hand.
Grayhammer Mine (5/5)
Head south from the last location. Behind the fire pit in front of the hut, you will find your final story of Sleight of Hand.