In this Lost Ark guide, we’ll be breaking down everything you need to know about the Hildebrandt Palace Abyss Dungeon and teaching you the best mechanics to work around it. So without further ado, let’s get started.
Lost Ark Hildebrandt Palace Abyss Dungeon
If you’ve been playing Lost Ark for a while now, you must be aware that most Abyss Dungeons in the game have some exciting phases and mechanics.
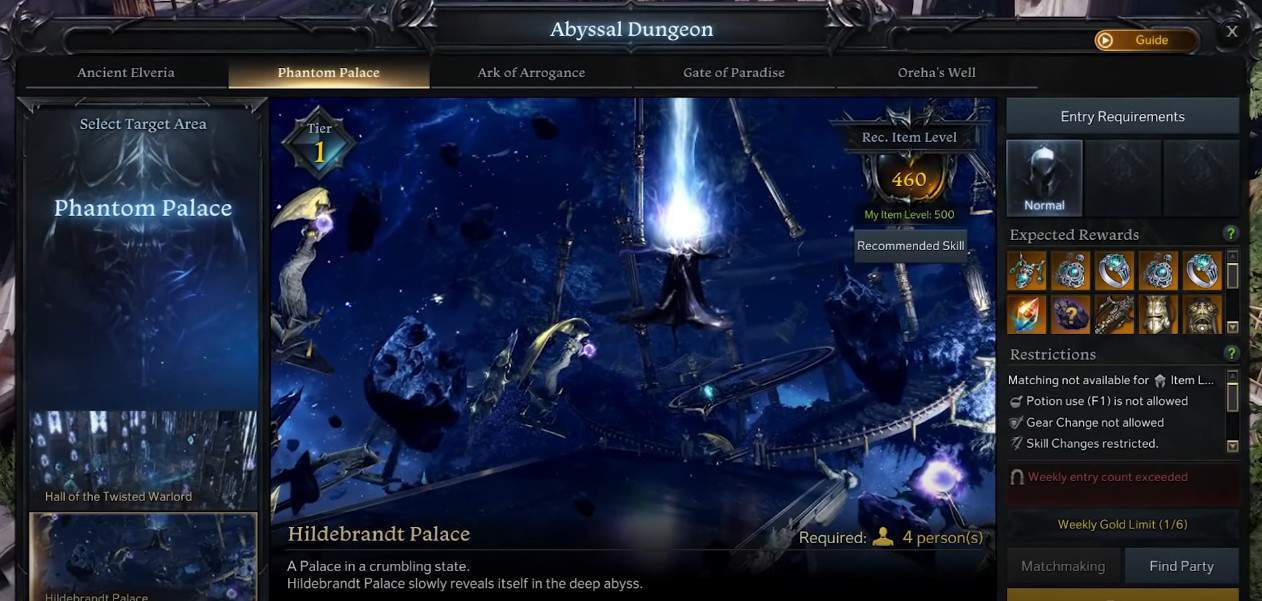
Hildebrandt Palace is a 460 gear score Abyss Dungeon in the Phantom Palace area, and entering it entails several boss fights with multiple stages. Some of which include punishing and team wipe mechanics.
Following are the boss fights you’ll be encountering while within the Hildebrandt Palace abyssal dungeon and the tips and tactics to win over the enemies fast!
Phantom Legion Queen Boss Fight
The first boss you’ll be encountering in the Hildebrandt Palace will be the Phantom Legion Queen. Unfortunately, dealing with her won’t be as easy as you think. Things get a little intricate when you’re in the Hildebrandt Palace.
If we’re being honest, she’s pretty exhausting to deal with. She’s a tough boss with some daunting abilities. For example, she can rotate the AoE field where only one corner is safe. She can quickly grab you this way and get rid of you under a split second.
However, there’s always a solution to madness like this. Luckily, you can tell what corner is safest.
So, to avoid the damage and find the safe corner, look out for the direction where the orbs fly away when the boss is about to charge the attack. But be quick to run over there as the rotation happens fast and she can catch you off guard and provide you with heavy damage.
One of her other abilities is sending large waves in the arena, which can kill you instantly if you come in contact with it. However, you can avoid it as you’ll get a notification when it’s about to happen, and purple boxes will appear, indicating where the wave is about to spawn in the arena.
To avoid the wave, you’ll have to enter the multi-colored portals that appear in the arena.
The portals will appear in different colors, and you’re required to have two outlets of the same color to teleport to the other side. So with the minimal time you have, search for a portal with a matching end and enter it to avoid the wave.
Also, to save you some time, never use the purple portal! They’ll teleport you directly to the center of the arena, and you’ll end up dead.
Brelshaza Boss Fight
The second boss you’ll be encountering in the Hildebrandt Palace Abyss Dungeon will be Brelshaza. This encounter will feel like a boss raid as you’ll have two phases here. Each of the phases will have different bosses to fight during the Brelshaza encounter.
First Phase
In this first phase, Brelshaza will call four spirits to fight you. These spirits will be charging the blue cone attack, which can freeze you or your members.
Having a team with frozen members will automatically leave you alone in the arena, and you’ll have no power against the enemies. So to have your team moving and fighting again, you’ll have to unfreeze them.
As soon as one of the members on your team freezes, they’ll have a bubble surrounding them alongside a purple bar below them. To unfreeze them, you must hit the bubble and let them free to participate in the fight again.
The other mechanic is when Brelshaza will tilt the map, and enormous balls will roll down on the arena. You need to run for your life when this happens. Then in between this, a random member of your team will be selected to stun and kill the boss with a red meteor.
Second Phase
After the demon’s hand has tried to crush Brelshaza, she’ll acquire a shield in this phase. You’ll need to destroy her shield, or she’ll wipe away your team. Use your stagger abilities and whirlwind grenades to do so.
Keep fighting till Brelshaza is only left with 15 HP. At this point, she’ll select a random player.
After that, all the other players will be granted a beam of light which they’ll have to throw towards the chosen player. This will create a giant AEO meteor that you’ll have to avoid. Then the screen will zoom out, and you and the team have to avoid a series of attacks.
Around when Brelshaza is at 8HP, she’ll again mark a random player, and two other players will be granted light beams.
Like before, these light beams should be thrown towards the marked player. The chosen player must run towards the golden circle that will spawn in between the process.