The Shed is the very first level of the game; It Takes Two. This level takes place in the backyard of the lead character and it features many interesting puzzles and mini-games. In this It Takes Two walkthrough, we will go through the mini-boss fights and games featured in the game’s first level “The Shed”.
It Takes Two The Shed
Various interesting mini-games and bosses have been featured in the “The Shed” level of It Takes Two, let’s start with the walkthrough.
Wake-Up Call
This game will open up with a conversation between a couple with their daughter, Rose, in the room. The couple is about to get divorced, and their daughter already knows. She pulls out two makeshift play dolls, and this is when player 1 and player 2 will select their characters.
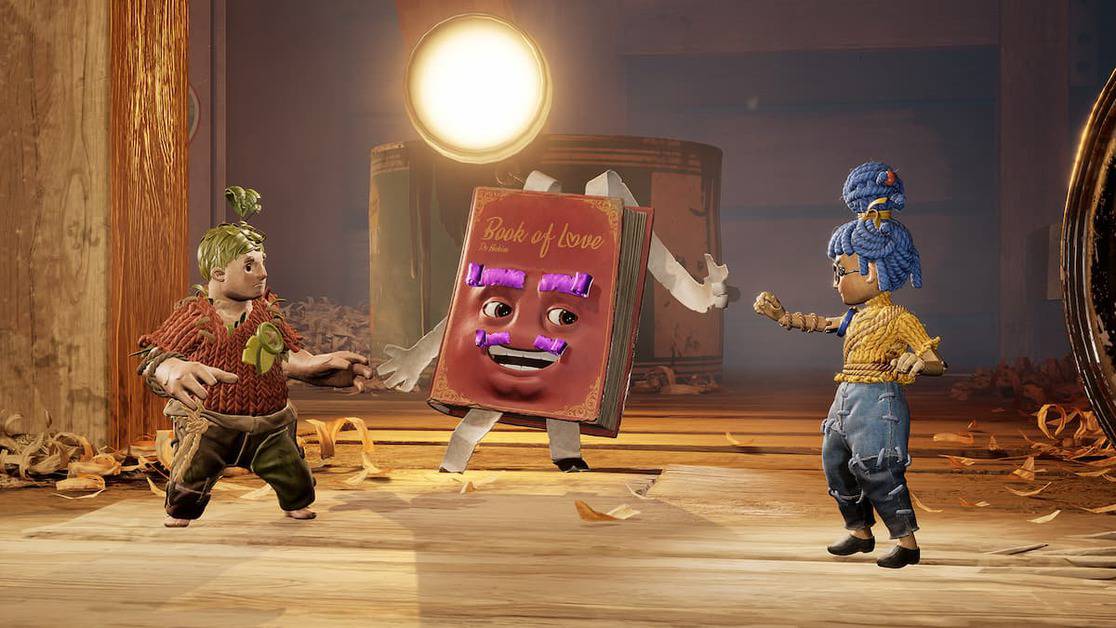
Your journey will begin, and you will meet up with a doctor of love, Dr. Hakim, to fix Cody and May’s marriage. This will mark the beginning of the very first chapter, Fix Your Relationship.
Explore around your surroundings, and soon you’ll become aware of the basic mechanics of the game, like jumping up and pressing Y together to pull the lever down and more.
Your objective is to meet up with Dr. Hakim and then a vacuum that will express its anger over the way it has been treated. The story will play out itself from this point onwards.
Biting the Dust
After the Wake-Up Call, once you are back in control, you will come across another vacuum that appears to be an evil version. Once again, you will have to understand some fundamental mechanisms of how the vacuums and hoses work.
Once you have the knowledge about some basic tricks and mechanisms, you’ll be able to solve these puzzles.
The mechanics require both the players to simultaneously perform some actions. For example, when you reach the Vacuum with controllable ends, one player will have to control the far end and aim it towards the red button. While on the other hand, the other player will have to jump inside the other side’s vacuum hose and ride on the air to reach the red button.
Like this, players will come across multiple hoses and Vacuum funnels, each with a simple puzzle to solve. You can utilize blowing fans and air to ride and reach the higher platforms.
As for the electrical wires, one player must press Y and act as a conductor of electricity between the cut wires, while the other will begin the current flow.
The game will also turn 2D at one point, follow the path and make your way to the red hole in the wall.
You will also come across a fan that you can operate with the help of an electrical box.
Other mechanisms will also include the operation of a vacuum hose. Just like other tools, both the players will have to take control of the hose simultaneously.
Towards the end, you will also come across red balls that you must suck up using the vacuum hose to launch yourself in the air.
After the completion of these exciting tricks and puzzles, continue your journey till you reach a block. Push it forward by pressing Y, and soon a cut scene will begin. Now is the time to face the Vacuum.
Boss Fight: Vacuum
The boss fight with Vacuum is the first boss fight of the shed level in It Takes Two, and it will require both players to cooperate proactively. The Vacuum will begin by attacking you with explosive mines. Players will have to cooperate and divide functions; for example, one player will use a vacuum towards the Vacuum while the other will suck up the mines using the bottom hose.
Check out our guide on the Vacuum fight if you’re having trouble. Let’s now get back to the walkthrough of The Shed.
The Depths
Now that you’ve defeated the vacuum boss, you will find yourself in The Depths of the Shed. Follow the path through a small door, and a cut scene will begin on the other side.
This is the point where you will be introduced to a talking hammer and a flying nail. Cody gets a flying nail while May gets a hammer.
You will learn the basic working of a hammer, which can hit things, and the nail, which can be thrown. Both the players will be using this knowledge to complete various tasks and proceed with their journey.
After various hitting and shooting puzzles, you will reach a door that both of you will open. Press Y to open it, and you shall come across Dr. Hakim, who will introduce you to the idea of “mini-games,” which is the game’s version of collectibles.
Mini-game: Whack-a-Cody
This is the first mini-game of It Takes Two. Both of you will be playing whack-a-mole in this game. May will get +2 points for hitting Cody, while Cody will get +1 points for hitting May.
Whoever fills up the bar at the top of the screen first will win. There is no reward in the end, but this can be a fun experience.
Back in the Depths
Proceed forward once you’re ready; the mechanism of the game will remain the same. Follow the path and utilize your hammer and nails to move. Both the players will have to cooperate while going through different platforms. When you reach the hanging half-box, Cody will observe that the dropping motion is raising a gate upon its fall.
Cody will have to shoot the nail at the circle of the gate that is rising. Now he can pass through. Cody will hit another nail to the circle up ahead, and May will be able to pass through. Now follow the pathway to find the second mini-game of this chapter: Flip the Switch.
Mini-game: Flip the Switch
Like all the other games, there is no reward at the end of this game. To begin this game, Cody will stand on the small square platform with a yellow circle inside, and May will be hitting the more giant yellow circle in front of it. This will launch Cody high up in the air and begin the mini-game.
The Depths Again
Once again, follow the path, and you will figure out what needs to be done. Shoot a nail at the yellow wood piece and get to the big red button. Your view will change into that of a 2D game.
As usual, Cody will utilize his nail while May will use her hammer and proceed further. Cody needs to shoot his nail while May must jump from wheel to wheel to reach the other side. May will get the third nail in a piece of wood nearby; she should hit it to launch Cody up in the air. Cody will come across some dangerous saw blades which he needs to tackle. May will have to hit the yellow buttons to launch Cody above the edges.
Another 2D puzzle will start; the primary mechanism will circle May platforming while Cody shoots. Cody will be able to shoot three nails at any time into the wall, and he will also be able to retrieve any of the three nails by aiming at them and pressing Y.
By using this mechanism, May and Cody will be able to proceed from one wall to the other and one platform to the other platform.
May can shoot the circles on the wall to continue climbing, while Cody will have to jump up through the corners. May will have to destroy glass bottles to help Cody.
You will be back at the point where the level began; Cody and May will need to press Y on the Toolbox.
A cutscene will start to play, and you will be bombarded with nails. May and Cody will have to escape through the path until they reach a yellow stub. After dodging and jumping from one platform to the other, you will finally get to the other side. Now you’re up for a boss fight with the Toolbox.
Boss Fight: Toolbox
It will take you around three rotations to destroy the can and the Toolbox. The Toolbox will mainly utilize two moves; a circular saw cut off parts of the platform you’re standing on, and the arms spin. You can jump over this to avoid taking damage.
Check out our guide on the Toolbox fight for more details! Once you defeat the Toolbox, the tools inside will be much happier, and they will be freed. Now let’s continue our walkthrough of the final portion of The Shed.
Wired Up
Now proceed by pressing RB on the nearby rail. This part will feel similar to the Ratchet and Clank. You will be riding the rails and moving forward. Start by pressing A/X and jump over obstacles and RB/R1 to jump to other rails.
You will eventually reach the rails charged with electricity. Dodge the moving jolt on the rail by pressing RB/R1 and move to a safer spot. You will come across a giant fan in the stable land. At this point, Cody will have to jump on one of the two rails while May jumps on the other.
This will allow both the people to reach a switch at the end of the rail while simultaneously hitting the switch with Y. Now, you will pass through the fan and come across a new set of rails.
You can advance along the rails by hitting on the switches in the same way. Now towards the end of the railing, Cody and May will reach a Shovel. Both of you will have to ground and pound the shovel simultaneously.
Once you’re done, a cut scene will begin, and you’ll meet encounter the talking binoculars.