In this It Takes Two The Cuckoo Clock Walkthrough guide, we’ll guide you on how to solve all the puzzles and face the enemies of this chapter in It Takes Two.
It Takes Two The Cuckoo Clock
The Cuckoo Clock is the fourth chapter in It Takes Two, and it is filled with puzzles that you need to solve as well as enemies that you need to fight.
Part 1
You’ll find yourself right next to your first puzzle as soon as the cutscene is over. However, this is quite easy, and you can solve it using Cody alone.
Use Cody’s powers to turn back time and clear the broken statue. The wooden walls will start moving. Afterward, heads through the gate that has recently opened up right in front of you. Once you’re inside the tunnel, you’ll notice two levers.
However, before you can solve any puzzle related to those two levers, a portion of the tunnel will collapse and block May’s path to the levers.
Use Cody’s abilities to clear the tunnel and let May pass. Before you turn the levers, set up May’s clone right next to the gate in front of you.
Next, turn the levers and have may immediately teleport to her clone and cross the gate. Cody, however, won’t be able to cross for now.
Once May has crossed the gate, use her to pull another lever on the left. This will open the gate again for Cody to cross.
Once both Cody and May have made it to the other side, look around to see a hook hanging in the air. Cody will be able to move it around. Lower the hook, and this hook will be used by May later on.
Meanwhile, use May to jump across the moving platforms and make it near to the hook. On the last platform, that is, before making the jump, leave a clone at that platform.
Use the hook to jump onto the highest platform in the room and jump on the huge button in the corner. This will open another huge gate.
You’ll see a passage in front of you collapse as soon as the gate opens up. Make it as close to the passage as possible and use Cody to turn back time. Then use May to jump onto the passage and leave her clone on the extreme end, near the wall, and then head back.
Once the passage has collapsed again, teleport to the clone and have Cody turn back time again. May will then be able to jump onto another platform nearby with another huge button. Press that button to open another gate.
Jump down using the moving platforms and head through the newly opened doorway. You’ll notice a pillar right in front of you, and it is, in fact crushing a statue.
Turn back time and remove the pillar to put the statue back together again. If you look towards the right, you’ll notice a small platform between the platform you’re currently on and a two-level elevator in front of you.
While Cody is controlling the time, have May jump onto that small platform. Once she’s landed onto the platform successfully, stop controlling the time.
This will plunge May in the air and onto the elevator. Once you’re on the elevator, turn Cody’s attention back to the elevator and have him control the time in such a way that the elevator moves up.
Once the elevator is up, leave May’s clone up there and drop the elevator. Then teleport May to her clone, and he’ll find herself on the second level of the elevator.
Use Cody to move the elevator up again until May is level with the platform on the left. Hop onto the platform and follow the path until you come across a lever. Pull that lever. The lever will slide open another gate, clearing the path for the wooden dolls to continue their journey.
After the dolls have moved along, follow them and then search for hooks on your right. Swing through these hooks to make it to the rail on the far end. Then slide along the rail before using another hook at the end to jump onto another platform.
You’ll find yourself amidst another puzzle. In the same room, you’ll find three buttons mounted onto the floor.
Have Cody stand on one of these, and May, along with her clone, on the remaining two. Have May teleport to her clone, and the platform in the middle of the room will begin to rise.
Cody can control this newly risen platform. Have Cody push it back down and Have May stand on it. Cody can then release the platform, and May will be plunged into the next room.
There, May will find another button that will open the gate for Cody to pass through. The dolls will pass through as well, and a cut scene would follow.
Part 2
The wooden dolls will soon pop up from the ground and start moving again. Follow them until you come across another closed gate.
The gate will have two huge bells on either side. One of the bells will be in the air with a button underneath it, and another one on the floor, hiding the button.
Use Cody to raise the bell that is on the floor to reveal the button. Leave May’s clone near that button and then move to the button under the second bell.
Press that button using May and then teleport her to her clone and immediately afterward press the second button to open the gate.
Follow the dolls again until you come across a closed barrier. The barrier is closed because of the fire in the vicinity. The fire needs to be put out.
Look around in the sky to spot a cloud with rain droplets. Have May jump onto the buildings to reach the backside of the cloud.
The backside of the cloud has a lever that is used to move the cloud around. Then use Cody to bring down the water droplets and use May to move the cloud everywhere to extinguish the fire.
Once the fire is put out, the barrier will open and the dolls will resume their journey. And so will you!
When you come across a closed bridge, look for two floor-mounted buttons. Leave May’s clone on one of those buttons and have her jump on the other one.
Have Cody jump over the button that has May’s clone and push it down. Once both buttons have been pushed down, the bridge will dropdown.
To hold it in that position, there’s a claw in the middle of the bridge. To manipulate that claw, you require Cody’s abilities.
Have May teleport to her clone as soon as Cody jumps off and makes his way under the bridge. Try jumping over the boats when you do so, as falling into the river will cost you a life.
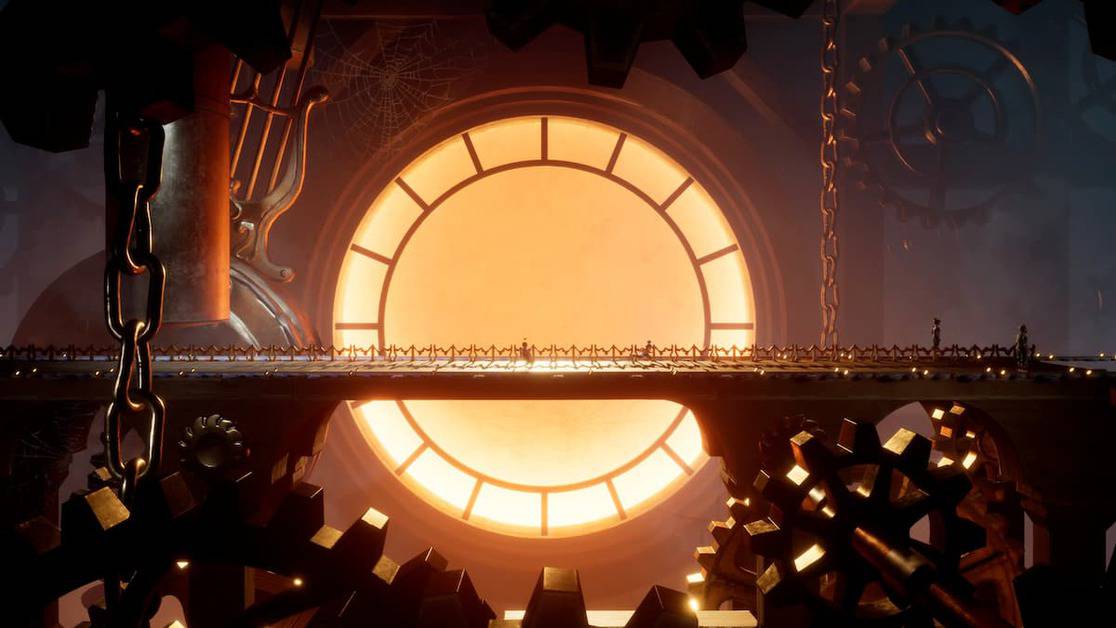
Next, you’ll come across a closed gate with a huge clock mounted in its center. Turn the wheels on either side of the gate at the same time.
The gate will open and another cutscene would follow.
Part 3
You will soon lose sight of the dolls as they carry along their path, and your path is blocked by some overgrown branches from nearby trees.
There’s another path nearby. Take that until you come across a circular elevator. Use the switches on either side of the elevator to make it move.
When you’re on the top, another cutscene will follow where you’ll get to meet the Book of Love again.
Part 4
When the cutscene is over, make your way to the birds and fly out to one of the two towers that the Book of Love has pointed out.
Land on top of one of them, and you’ll find another circular elevator in the center. Use the switches on either side of the elevator to make it move.
You’ll soon find yourself inside the tower. You’ll then come across a broken path that can be fixed using Cody’s abilities.
There’s a door on the other side of the path. As May walks towards that door, the door closes, and as she walks away, the door opens.
Therefore, leave a clone by the door and then walk away from it, that is towards Cody. Then teleport to the door and move onto the next room.
In the next room, you’ll see a couple of clocks mounted to the wall. Keep an eye on each of these clocks and have Cody jump on the giant circle near the path that you just came from.
Each block that he presses will light up one of these clocks. Do a test run at first to see which block lights up which clock.
Then press them in an order such that each time a clock lights up, the hour needle needs to be at a bigger number than the previous clock that lights up, starting all the way from one and ending at nine. This has to be in perfect ascending order.
Once done, a door will open up for Cody and May to meet up again. Have may and Cody meet halfway at the circular elevator.
Go up the elevator to see another cutscene roll in.
Part 5
Jump onto the birds, catch a lantern from the sky and throw it at the circular blob to destroy it. Once it has been destroyed, head to the second tower.
Land on top and then use the elevator to head down. You’ll find yourself standing next to multi-colored platforms.
In front of you, you’ll see the colors of each of these platforms flashing from time to time. You can only jump on the platform, which has its color flashing in front of you. Else you will fall down.
In the next room, use Cody’s abilities to put together a path for May. Have May stand on the buttons on the floor while Cody starts jumping across another set of colored platforms.
Have May leave a clone on the button having a square and stand on the button having a triangle while Cody jumps across the first three platforms.
When Cody is about to make a jump for the last platform, have May teleport to the second button and press it.
Have May head back to the platform from where she can access the colored platforms. This time around, Cody won’t be available to lay down a path for her, but she can use a hook on the roof to make a bigger jump.
Cody can control which colors are flashing so that May can jump across the colored platforms and join him with ease.
Head to the circular elevator on the right and head up. Destroy the second circular blob and start following the dolls again.
The dolls will get stuck at a platform that can be raised with Cody’s help. Get them to the upper level, and they’ll get stuck at another gate.
The gates could be opened up by two movable walls on either side of the gates. To get them moving, you have to jump on them and keep climbing to keep them moving.
Head through the gates, and a cutscene would follow.
Part 6
You will drop down in a room, where a wall will start closing in on you. Leave May’s clone near the wall and then teleport her such that she’ll find herself on the other side of the wall.
Pull the lever on the far end to raise the wall and save Cody. Continue down the path that has just become visible.
You’ll come across a key mounted to the floor. Twist it with combined effort. Soon you’ll come across another key. Twist that one too. Next, you’ll come across some keyholes near the giant gatekeeper. For this, you’ll require two keys.
For the first key, look for a trail that spirals around and takes to an upper level. Once you’re on the upper level, look around for some platforms suspended in the air.
Keep jumping between the platforms until you reach a huge circular platform. There is another set of platforms that can then be controlled by Cody.
Have May jump onto the platform and keep jumping between the platforms. If you seem to have reached a dead-end, focus on the trajectory of the platforms and use May’s cloning ability to get you across.
Certain platform paths overlap while moving. At the point where they overlap, you can leave a clone, and when the next platform is under the clone, you can teleport.
Once you get the first key, get back to the first keyhole. Place the key inside and turn it. Now head to the tracks at the opposite end of the room.
Two walls on the left can be moved by Cody. Move them, so May can climb up through the crack in the walls.
Have Cody turn back around from where you just came, and he’ll get to forge another path for May. Have May move to the edge of this newly created path.
Cody will then forge another path right in front of it, but when that path starts to appear, the path that May is currently on starts to disappear. Therefore, she’ll have to make a well-timed jump.
On the other side of the path, May will find herself on the edge of a huge box that’ll plunge her forward with the help of Cody.
She’ll then come across a dial. Rotate the dial to drop the second key. The cage that the key is in will only drop to a certain height, after which Cody will have to take over.
The cage is locked. Have may clone right under the cage and have Cody drop it on her clone. Teleport inside the cage and leave another clone.
Have Cody pick up the cage again and have May teleport below the cage with the key. Put the key in the second keyhole and twist it. Then head towards the other key and twist it again. A cutscene would follow.
Fighting the Bull
Enough with the puzzles. After the cutscene ends, you’ll be fighting a boss in the shape of a bull. To defeat the boss, have Cody control the button at the far end of the room and have May stand on it with its clone elsewhere in the room.
This makes a gate drop down, revealing a wall. The bull will charge towards May, who can then teleport to her clone, and the bull will hit the wall.
Do this a couple of times, and the statue will fall on the button, cutting off your access. But Cody can still turn back time.
Now, when the boss charges towards the wall, drop the statue on it to defeat it for good.
Part 7
After defeating the boss, look for a hole in the wall. Use the floating platforms that are being controlled by Cody to make it to that hole.
On the other side of the hole, find a lever and activate it to drop a giant stopwatch in the same room as Cody and then jump from it to make it through the hole and join May. Continue down the path afterward.
There will be huge walls moving on either side of the platform. The last one can be controlled by Cody. Have May climb between the walls and move them in such a way using Cody that May is able to climb all the way up.
Look for a glass lantern up there that can be dropped down. Once it drops down, it will break. Cody can then climb on top of the wrecked lantern and turn back time to make it back up and join May.
Next, look for a button mounted on the floor that will create another passage for you. have Cody stand over the button and move May to the next platform.
Leave May’s clone there and bring her back to push the button while Cody moves to the next platform. Then teleport May to her clone.
The End Game
There will be no more puzzles from this point onwards, just a game of reflexes in which you’ll be dodging objects and antagonists while waiting for the game to carry you on.
Also, when you find yourself on a giant clock, there is nothing that you can do but jump over the needles and survive till the clock stops. The same could be said about the remaining ventures of this chapter.