The Dishonored mission 8 begins right after the end of the previous mission. Our Dishonored ‘The Loyalists’ Low Chaos guide will help you get the best ending.
What you need to do in the Dishonored The Loyalists mission is to get to your room on the third floor of the Hounds Pit bar.
Dishonored ‘The Loyalists’ Low Chaos
First of all, talk with Cecelia, she will give you the details of all that had happened after you were poisoned and left in the Flooded District by Samuel.
After you are done talking to her, go to the first floor and enter the room to your left. Take the two keys hanging in this room. Use one of the keys to open the door to the right from where they were hanging.
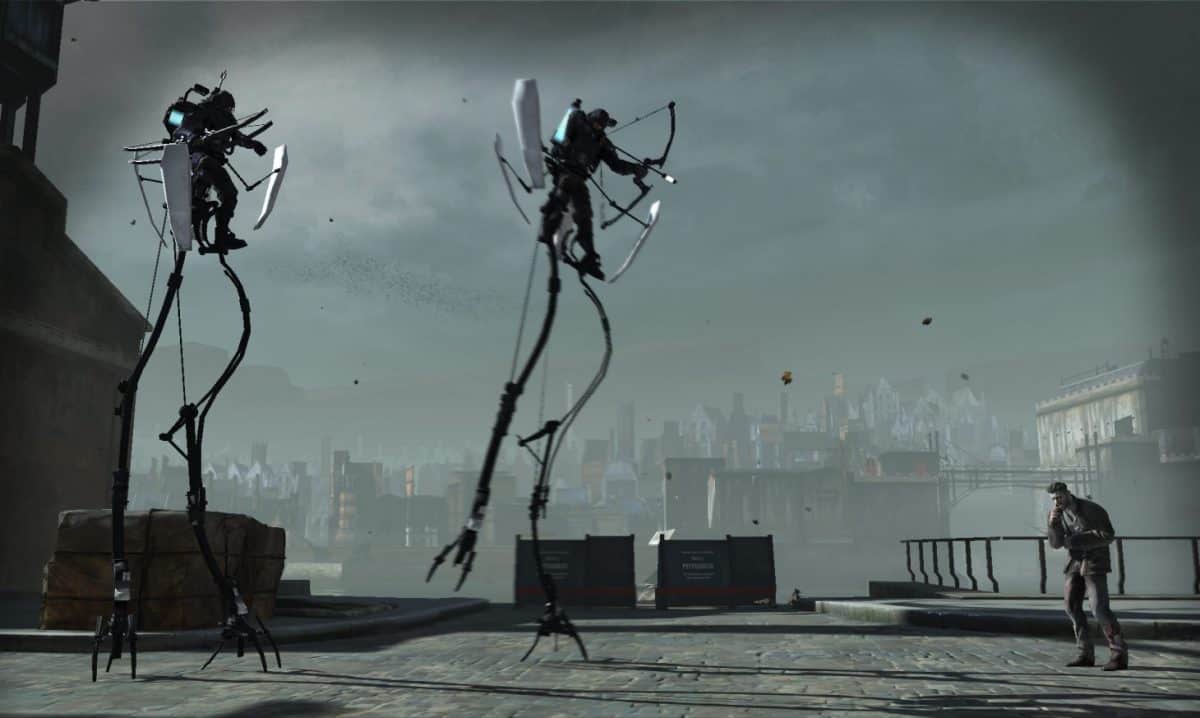
You will come out of Cecelia’s apartment, and across the street will be the Hound Pit bar. The street is being patrolled by three guards and a single Tall Boy.
When the Tall Boy goes to the far end of this area then is your chance to blink to canopy of the Hounds Pit bar.
Note: I’m assuming by now you have the level two blink at least.
Travel on the canopy to the left side and you will see an open window. Get into the bar through it. Take the door in the upper-right corner of this room. You will end in a corridor.
Go into the first room to your right in this corridor, and pick up the Blueprint in the trashcan. Go to the end of the corridor and you will stairs leading you up to the third floor and Emily as well.
There are four persons in this room that you have to neutralize. Use of Dark Vision is absolutely pivotal to clear this area undetected. It will help you locate enemies even through walls. One of the guards has the habit of leaving the other three and coming out in the second room. When he does this fire a sleeping dart at him and then blink over to him. Carry his body to the stairs with you.
When the fourth guard leaves the two guards talking to each other, quickly fire sleeping darts at them and put them unconscious. This will alert the last enemy, but you are still undetected. Now there is only a single guard left. You can deal with him in any fashion you like without the worry of being spotted.
There will be a letter in this room for you left by Emily. In this letter, you will learn that you need to find Callista to further progress this mission.
Furthermore, you will learn that the Admiral and his lackeys have left for a lighthouse on Kingsparrow island.
Go out the window and get on top of the roof of Piero’s workshop. Here, you’ll acquire an optional mission, where you have to talk to Piero and Sokolov. This mission is very simple, and it’ll net you a Rune, plus you will be able to re-stock/upgrade with Piero for one final time, so you should definitely do it.
Optional Mission
From the roof of Piero’s workshop, jump down to the vent, then follow it to a door. Open the door and pick up the Rune from the table, then go downstairs and you’ll meet Piero and Sokolov.
Have a chat with them. Piero tell you about their project, which is a new kind of Arc Pylon that they have nearly completed. Problem is, the blueprints were taken from them; so, he’ll ask you to find them and bring them to him. If you followed this guide, you will have already done that; so, give it to him right there.
The Arc Pylon can be configured to a high-power level, which will incinerate all the enemies present nearby, or a low power level, which will just put them to sleep. You have to do the latter for low chaos.
You’ll need whale oil for this. Go back upstairs and get an empty canister by using the dispenser on your left. Fill it up and go back up to the roof.
There will be a series on canisters present on the roof. Open them up by pulling the switch and place the canister you filled on the empty socket. Close it by pulling the switch again, and a cutscene will start.
Subsequently, all the enemies in your vicinity will have been put to sleep. You can now walk around and loot whatever you want
Go back to the room where you took down your first guard in this area. Once there you will see an open window. Go through it and make your way to Callista.
It is very simple, all you have to do is follow the white marker. Interact with the door and tell Callista it is you.
She will open it for you. She will fill in you with all the details she has. There are a few things in this room you need to pick up. Emily’s key and a letter by Sam are both placed on the bed. Use the flare launcher in the window to signal Samuel.
Exit out of the door on the other side of the room. You will see Samuel docking his boat on the shore below. Go to him to effectively end this mission.
If you are looking for assistance on other Dishonored mission, you can refer to our Walkthrough.