Zombie Army 4 Dead War is all about killing the undead by using your best weapons and lots of ammo. As the game increases in difficulty with each subsequent chapter, you will want to upgrade your weapons and gear to raise your shooting potential, and that’s where upgrade kits come. These are the only source to improve your weapon’s accuracy, ammo capacity, and other important characteristics. That’s why you must know all the ways to locate these in the game world.
You can farm Upgrade Kits in Zombie Army 4 by following methods:
- Earning Gold Medals (one kit for achieving max points in each chapter)
- Leveling Up (one kit for every 5 levels)
- Completing Challenges in individual Missions
- Finding Upgrade Kits during missions
- Acquiring all Collectibles during campaign
- Finishing Sticker Album Pages
If we only consider the kits that you can pick up mid-game as collectibles, we were able to find 35 kits across 9 chapters. These kits are easily recognized by the green arrow mark appearing on them. Read on to learn about the location of all such collectible upgrade kits in Zombie Army 4 Dead War.
Below are all the locations of Upgrade Kits you can find in Zombie Army 4 Dead War. We have divided the locations into Chapters and Stages so you can get them sequentially.
Dead Ahead Upgrade Kit Locations
1. Reporting In
Head through the Medical Bay and speak with the doctor. After that, go to your right and smash the boards on the door with a suitable weapon. Head inside, and you will have your first upgrade kit of Dead War.
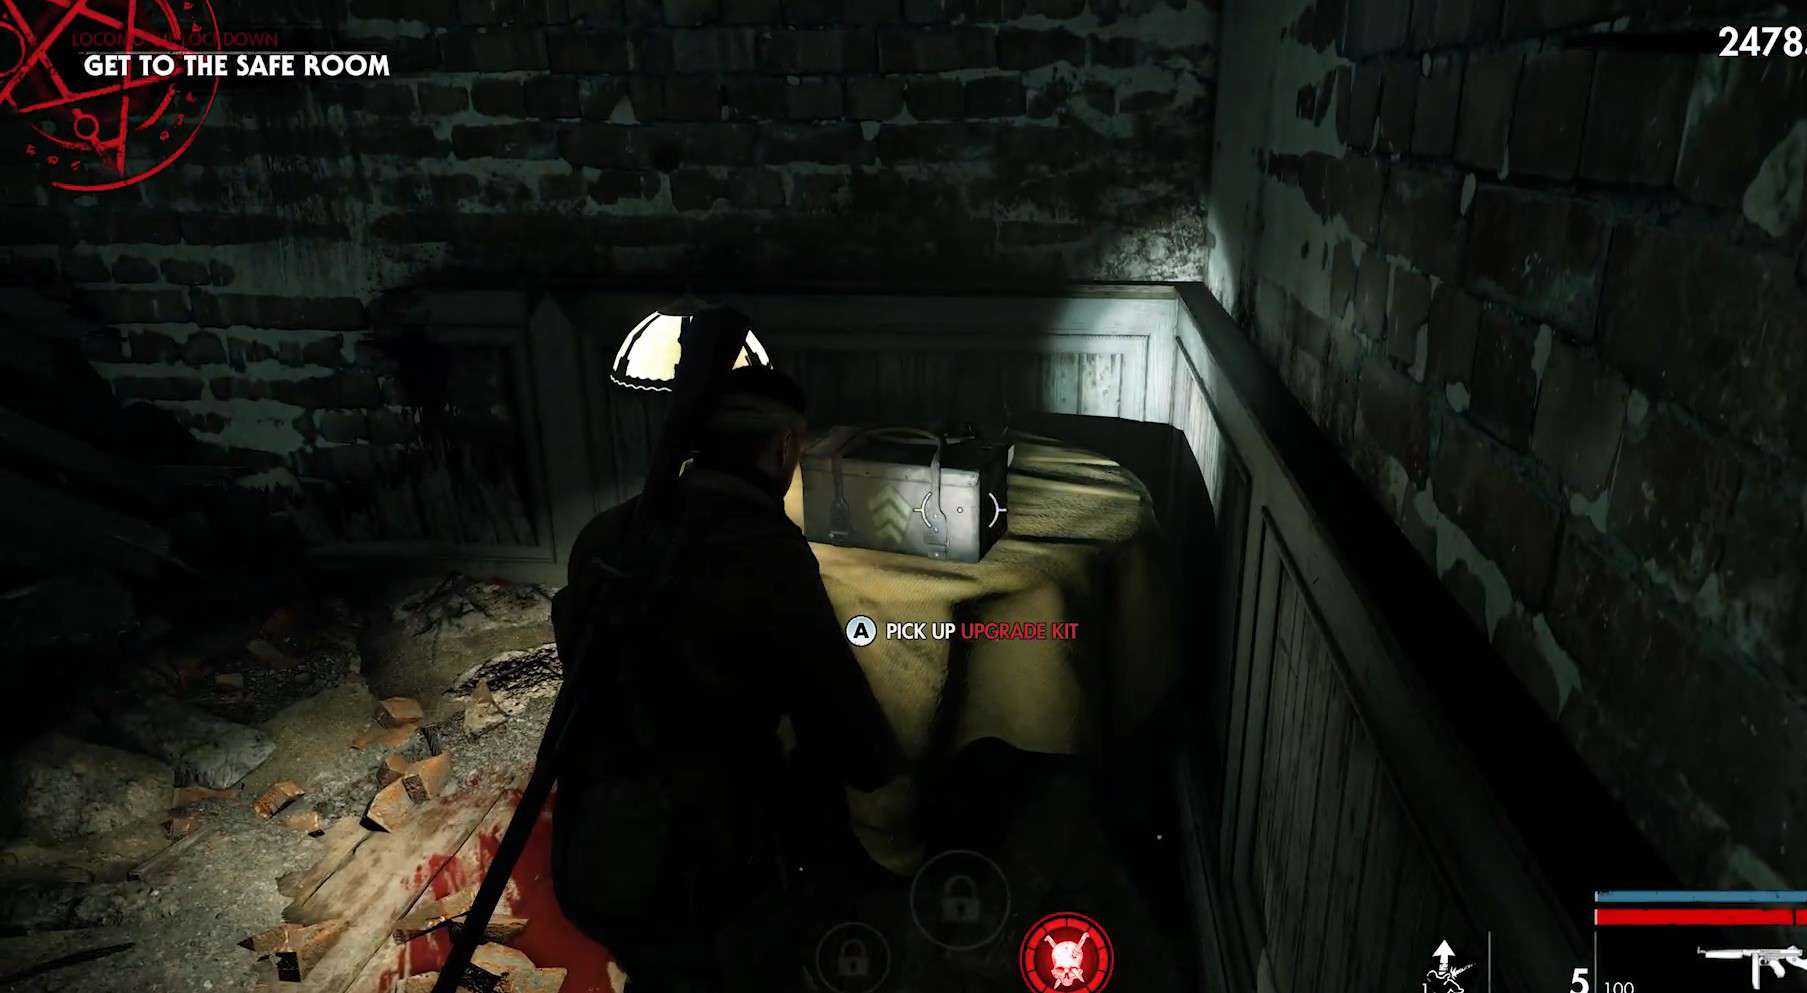
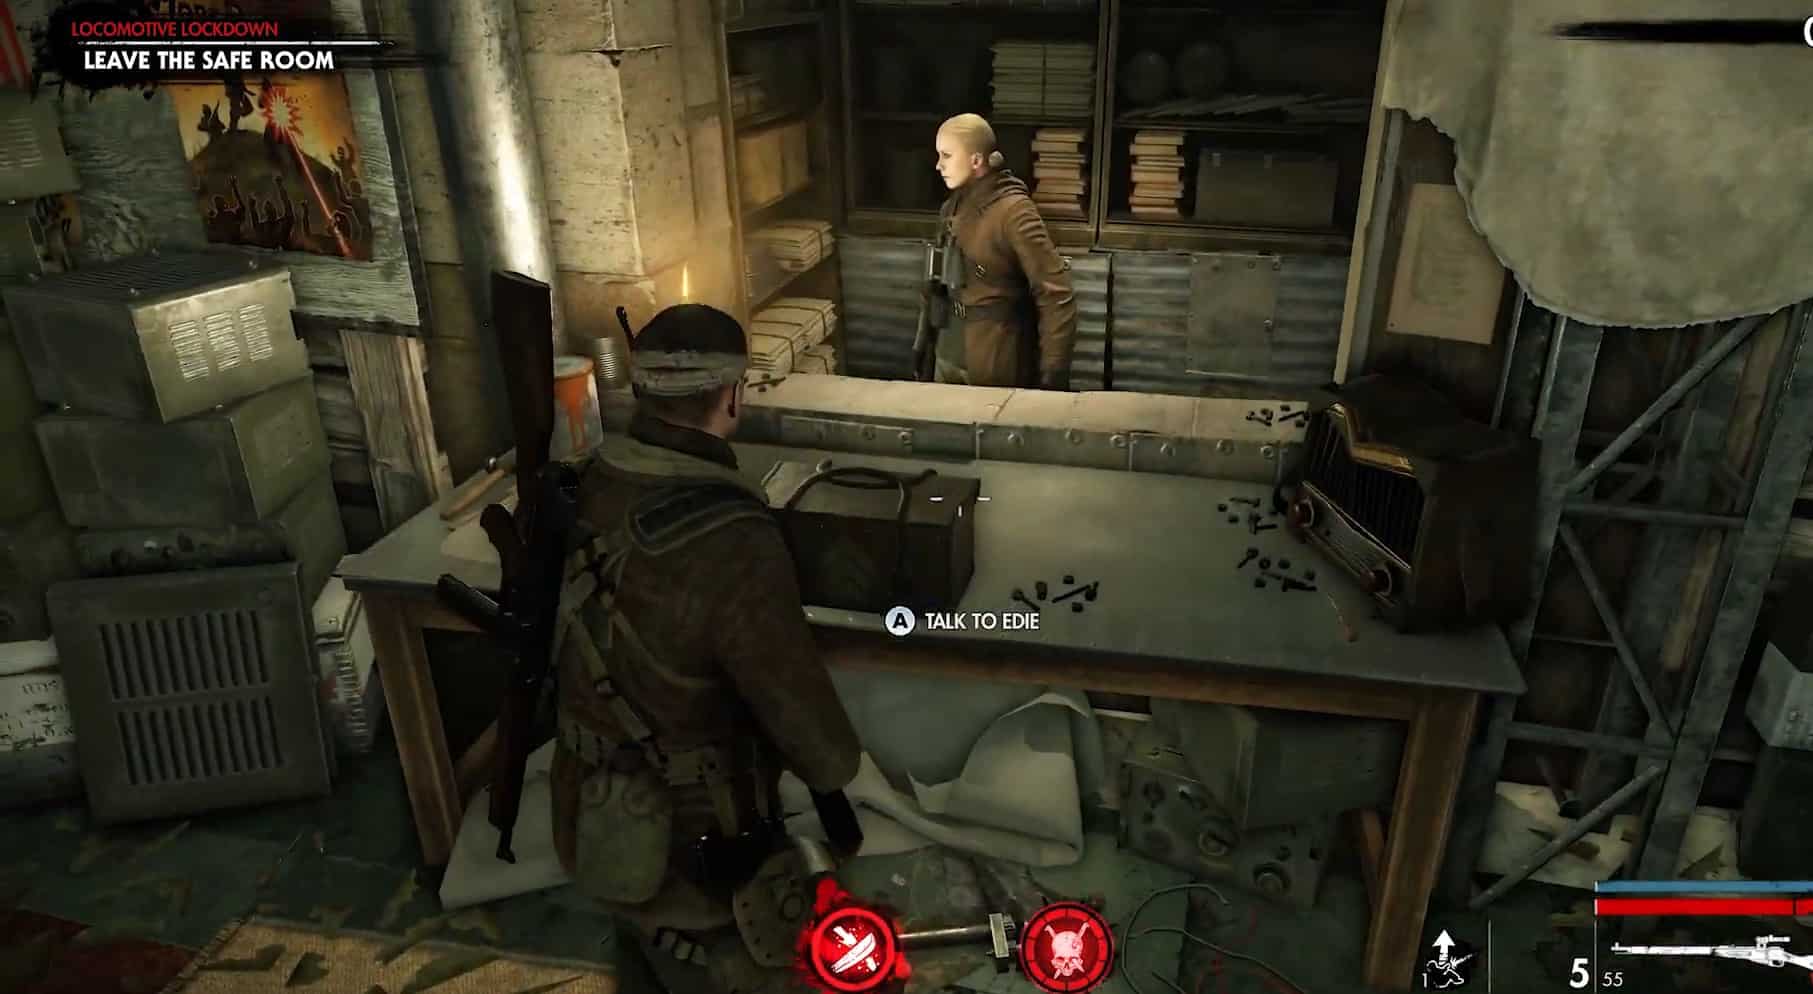
2. Locomotive Lockdown
To find this kit, go back upstairs and take a left to head to the Workshop. You will find the upgrade kit on the table in front of Edie.
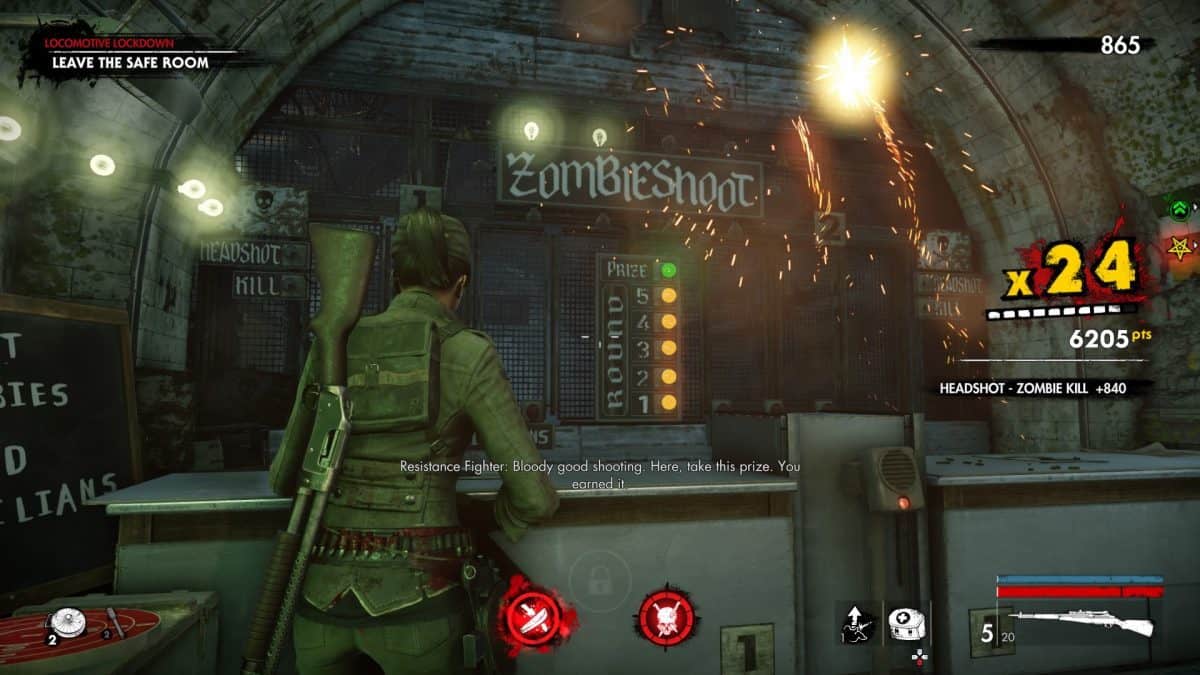
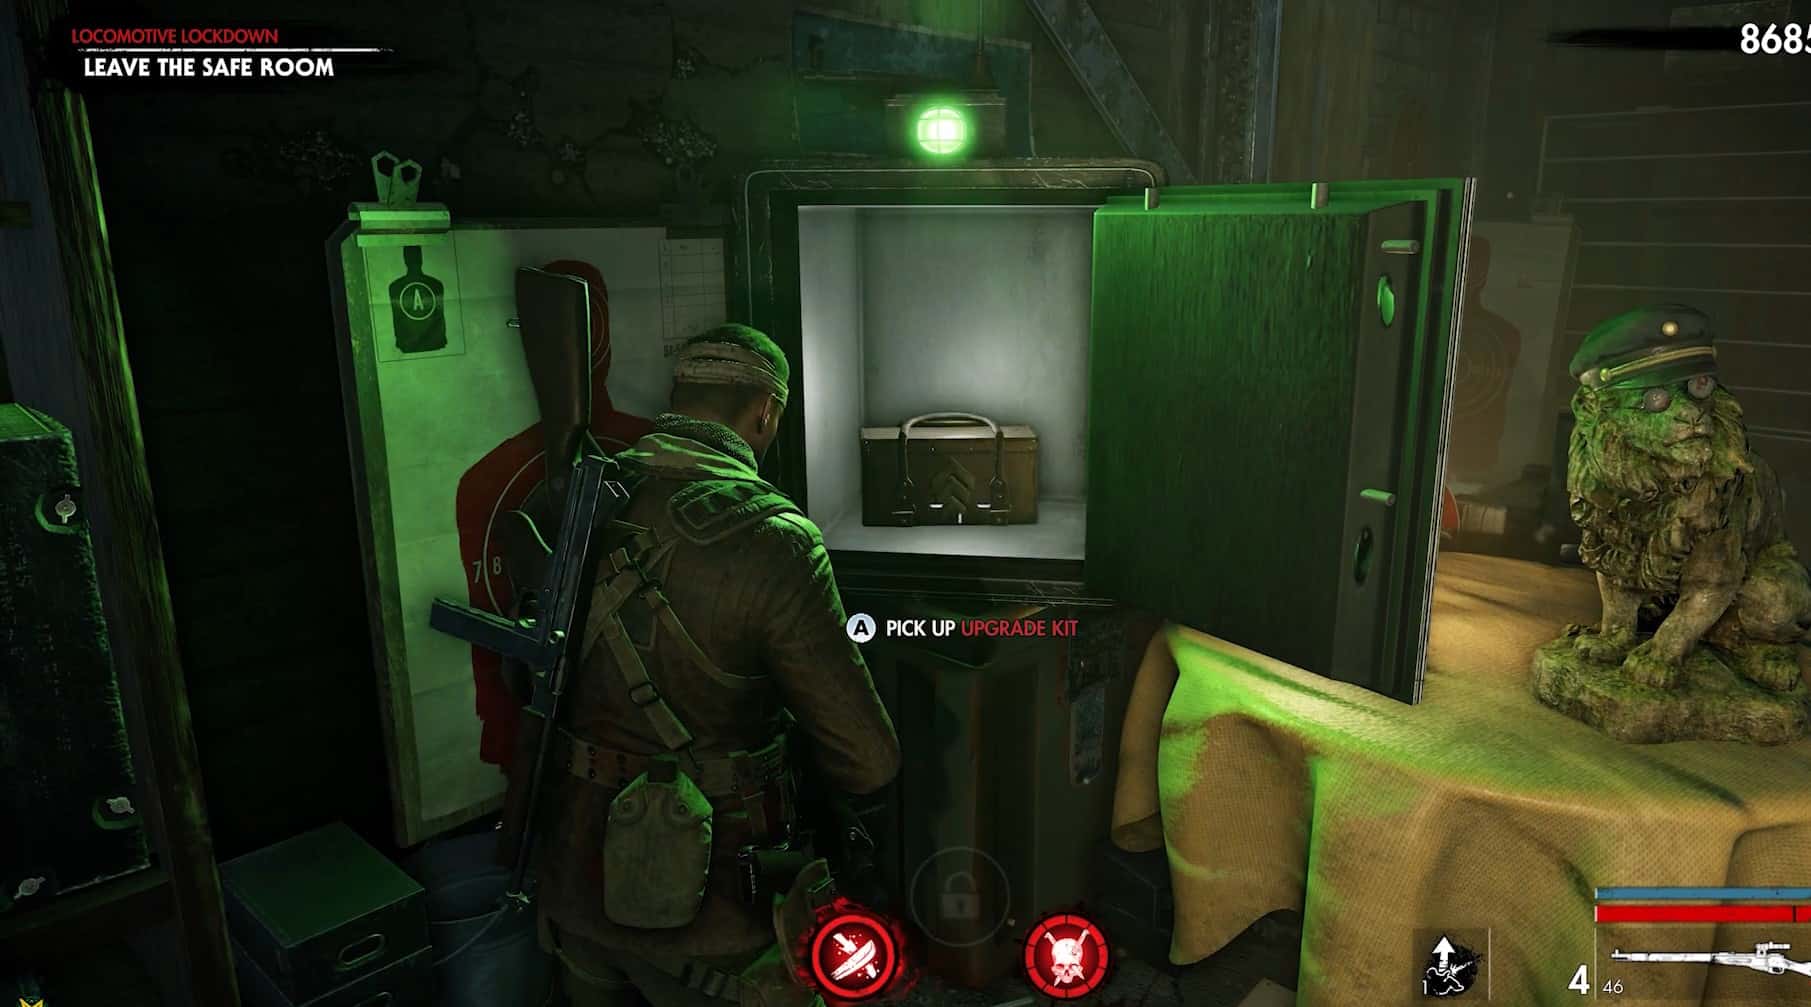
3. Locomotive Lockdown
To find this kit, head to the shooting range after exiting the safe room. Start the Headshot Kill challenge by pressing the button, and complete it with a high score while avoiding civilians (women). Once the challenge is over, the Prize safe room will be opened. Go inside and then explore the safe to get a well-deserved upgrade kit.
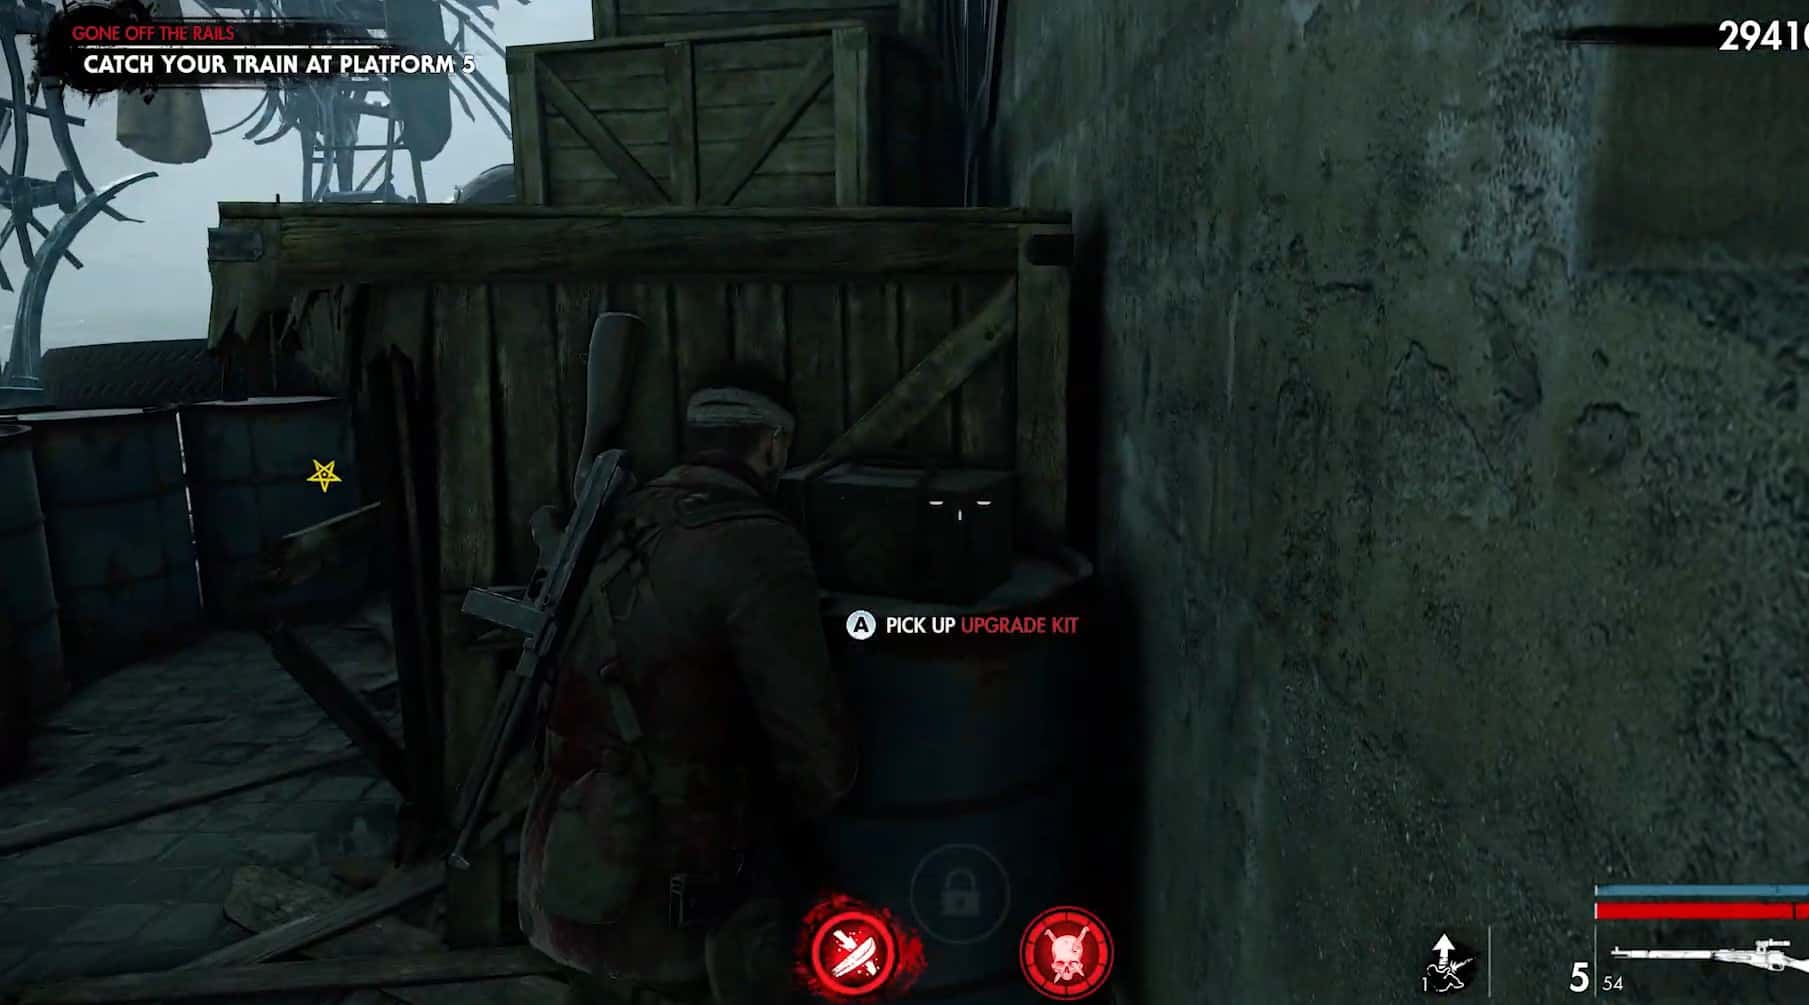
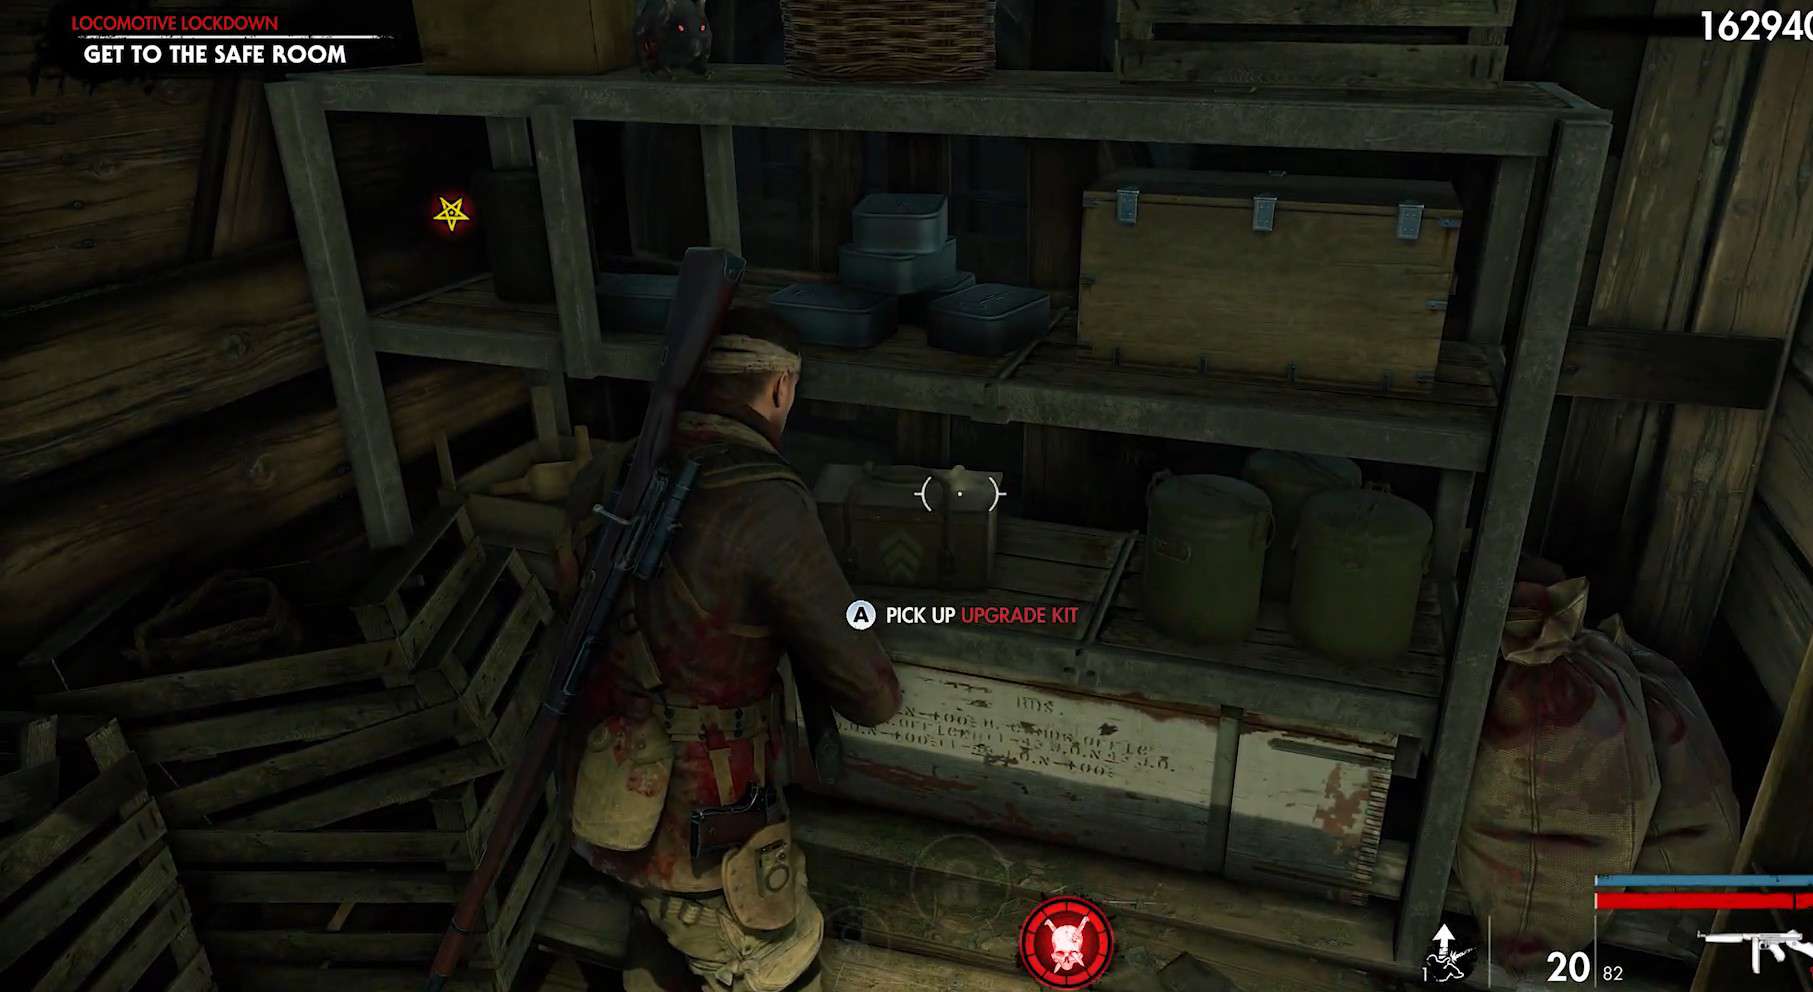
4. Locomotive Lockdown
You will find this kit near the area where you encounter a large number of suicide zombies. There is a building near the entrance area. Go to the second level with a red and white pinstripe awning. It is to the right of the “Binario 345” sign. Climb up to the building to find the upgrade kit on a table in the back.
5. Off the Rails
You will find this kit after saving the resistance fighters. Go back upstairs towards the new objective. When you reach the objective point, there will be an earthquake. After the earthquake tremor, the platform will split into two parts, one going right and one going left. Go left, and at the bottom of the stairs, turn right. The upgrade kit is at the end of the alley.
Death Canal Upgrade Kit Locations
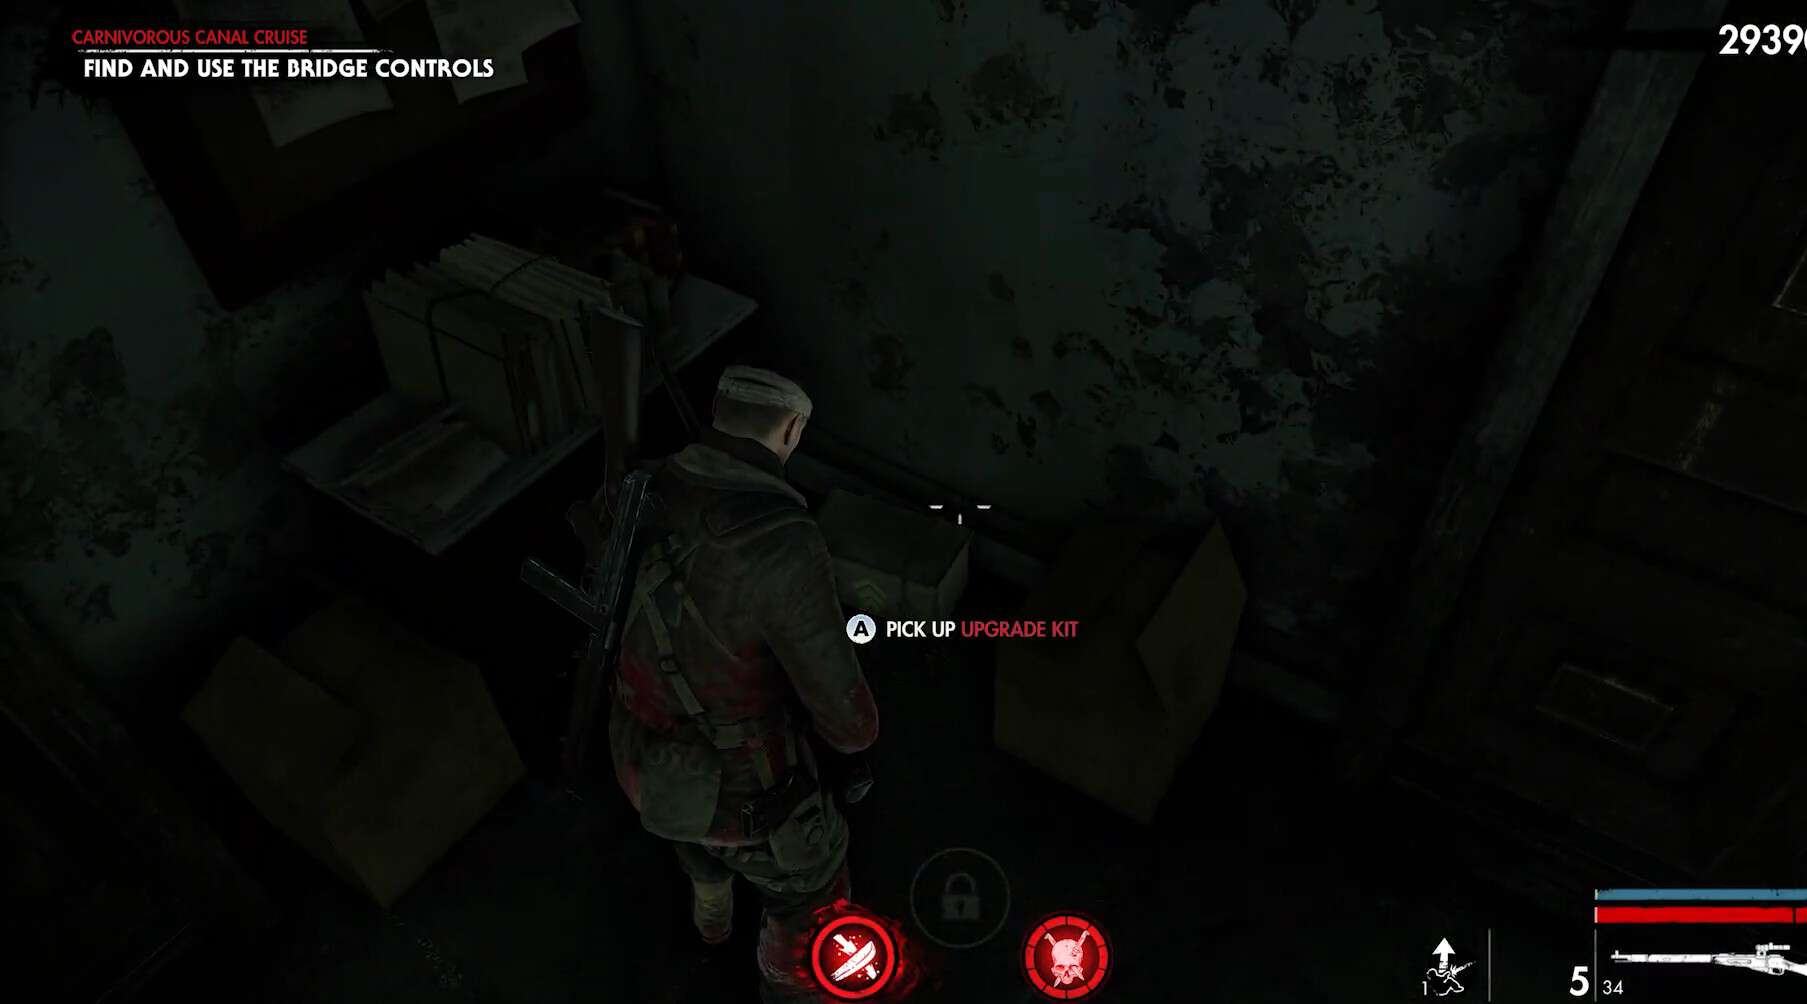
6. Carnivorous Canal Cruise
To get the upgrade kit in this area, go straight through the square. Cross the bridge and go right. Follow the path along the canal and turn left when you enter the next open area. Here you will see a distraction device and a grey stone building to the left of it. The upgrade kit is on the floor in the grey stone building.
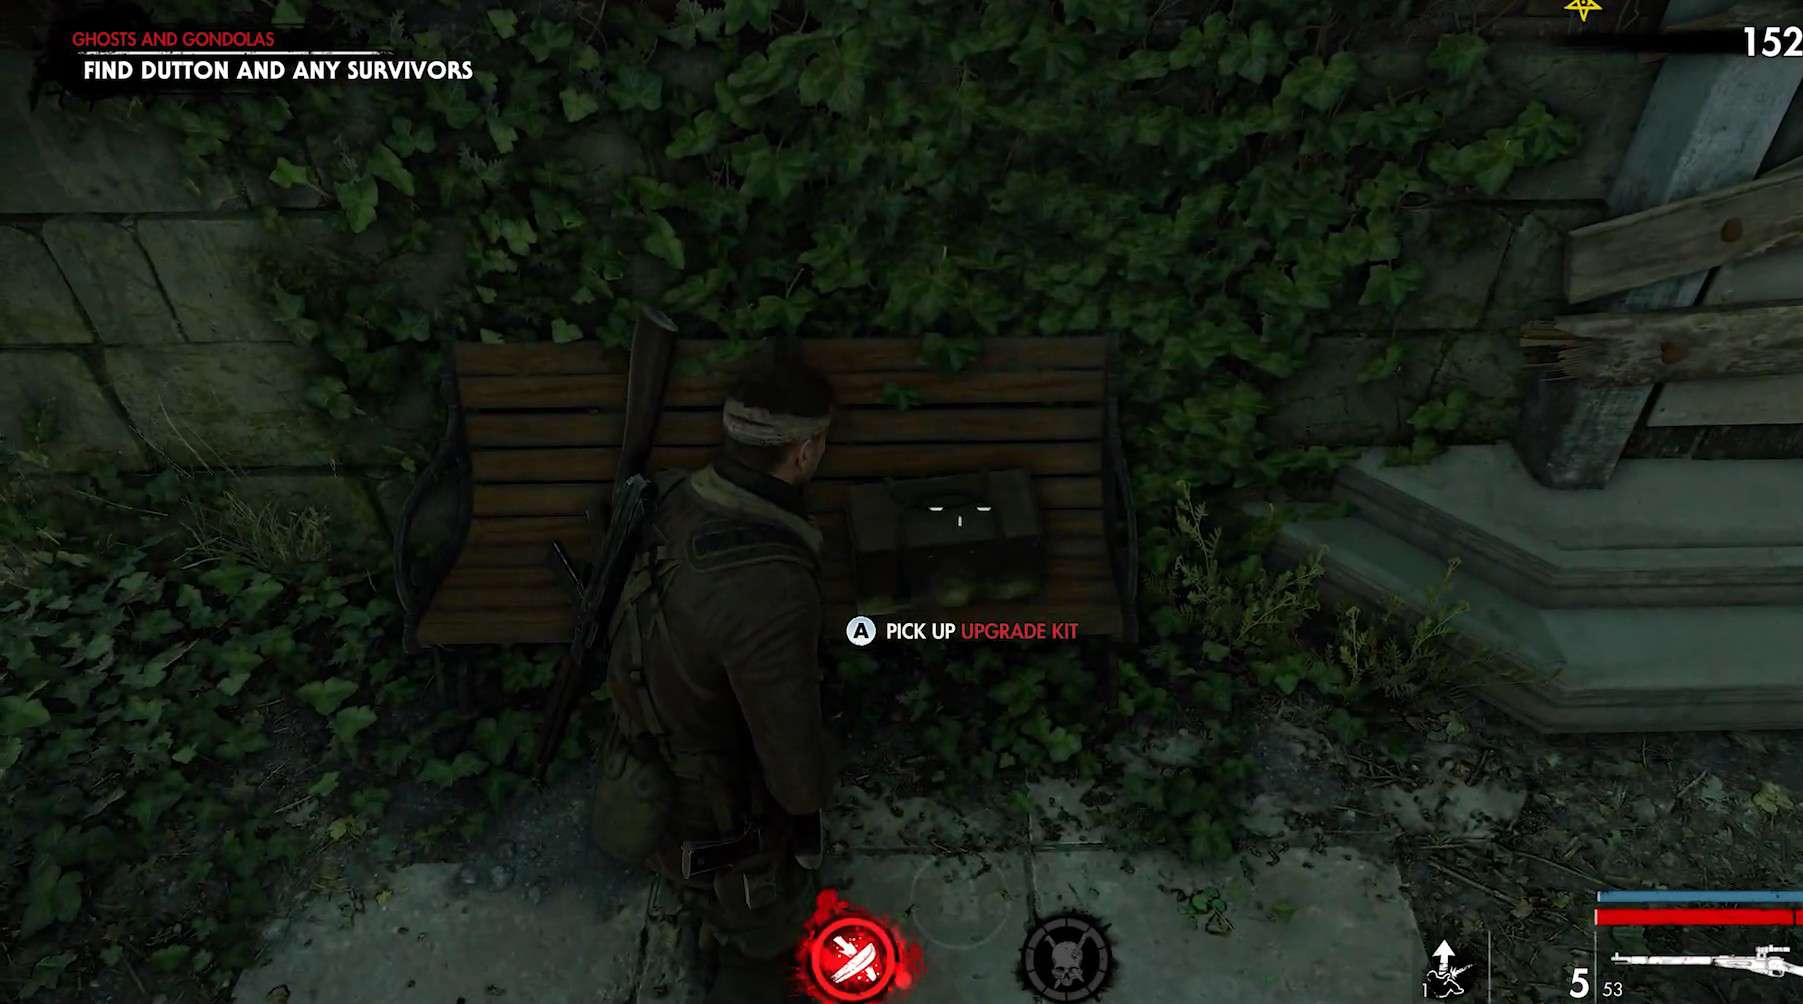
7. Ghosts and Gondolas
As you exit the safe room in Ghosts and Gondolas, turn left and move through the narrow alleyway. From the Fountain, turn left again and go down a few steps to reach the water. Paddle through the water and then take the steps to spot the upgrade kit on a table in the corner.
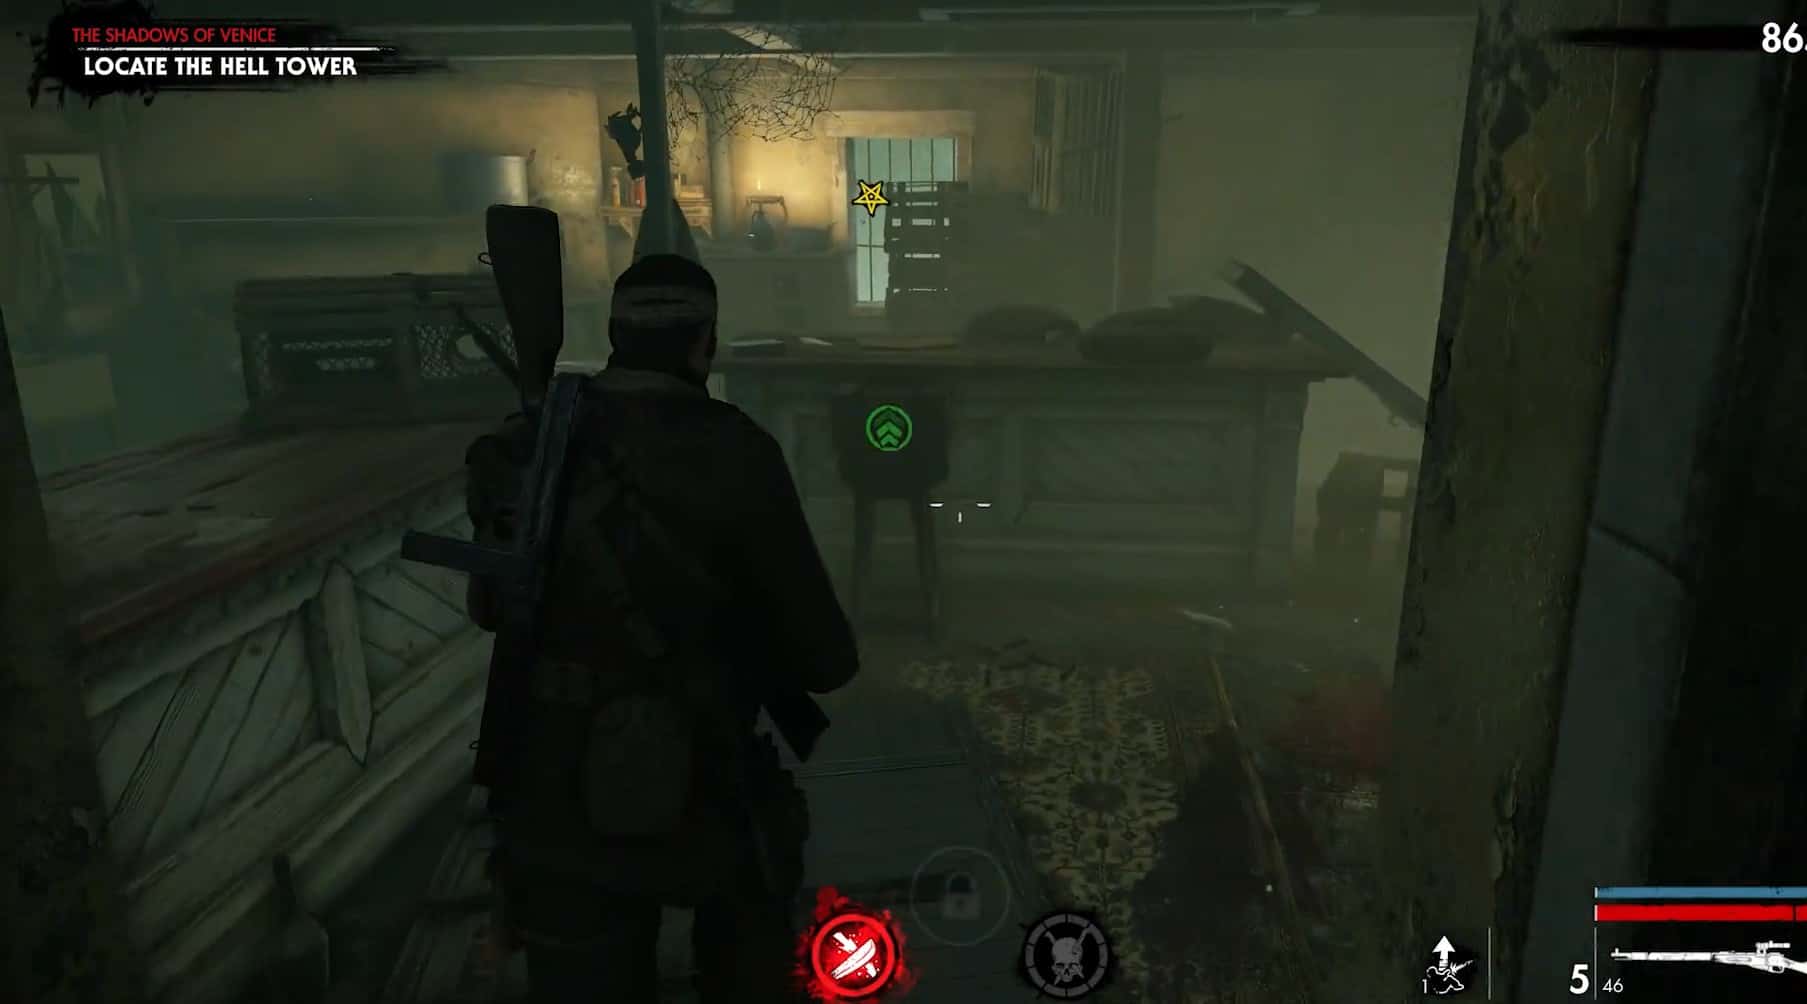
8. The Shadows of Venice
As you start this level, turn right and cross the bridge. Go to the backside of the area where there will be a fence in front of you. There will be two zombies on the other side of the fence. Turn left and enter the back of the building. The upgrade kit will be on the stool.
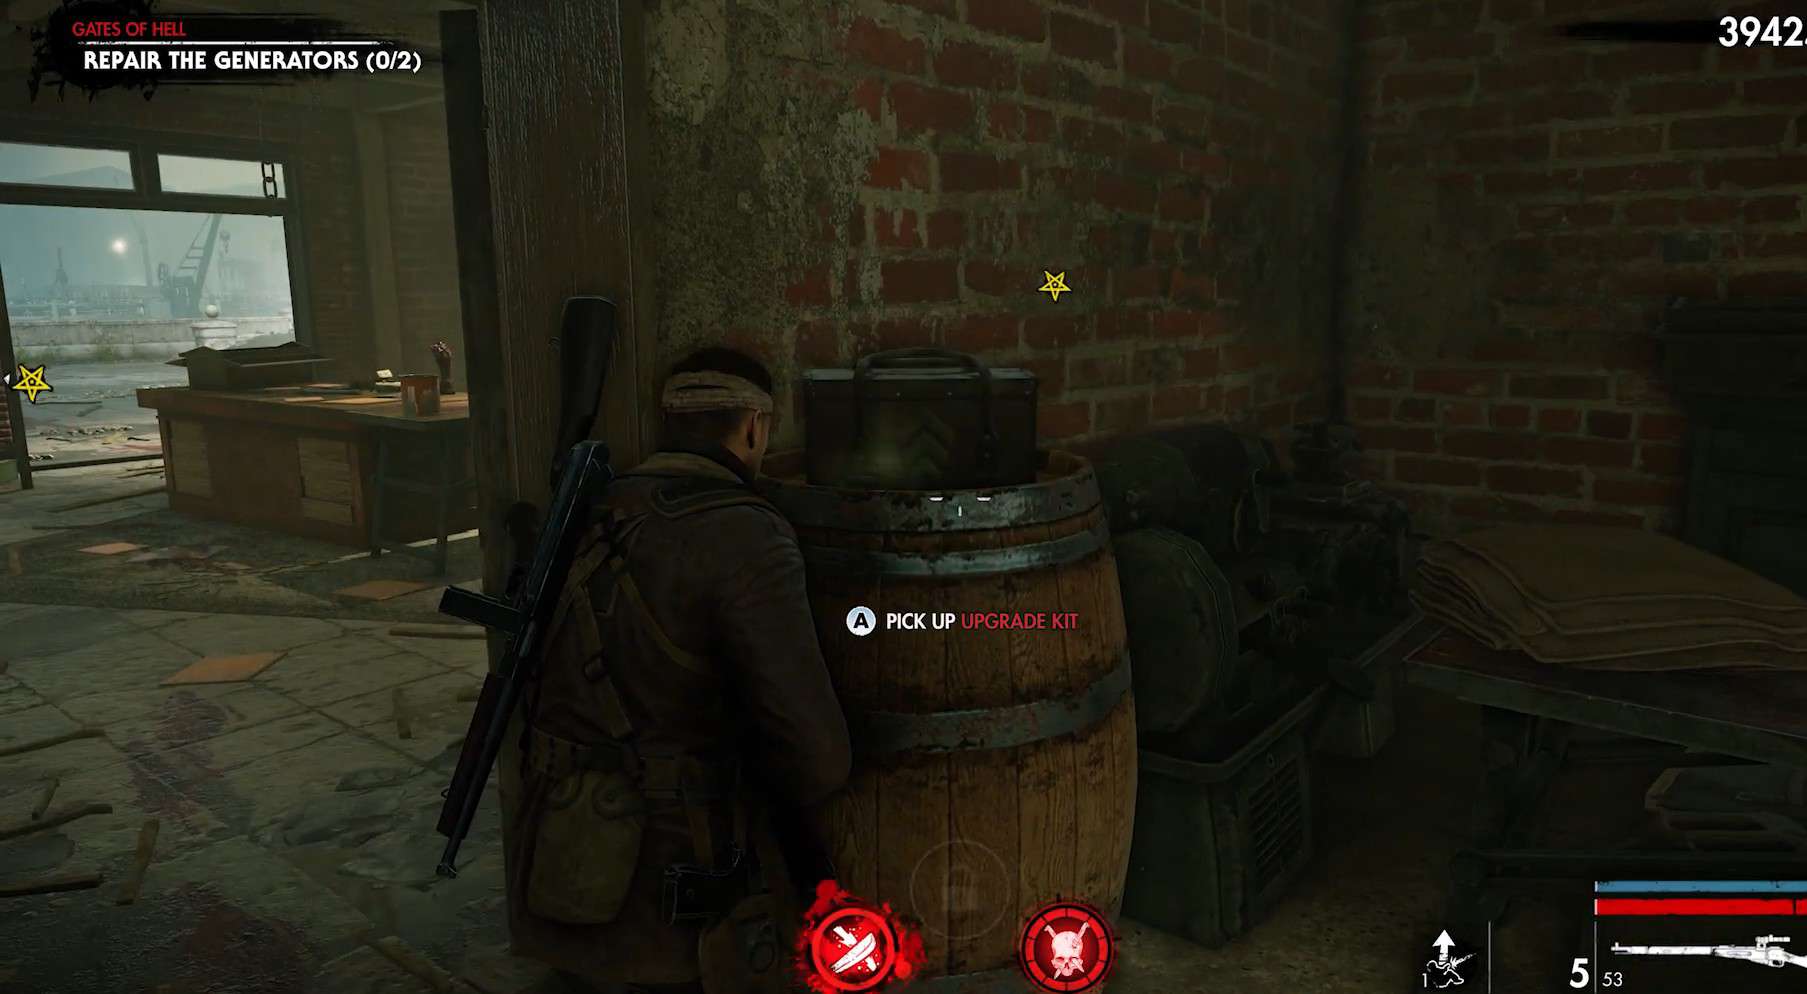
9. Gates of Hell
To get this upgrade kit, release the charge on the first generator. After doing that, door on your left will open. Go through it and down the stairs and turn left at the bottom. There is a small room on the left side with the upgrade kit inside.
Meat Locker Upgrade Kit Locations
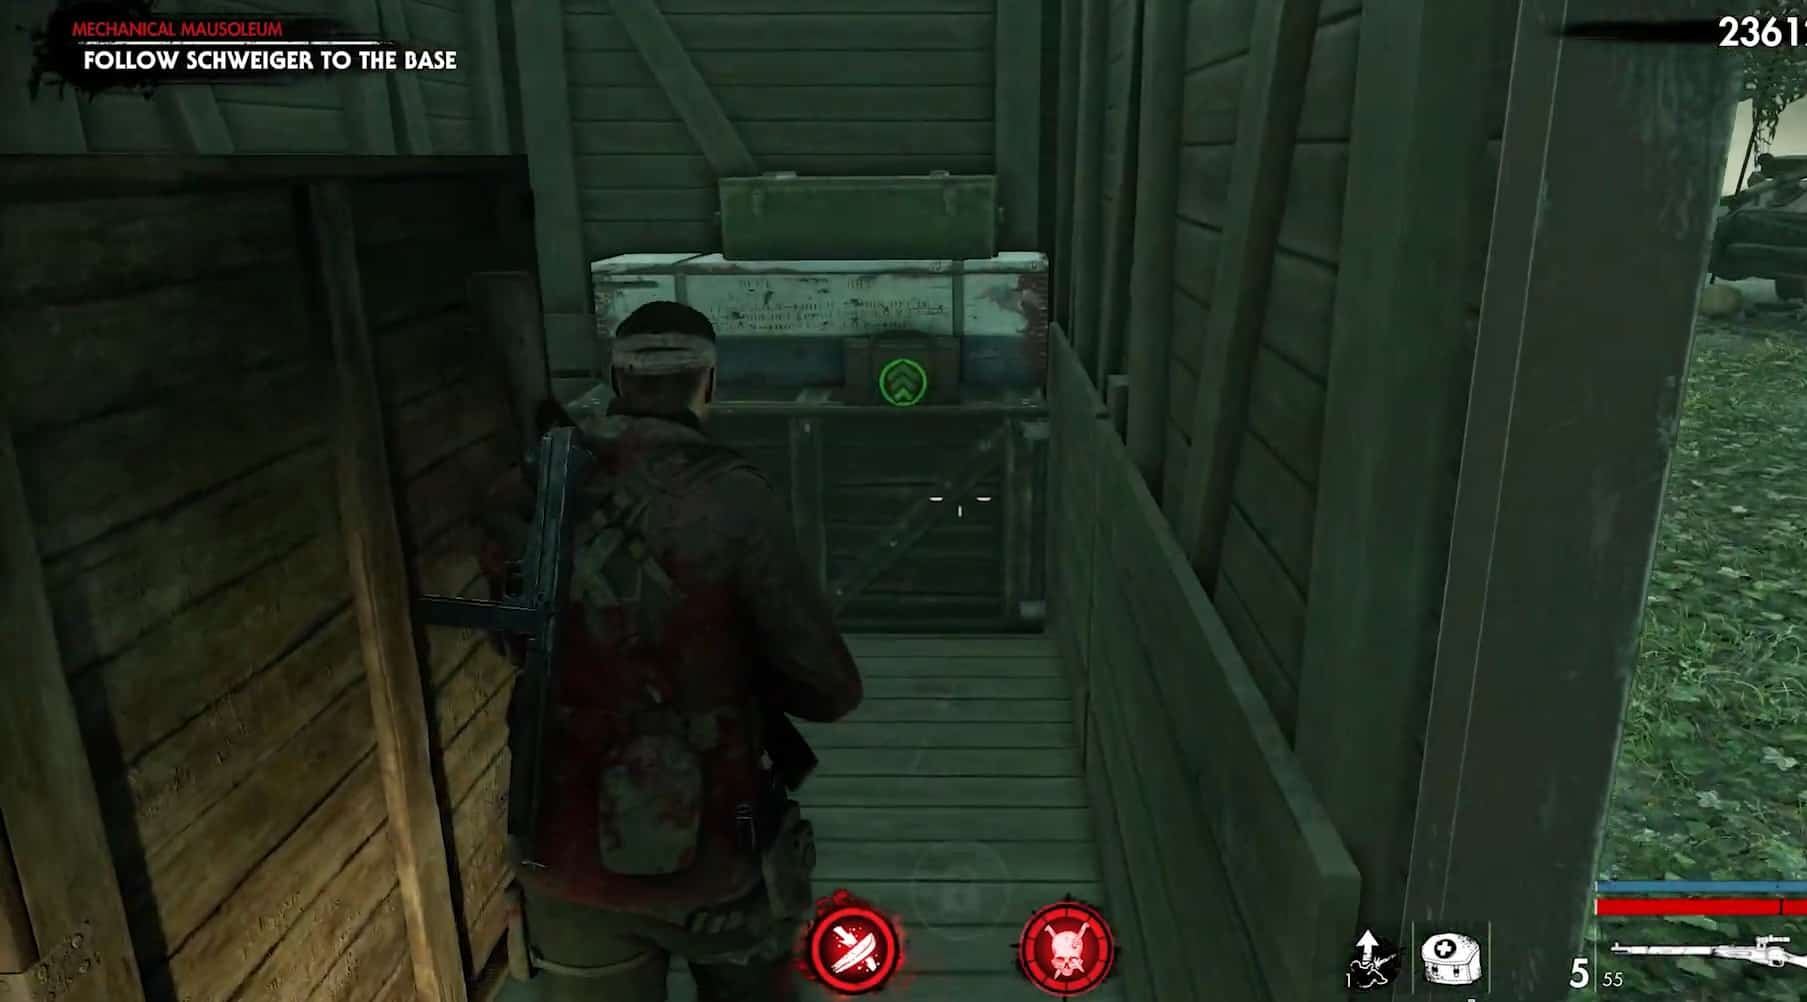
10. The Hunter for Dr. Schweiger
Enter the area and go into the middle to the crates and old tank area. There will also be several railroad cars here. The upgrade kit is in one of the train cars.
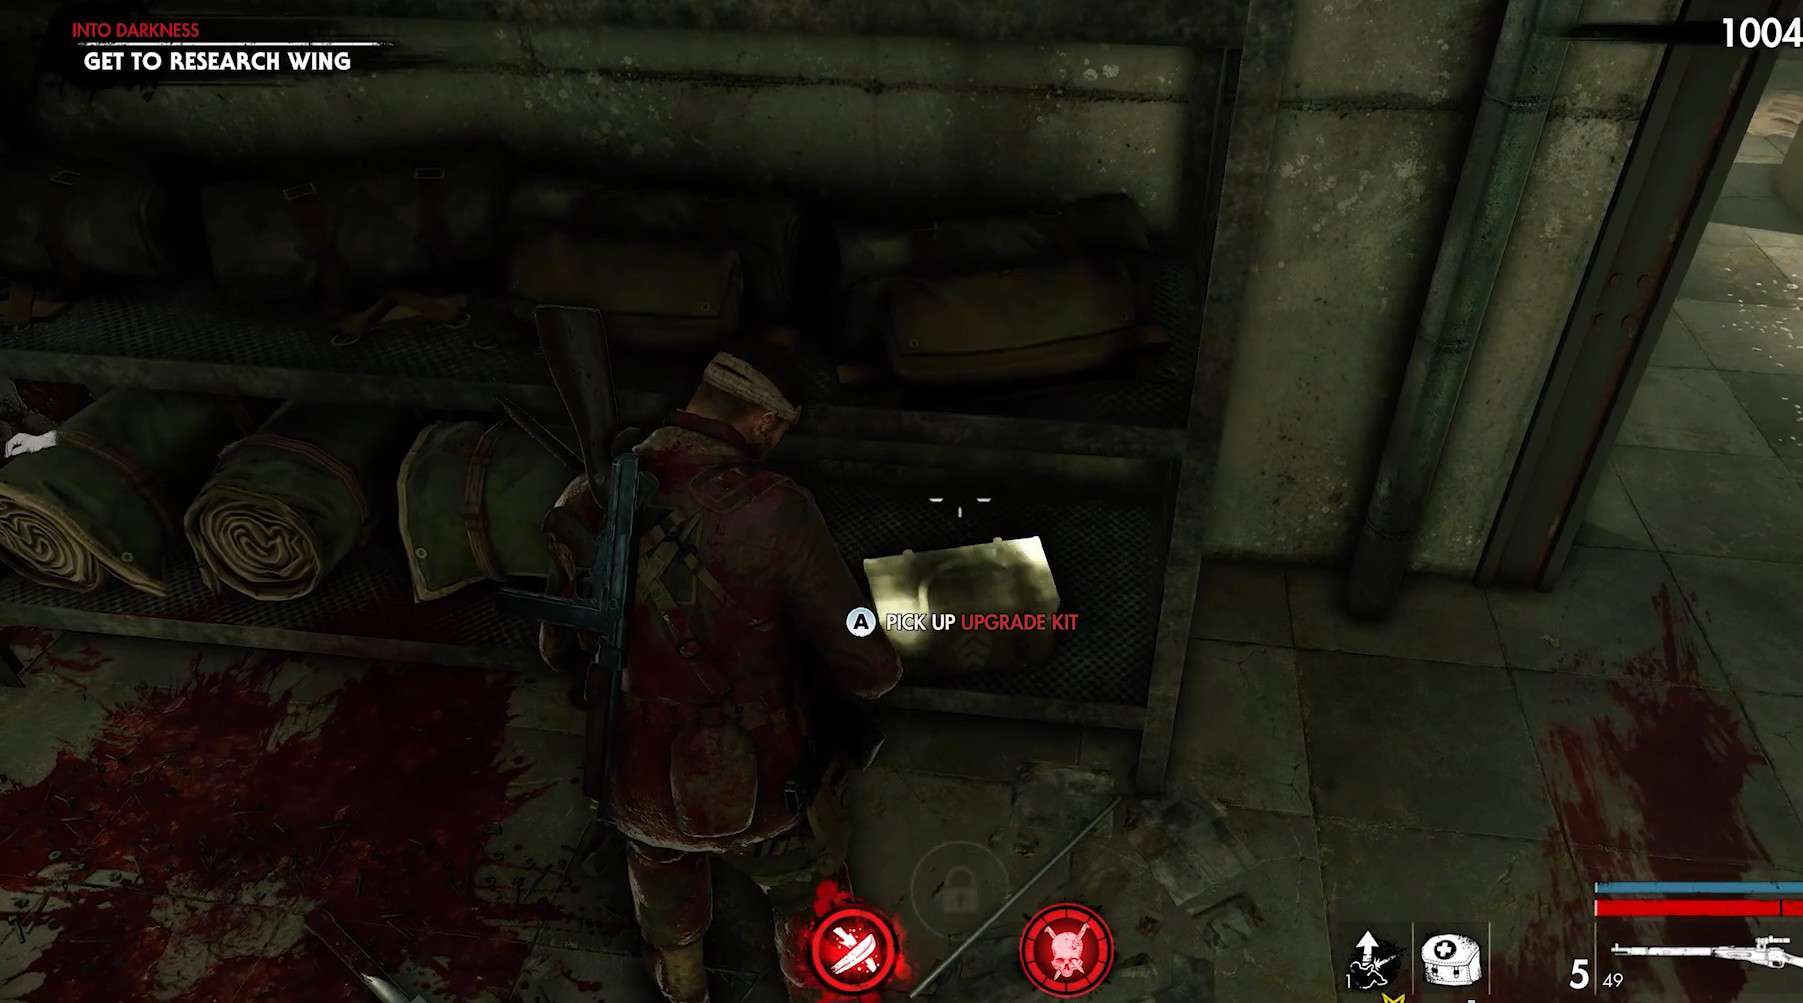
11. Into Darkness
After turning the power on, the next door will be opened, and you will have to clear some armored zombies. As you pass through the door, you will come across some stairs going up. If you turn right and enter the doorway, you will find a comic book inside.
Now, go upstairs and turn right to enter a shooting range. At the end of the range, turn left to go into the hidden room. You will spot the upgrade kit on the shelf at the starting part of this room.
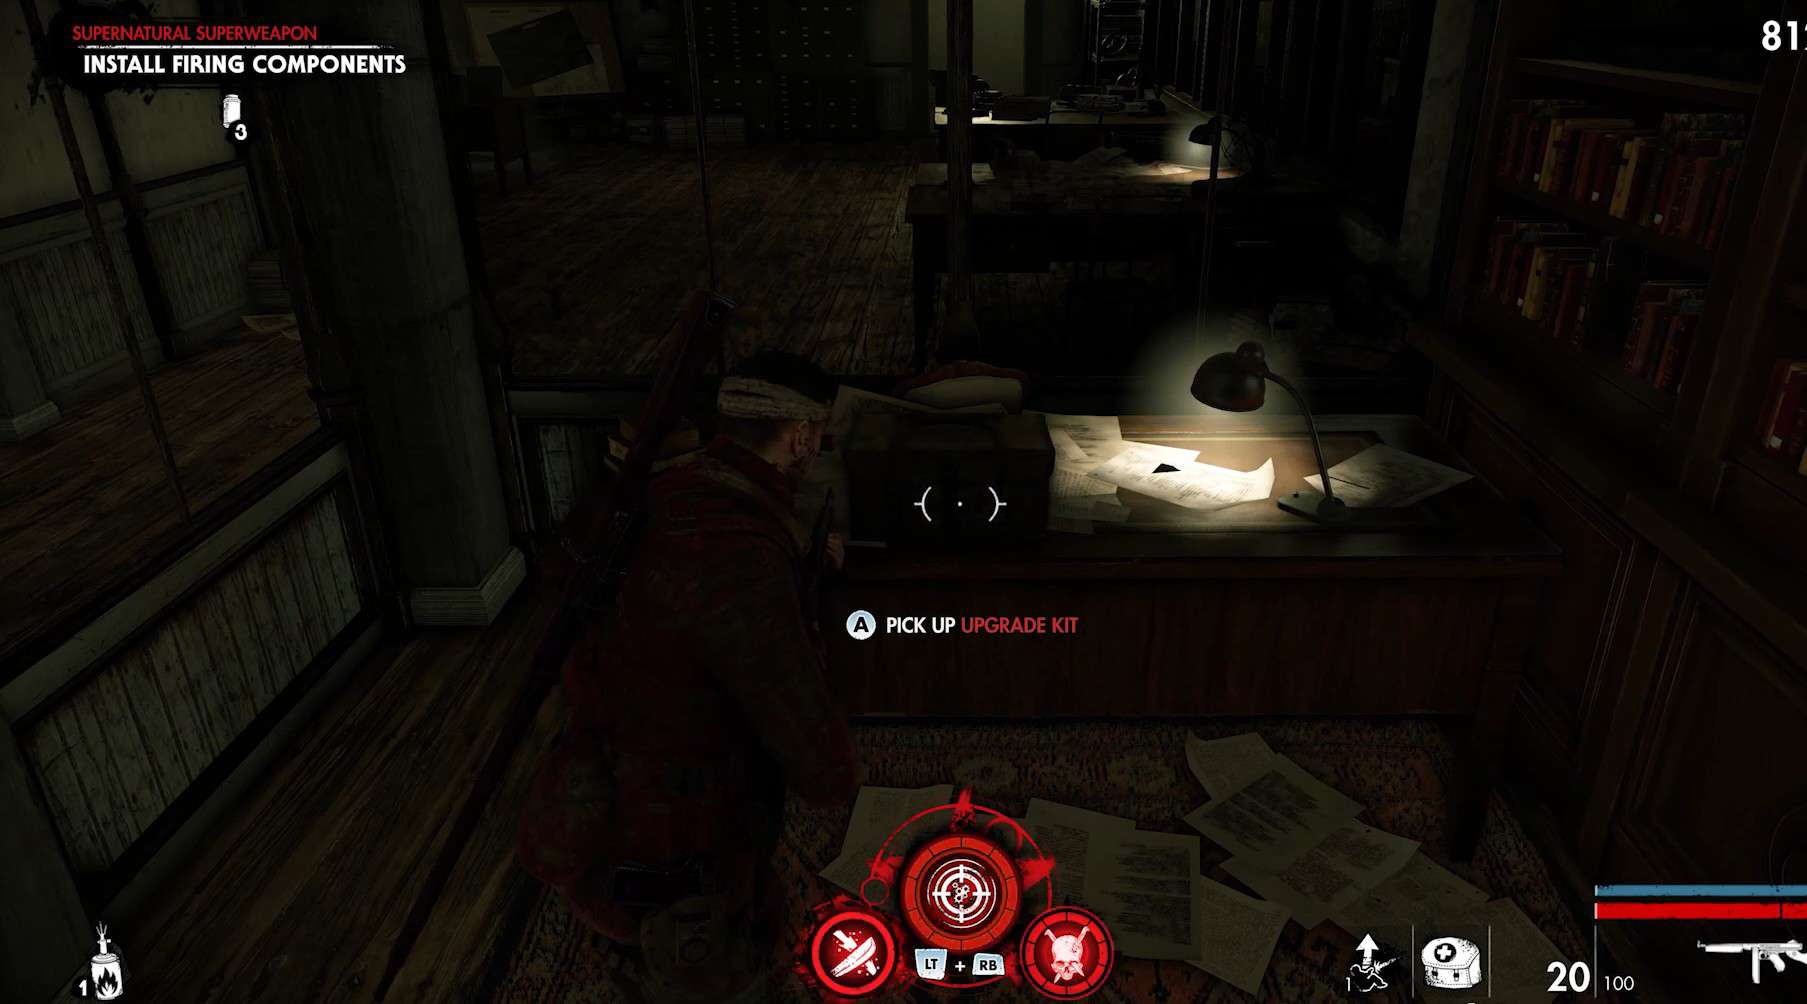
12. Supernatural Superweapon
In this chapter, you will be given a compass to locate and Install Firing Components. While finding one of these, your compass will take you to the lower floor where you’ll walk alongside a missile.
Turn right from the missile and enter the large office where you’ll find the firing component. Walk a few steps ahead to find the kit placed inside the cabin.
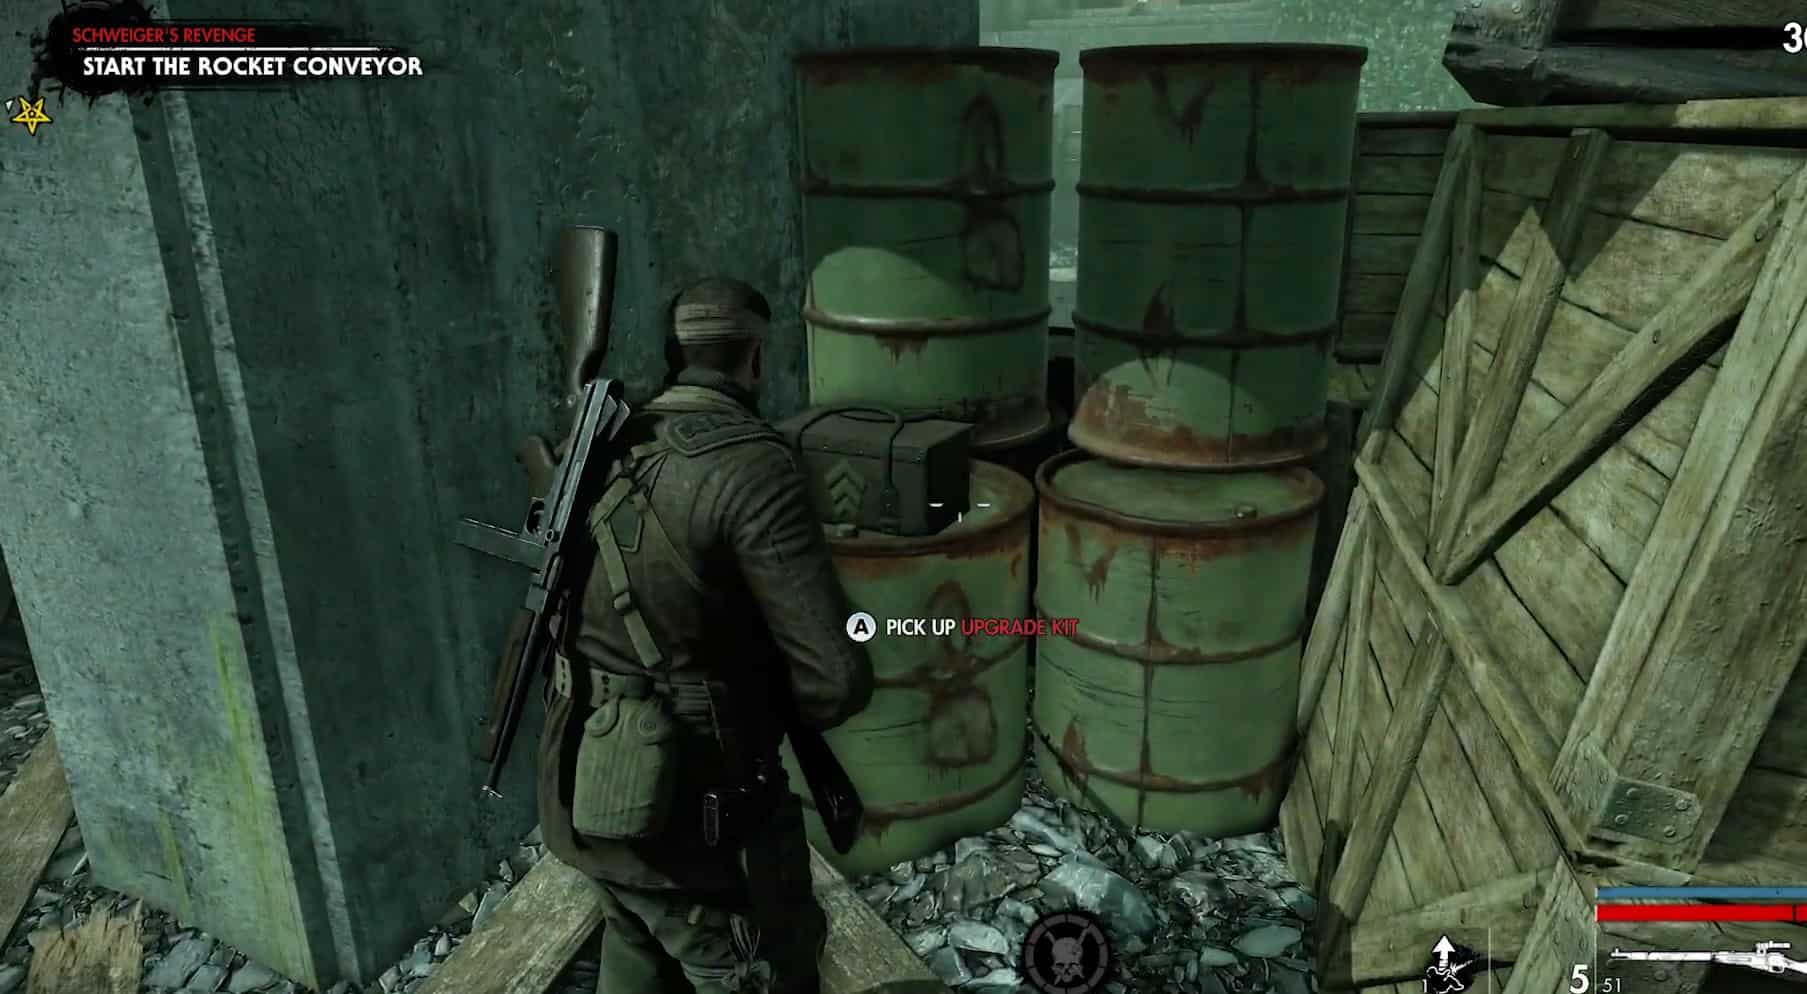
13. Schweiger’s Revenge
After you enter this area, continue on the path near the sandbags. There will be a burning half-track in the open area. The upgrade kit is on a barrel under the overpass to your right.
Zombie Zoo Upgrade Kit Locations
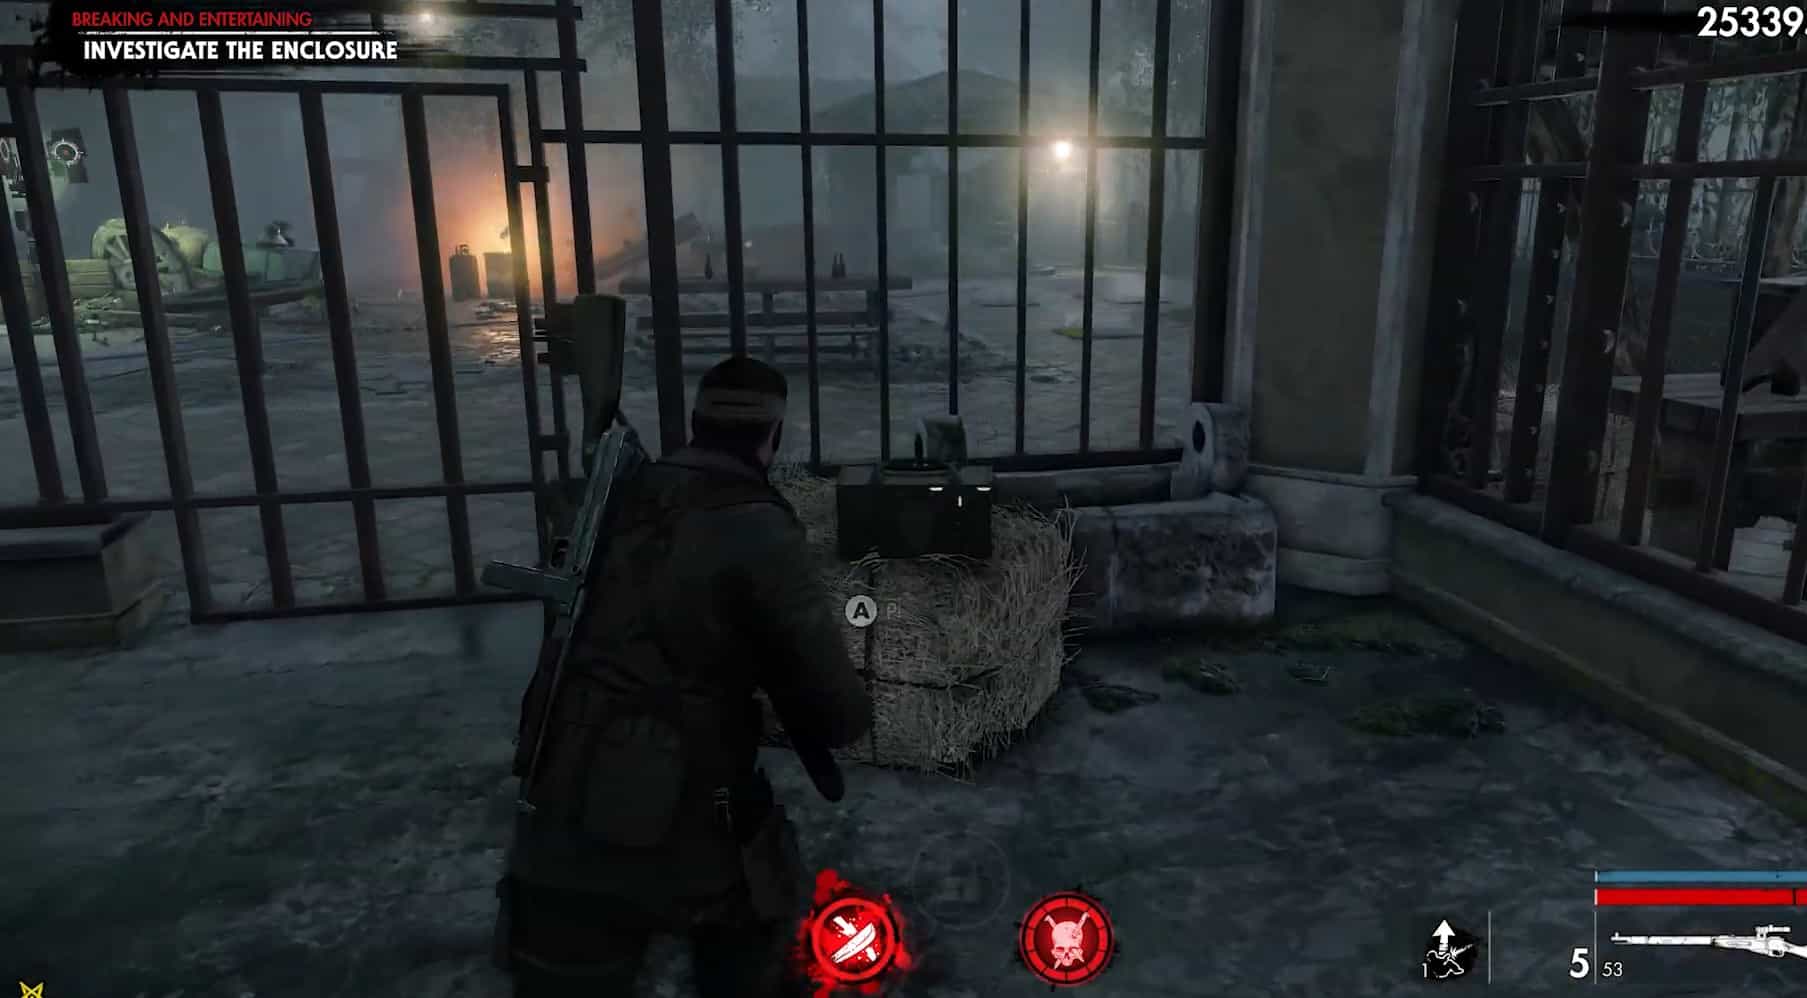
14. Trouble At The Zoo
When you are going to deactivate the last breaker, you will have to go through some large cages. The upgrade kit will be in one of these cages, placed on a small table.
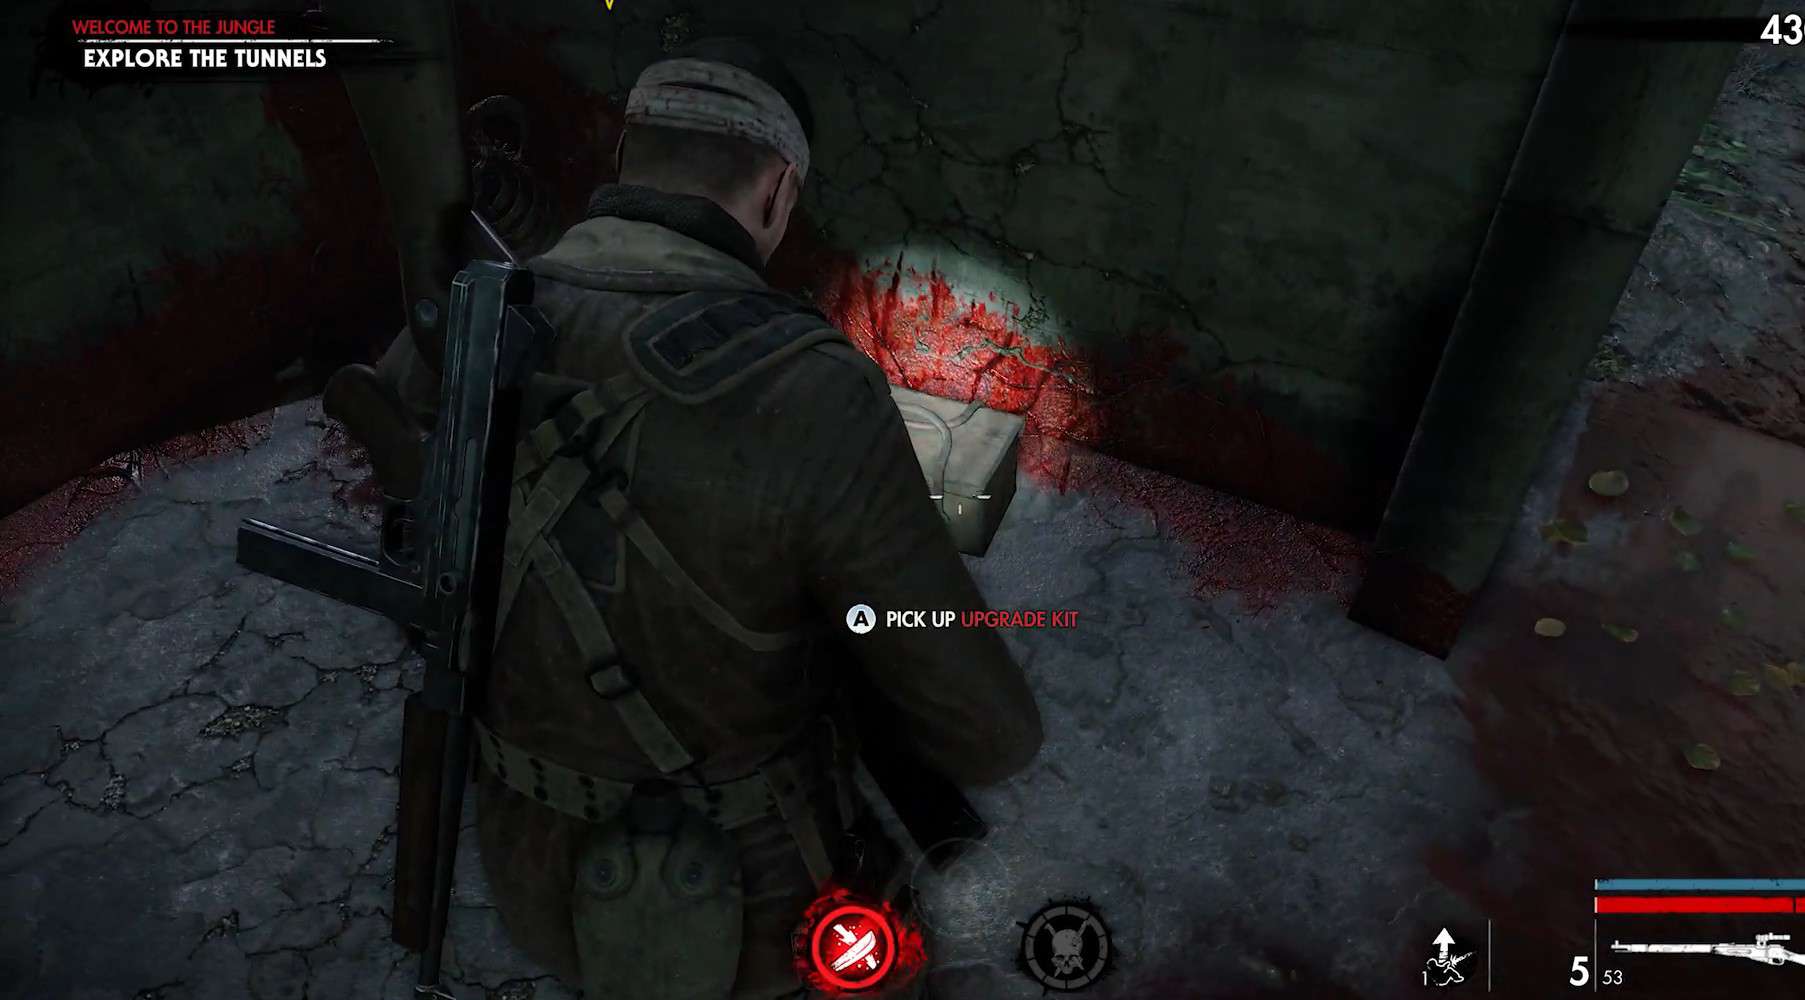
15. Welcome to the Jungle
In this area, there is a bunker in the second enclosure. The upgrade kit is on the floor on the right side.
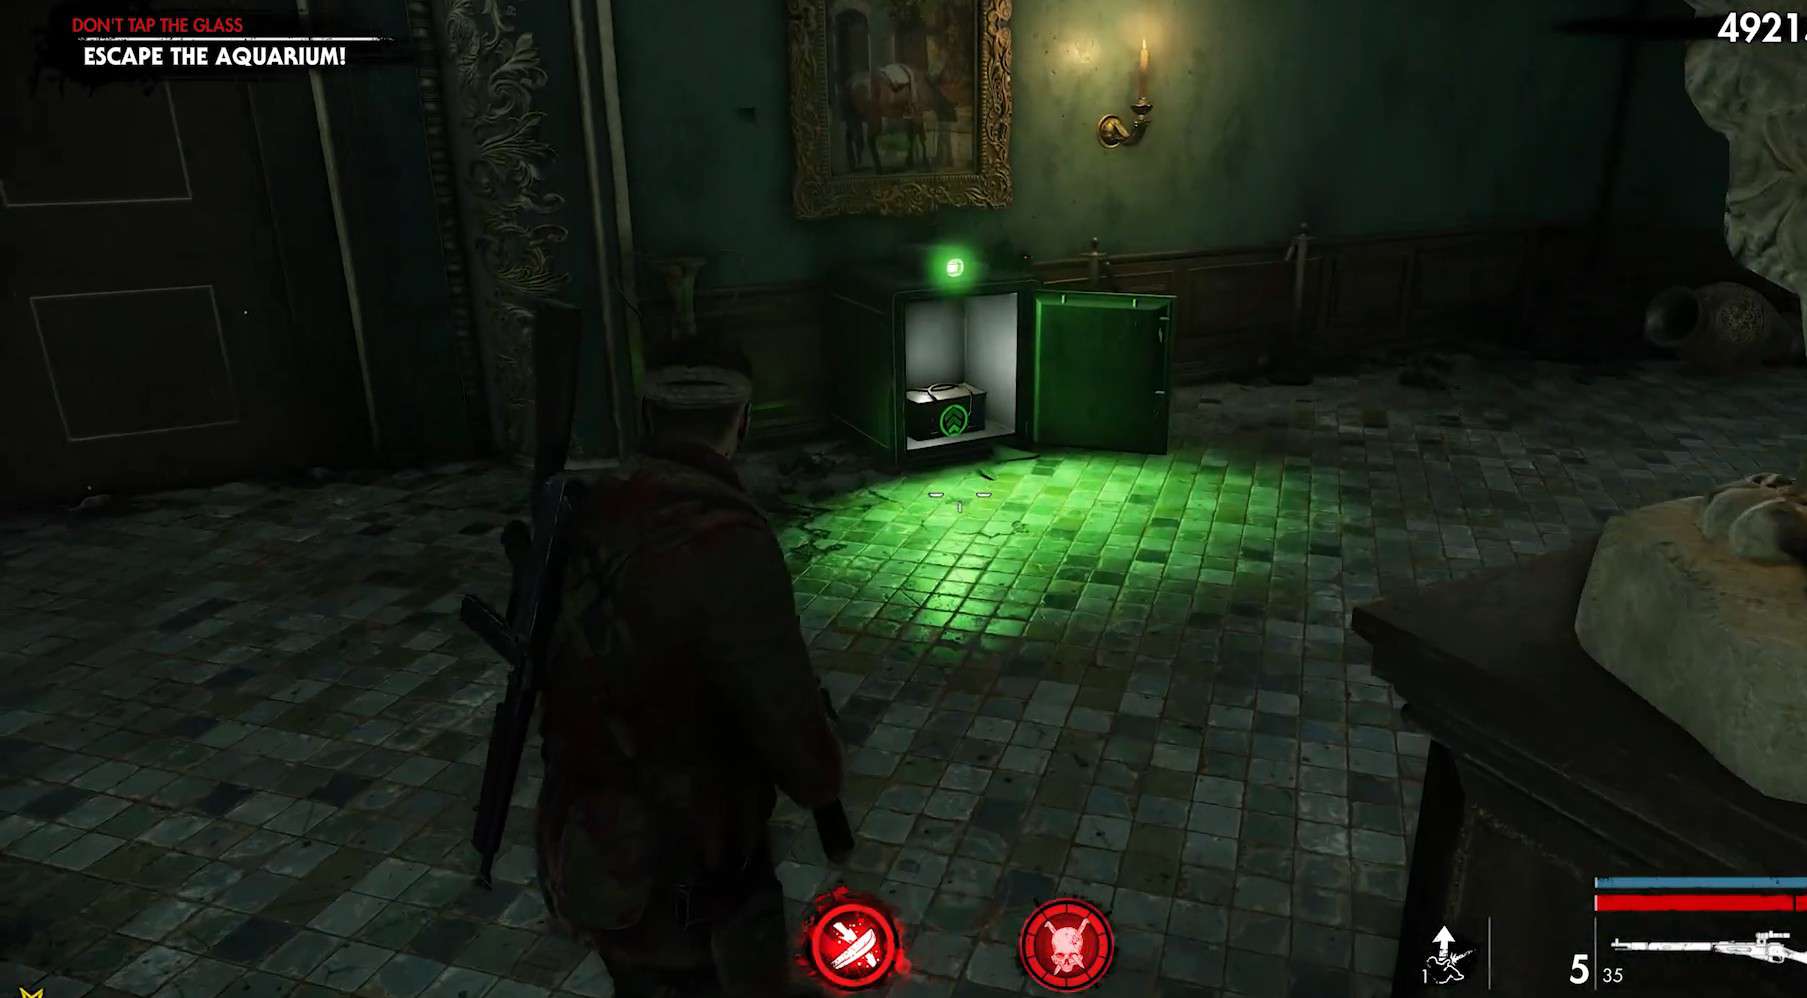
16. Don’t Tap the Glass
After exiting the room with the heroic action, you will find the upgrade kit infront on the right inside an open safe.
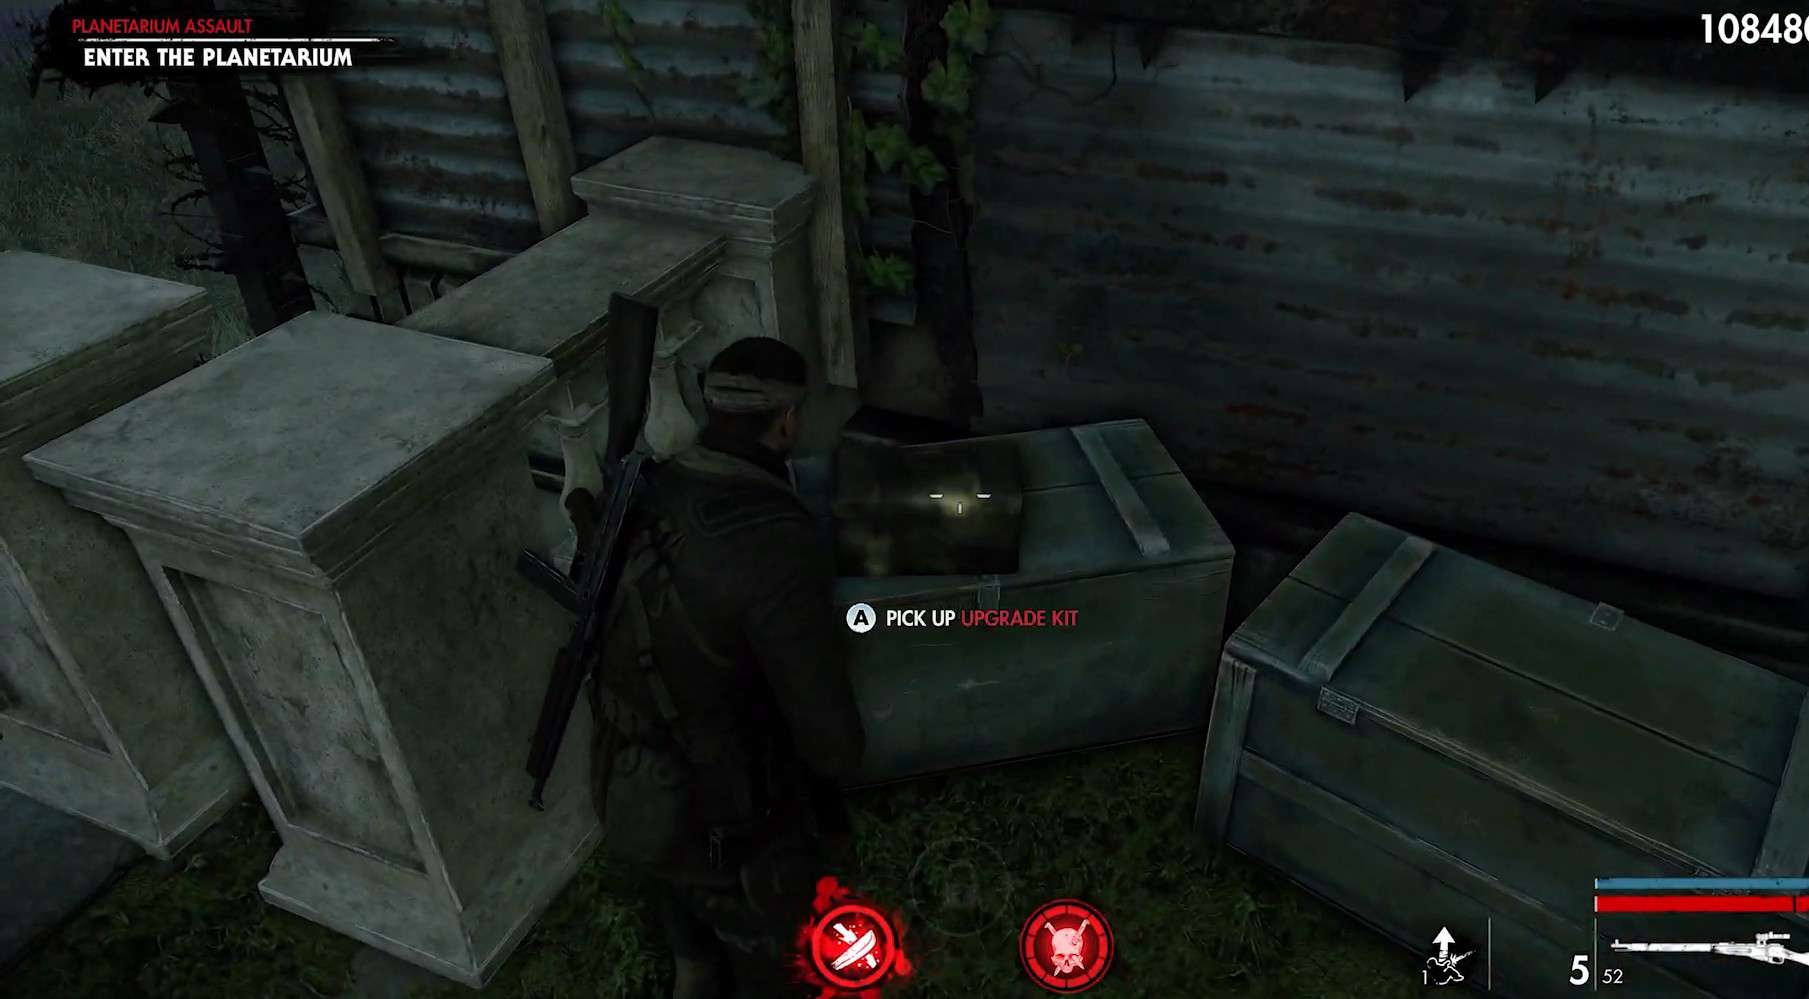
17. Planetarium Assault
Before trying to enter the Planetariums, look to your left (just before the door) to find two briefcases. The kit will be placed on the left one.
Rotten Coast Upgrade Kit Locations

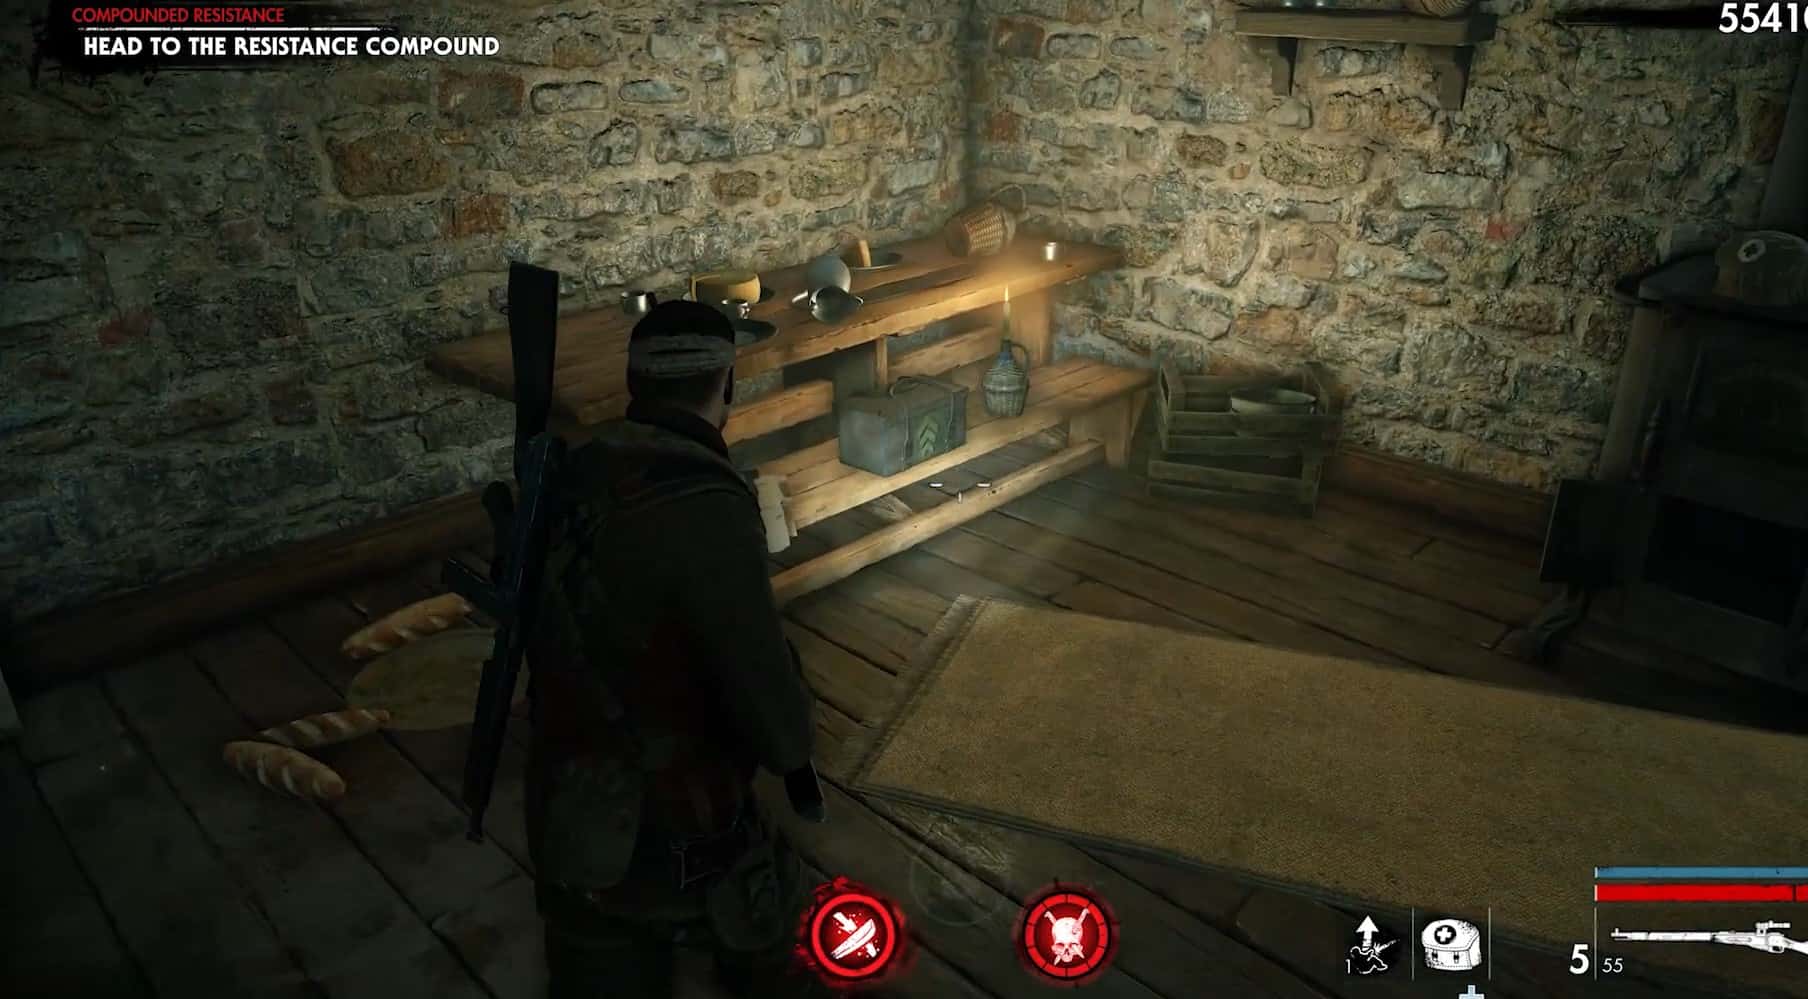
18. Compound Resistance
In the area, climb down towards the resistance compound. When you reach the bottom, go all the way to the right (past the tank). At the end, there’s a small house with a rooster weathervane. The upgrade Kit is inside on a bench near a stove.
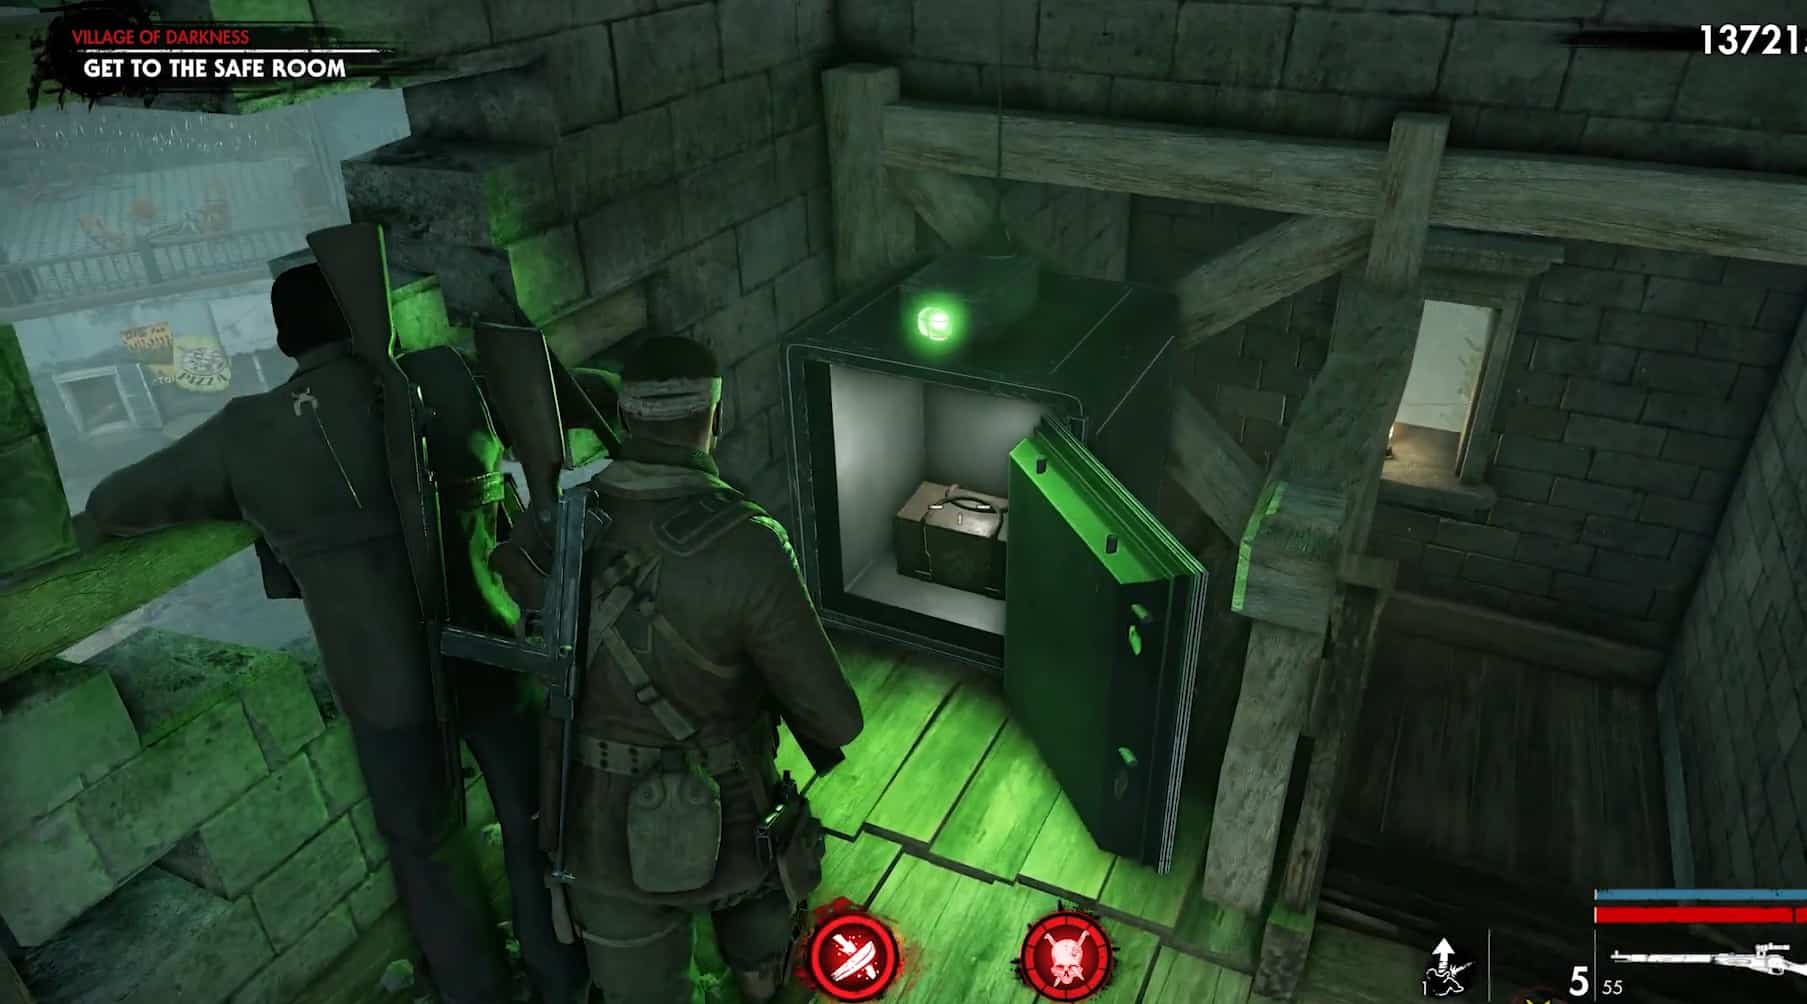
19. Village of Darkness
After saving the resistance fighter, he will open a safe. You will get the upgrade kit as a reward inside the safe.
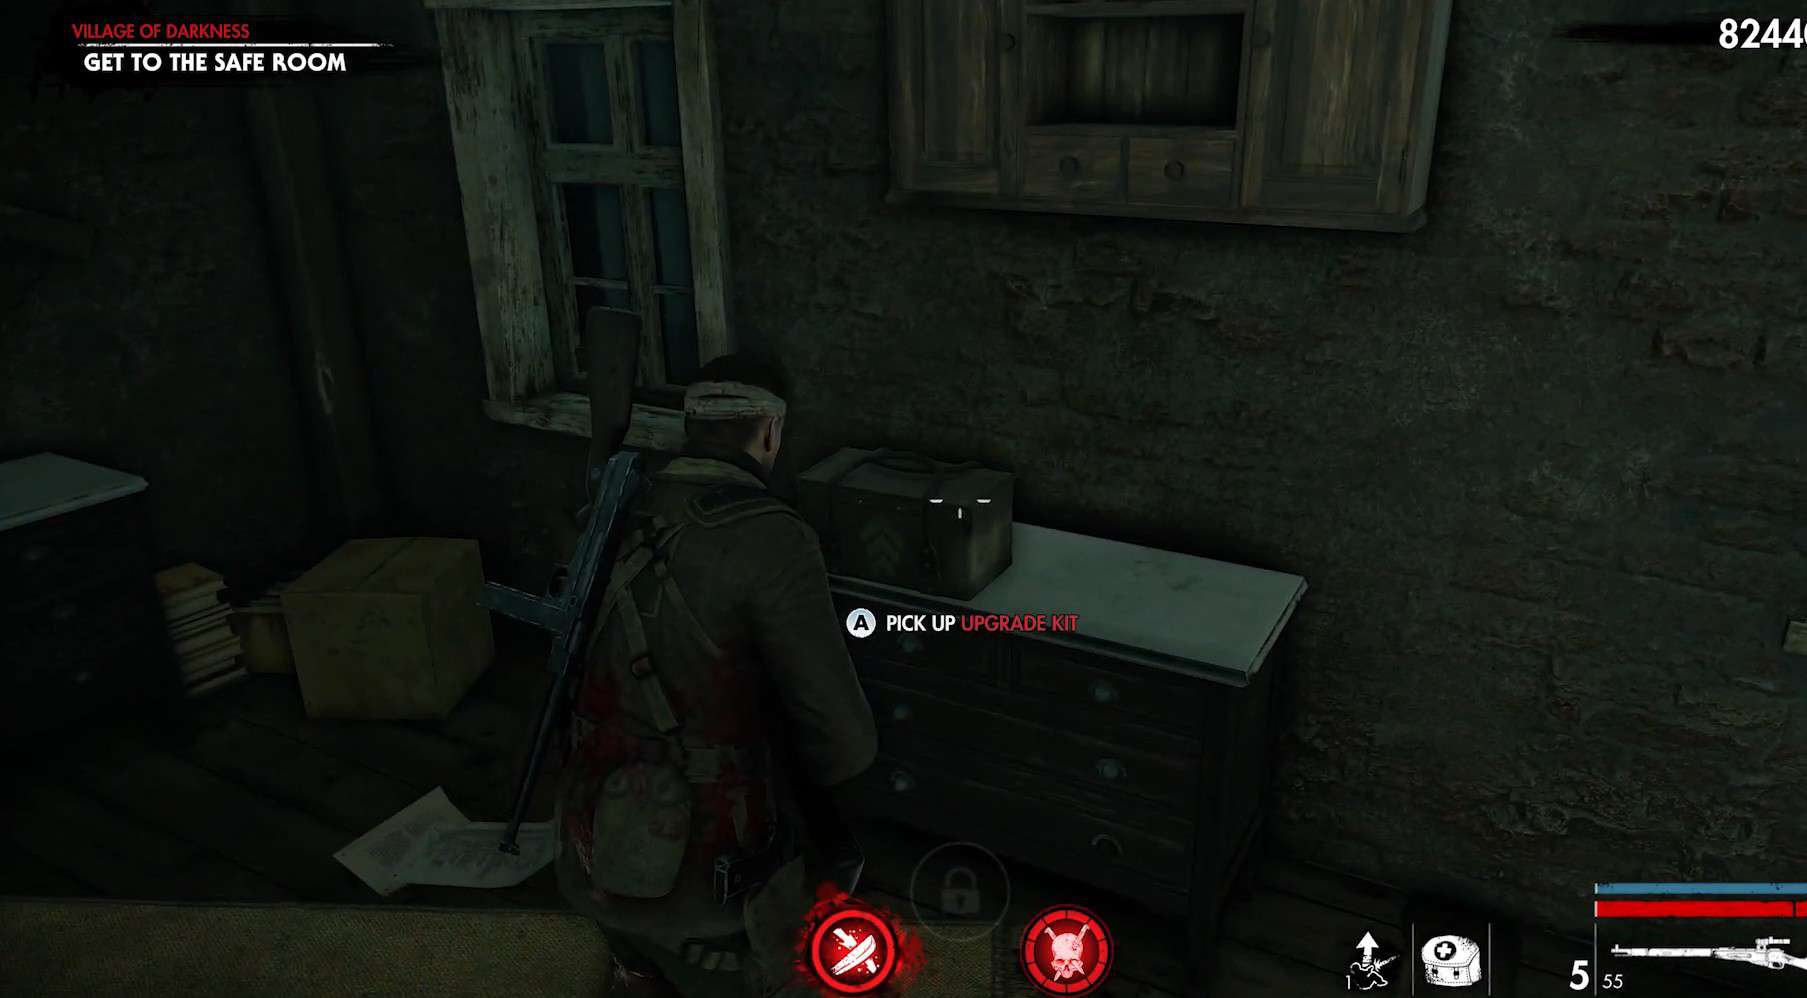
20. Village of Darkness
To find this kit, head to the safe house. To the right of the safe room is a two story house. Go to the second floor to get the upgrade Kit at the top of the stairs.
21. Trouble in the Styx
As your boat stops on your way to re-align the communication dish, you will need to deviate from the actual wooden path. Go a little left and wade through the water to reach a small shack on the other side. Go through the door and see to your left to find the kit placed on a wooden box.
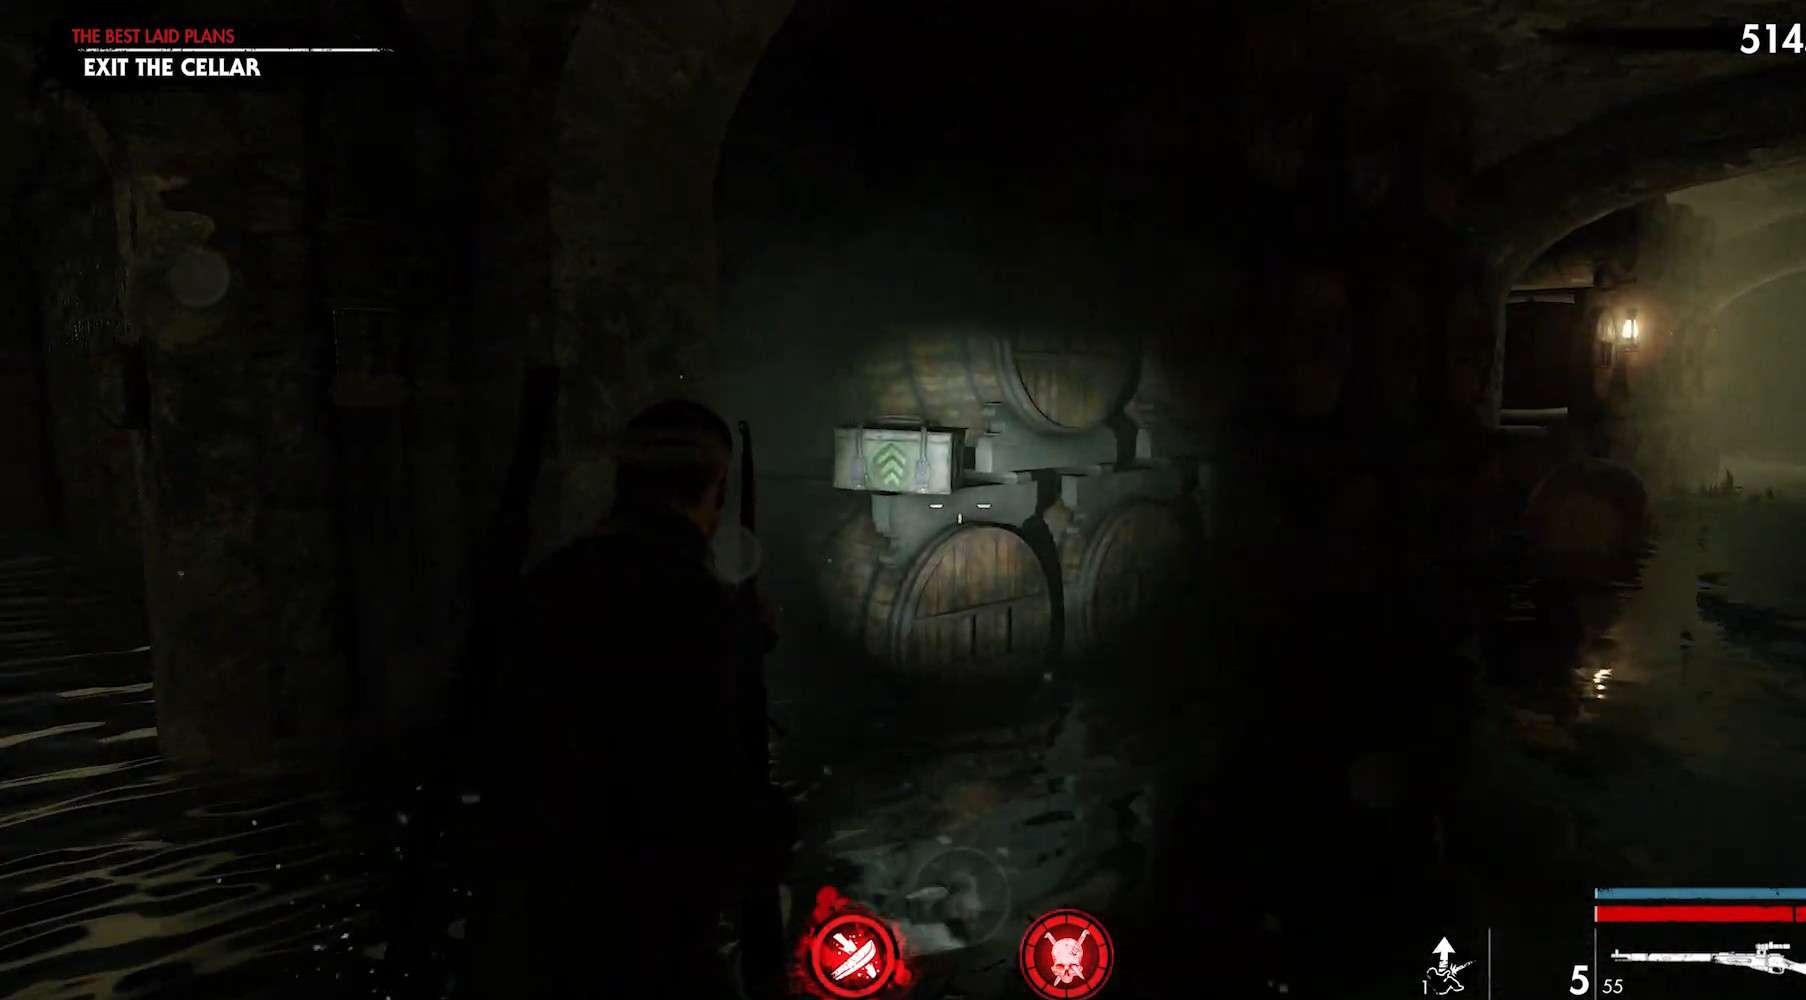
22. The Best Laid Plans
In the catacomb sewers, fight the buzzsaw zombie. After defeating him, continue pursuing your objective to find the cellar exit. As you turn left in the tunnels right before hitting the next objective, you will see barrels alongside the wall. The upgrade kit is on the left-hand side placed on one of these barrels.
Molten Nightmare Upgrade Kit Locations

23. Come Hell Or High Lava
While following the cultist’s trail, you will eventually reach a large gate entrance that can be approached by jumping through lava. Once you do so, you will get the “Repair the Water Pump” task.
But before that, turn right from the gate to enter the adjacent building (where a friendly NPC is standing). Go upstairs to spot the kit on the second floor, right beside the door leading to the balcony.
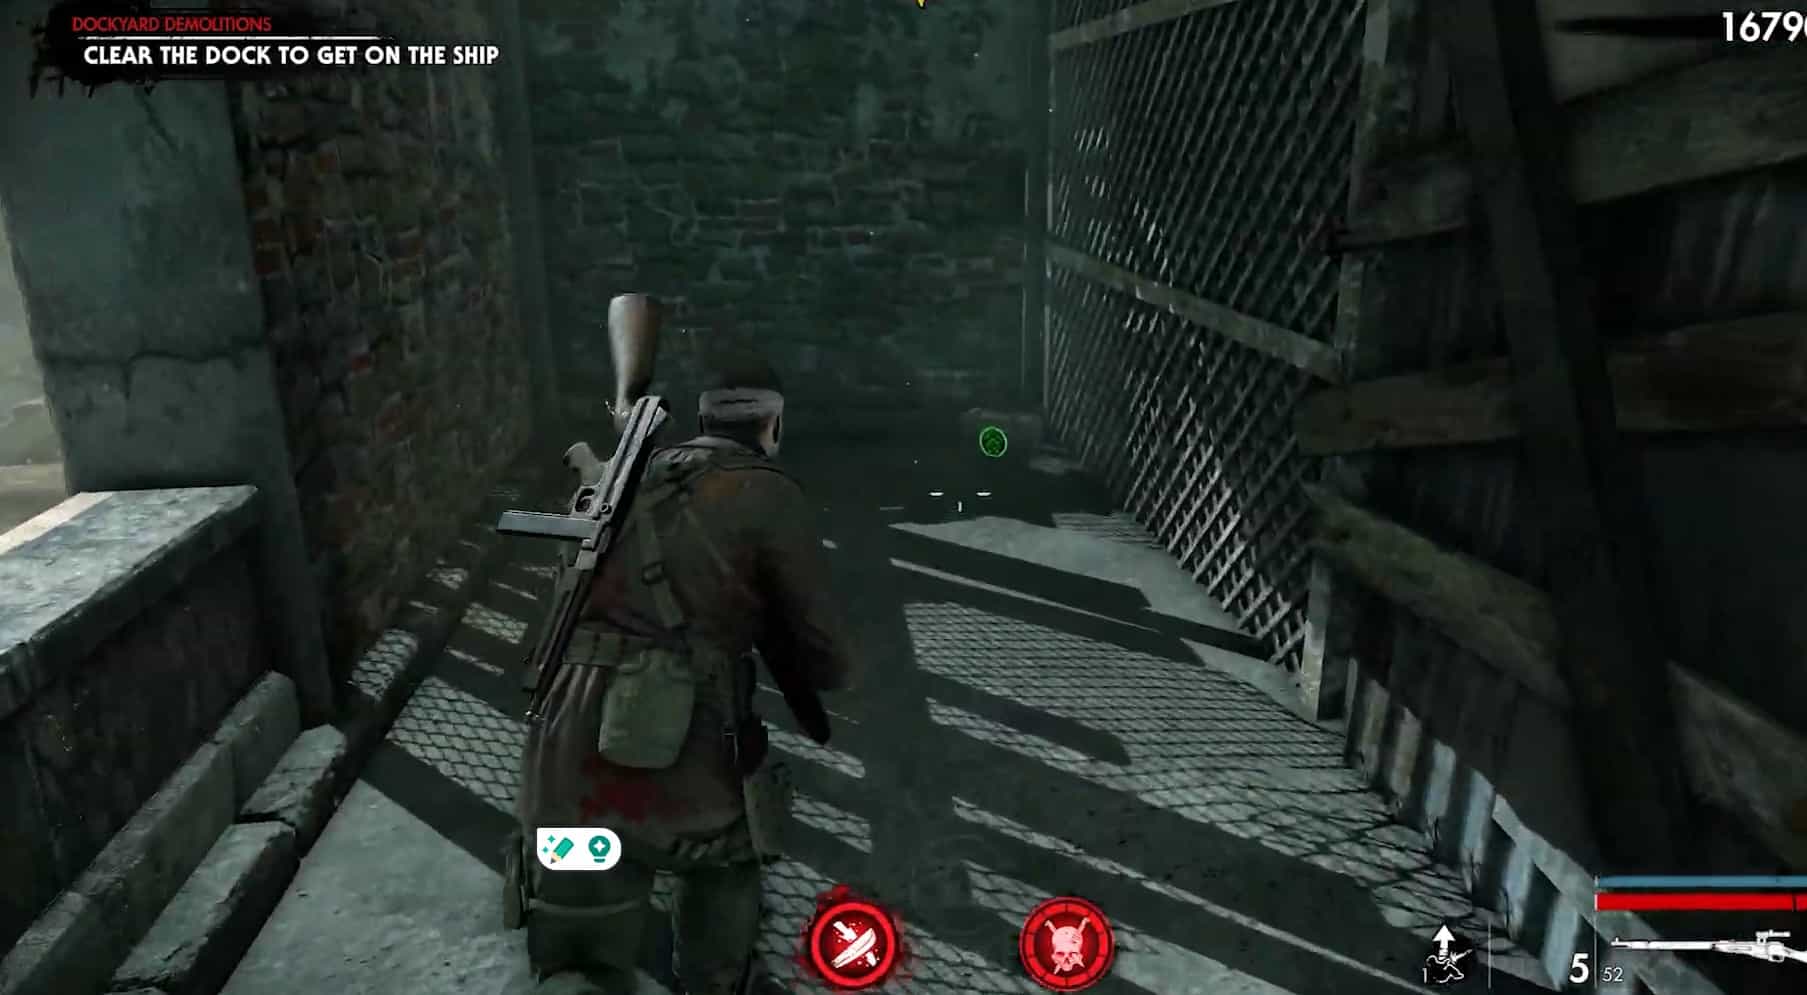
24. Hot on the Trail
Follow the objective path. Drop down to the docks and find the wooden stairs to the left. Turn left at the bottom and vault over the small stone wall. The upgrade Kit is on the other side, beside the left wall.
25. Night On The Town
While pursuing the “Head through the Memorial Garden” objective, keep to your right and move slowly from the entrance. On your right, you will soon witness a crypt. The upgrade kit will be clearly visible and placed inside one of its shelves.
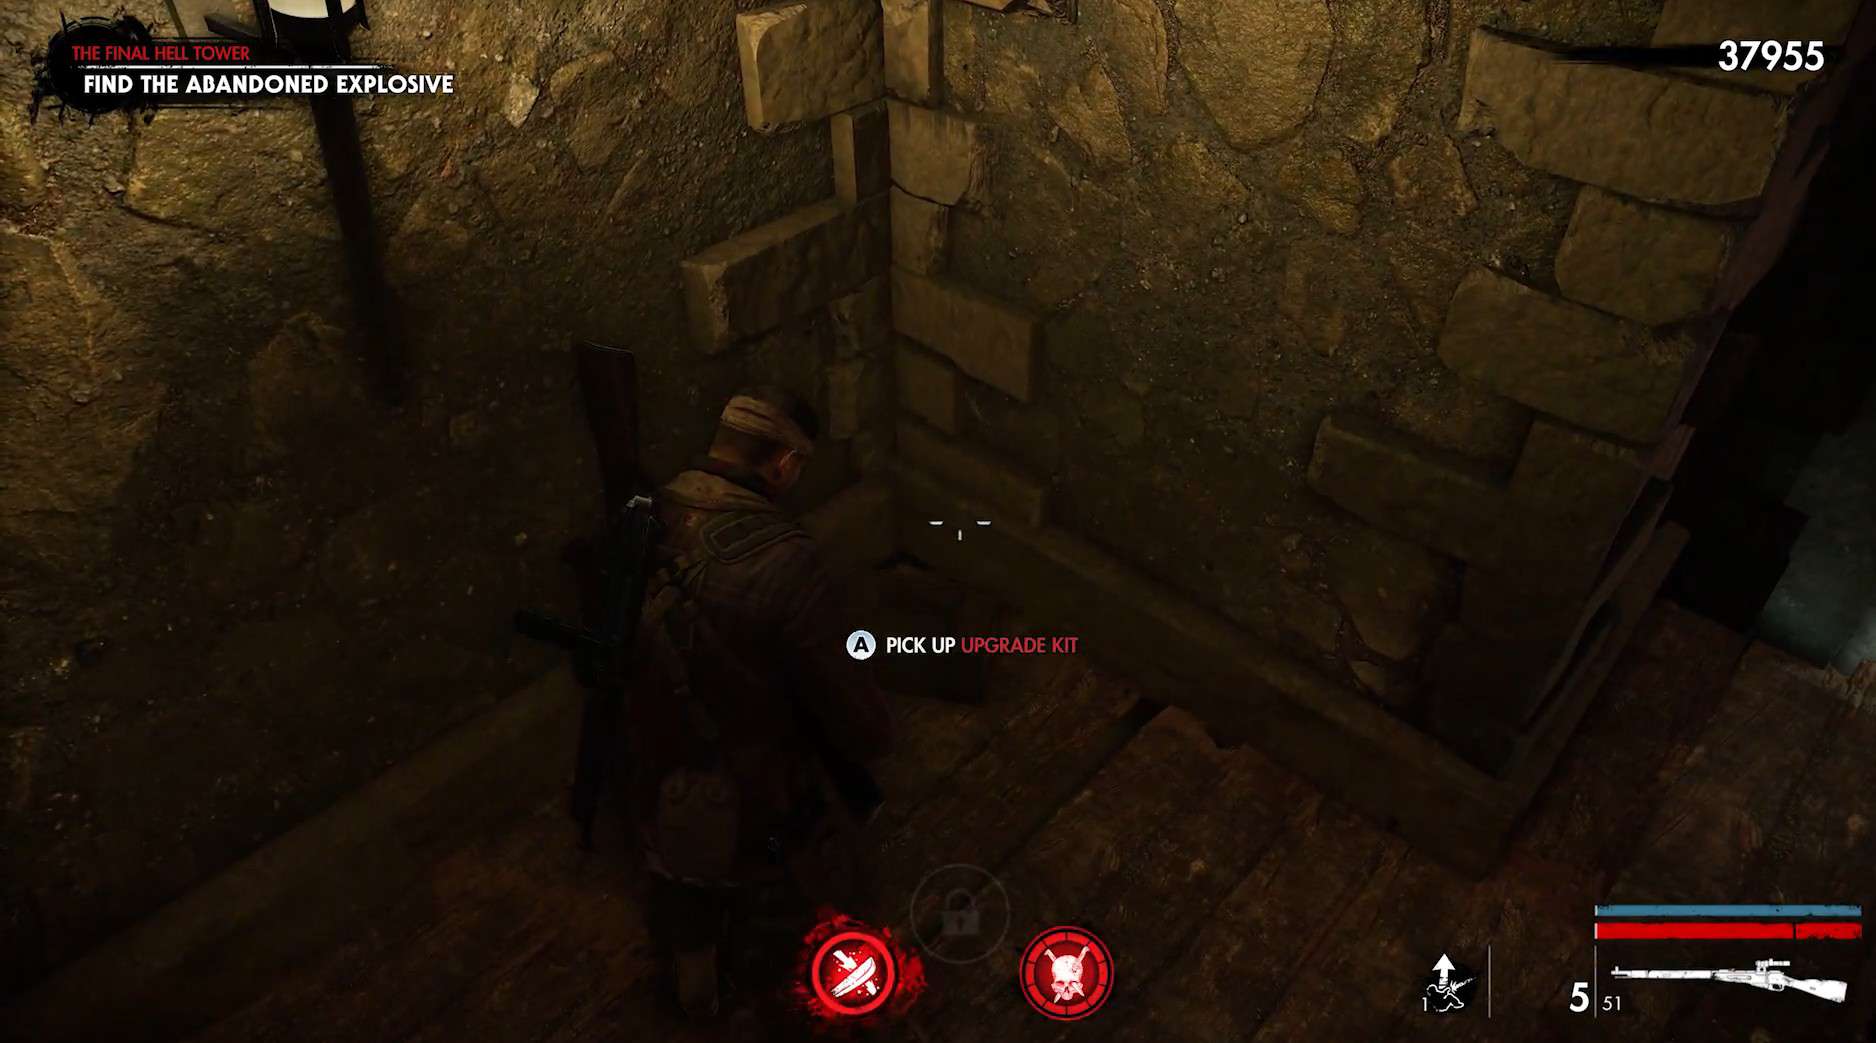
26. The Final Hell Tower
Make your way to the castle. After clearing the enemies, you reach the castle ramparts and go into the room where the giant armored giants came from. You will find the kit on the right corner side.
All Roads Lead To Hell Upgrade Kit Locations
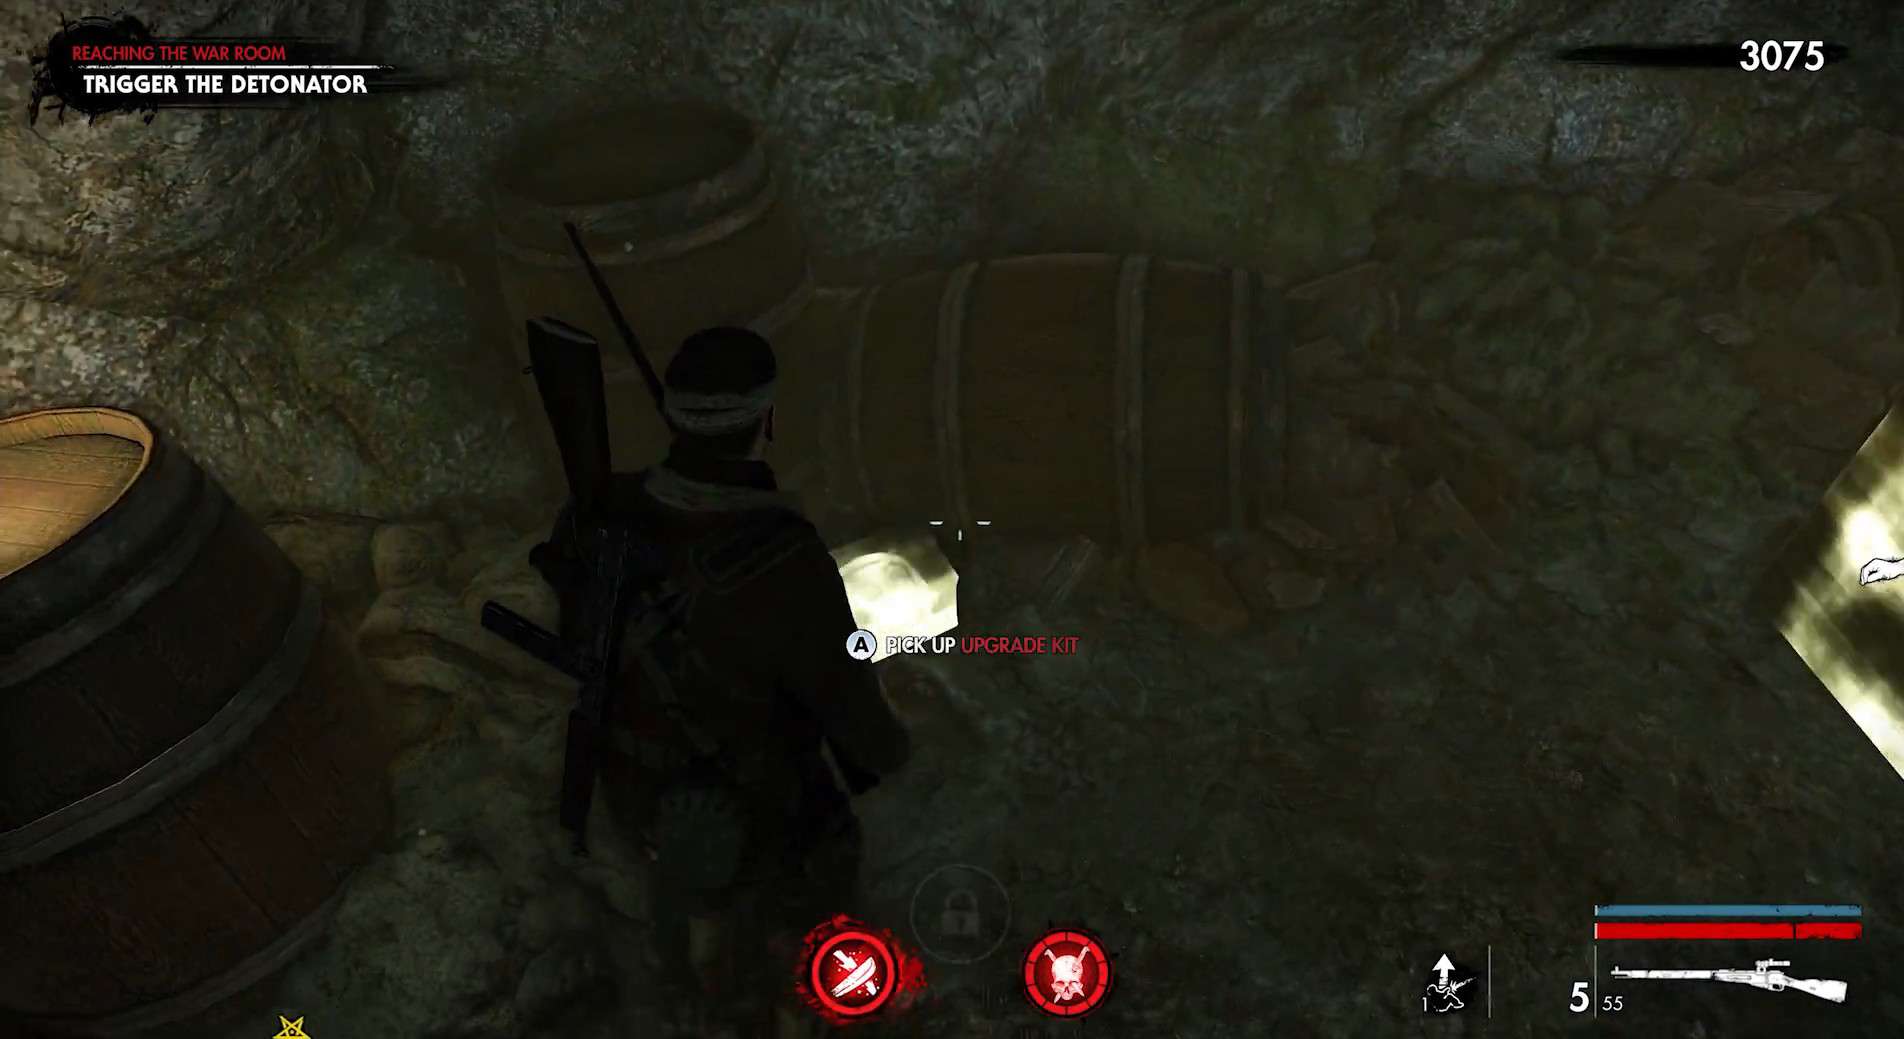
27. Reaching the War Room
Find the hut in this area. Directly behind the hut, there is an entryway and a small room. The upgrade kit is lying on the floor, between some barrels.
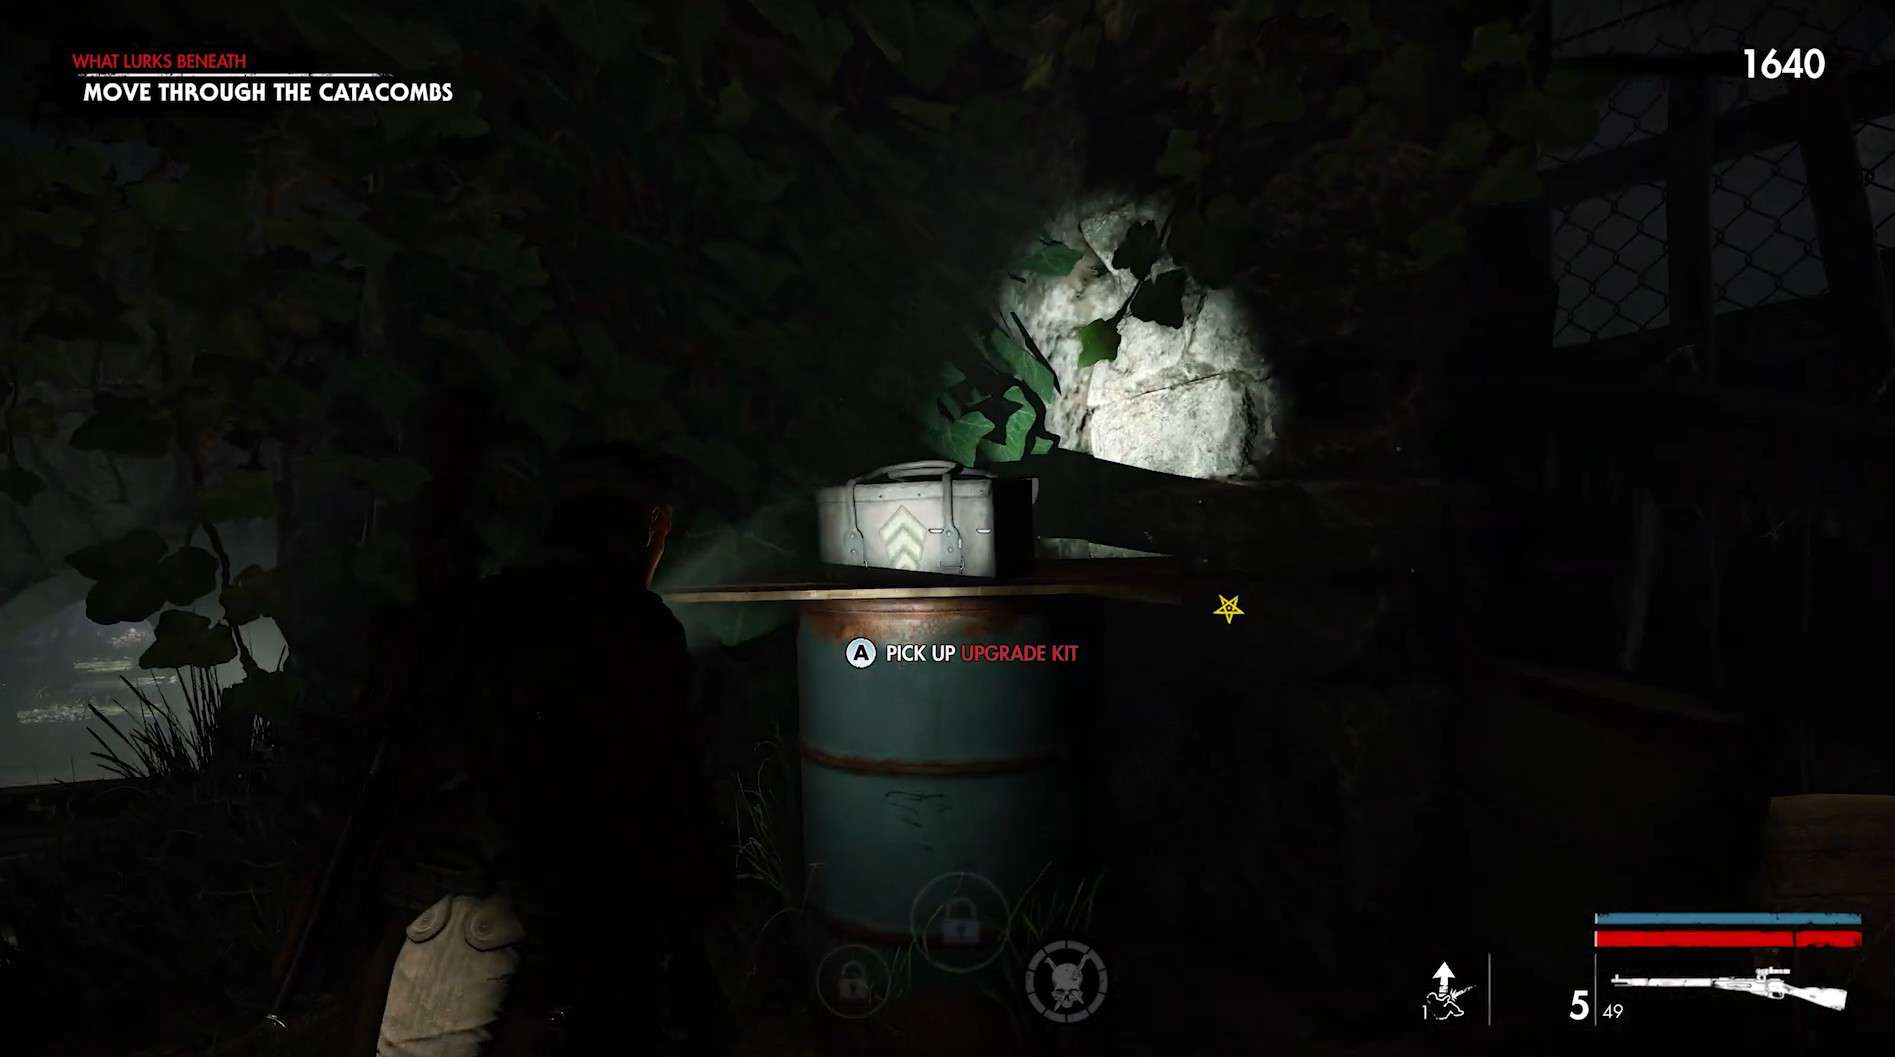
28. What Lurks Beneath
Keep going through the long tunnels until you are able to change your direction to either right or left. From there, walk a few steps to your right and wade through the water to reach the wooden walkway. Look to your immediate left, and you will see the kit lying on a blue barrel.
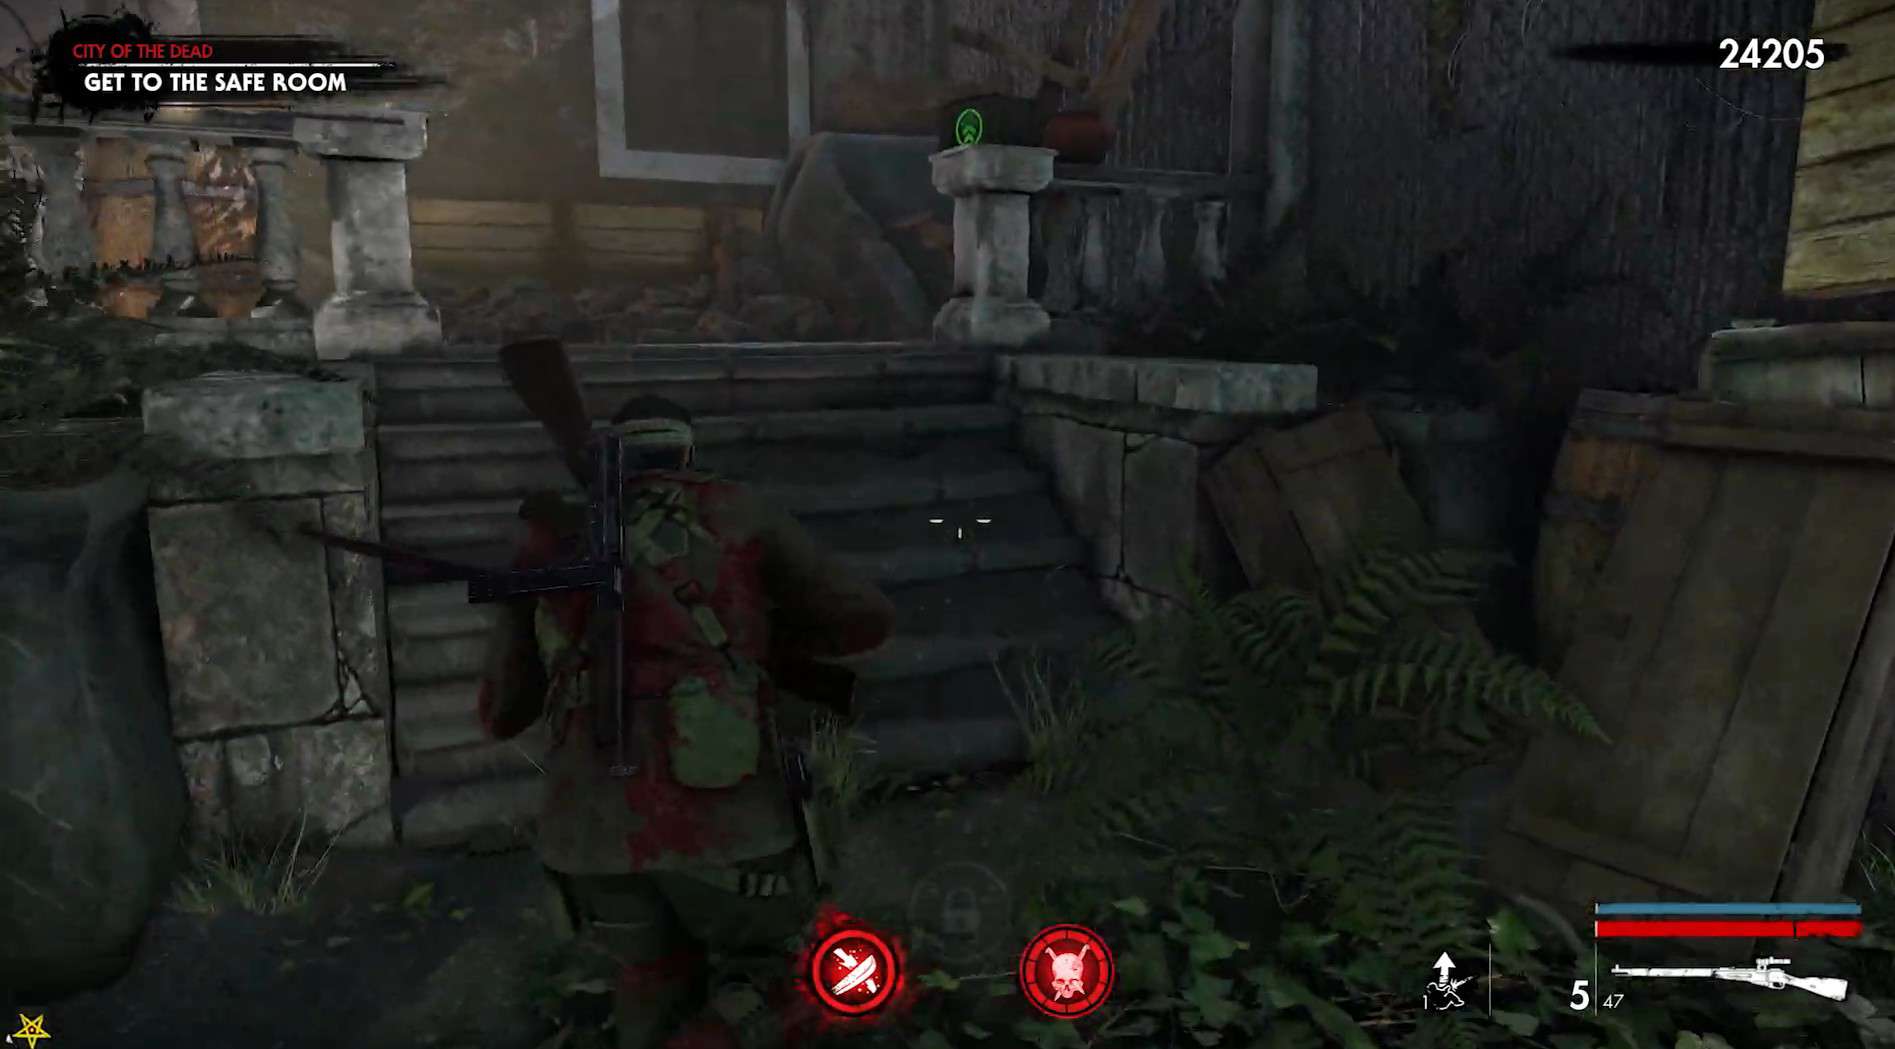
29. City of the Dead
At the end of this chapter, you will get the task of going to the safe room. Instead of doing so, use the wooden ledge/ bridge to climb and reach the other side of the rooftop area. The upgrade kit is right out in the open on a stone pillar.
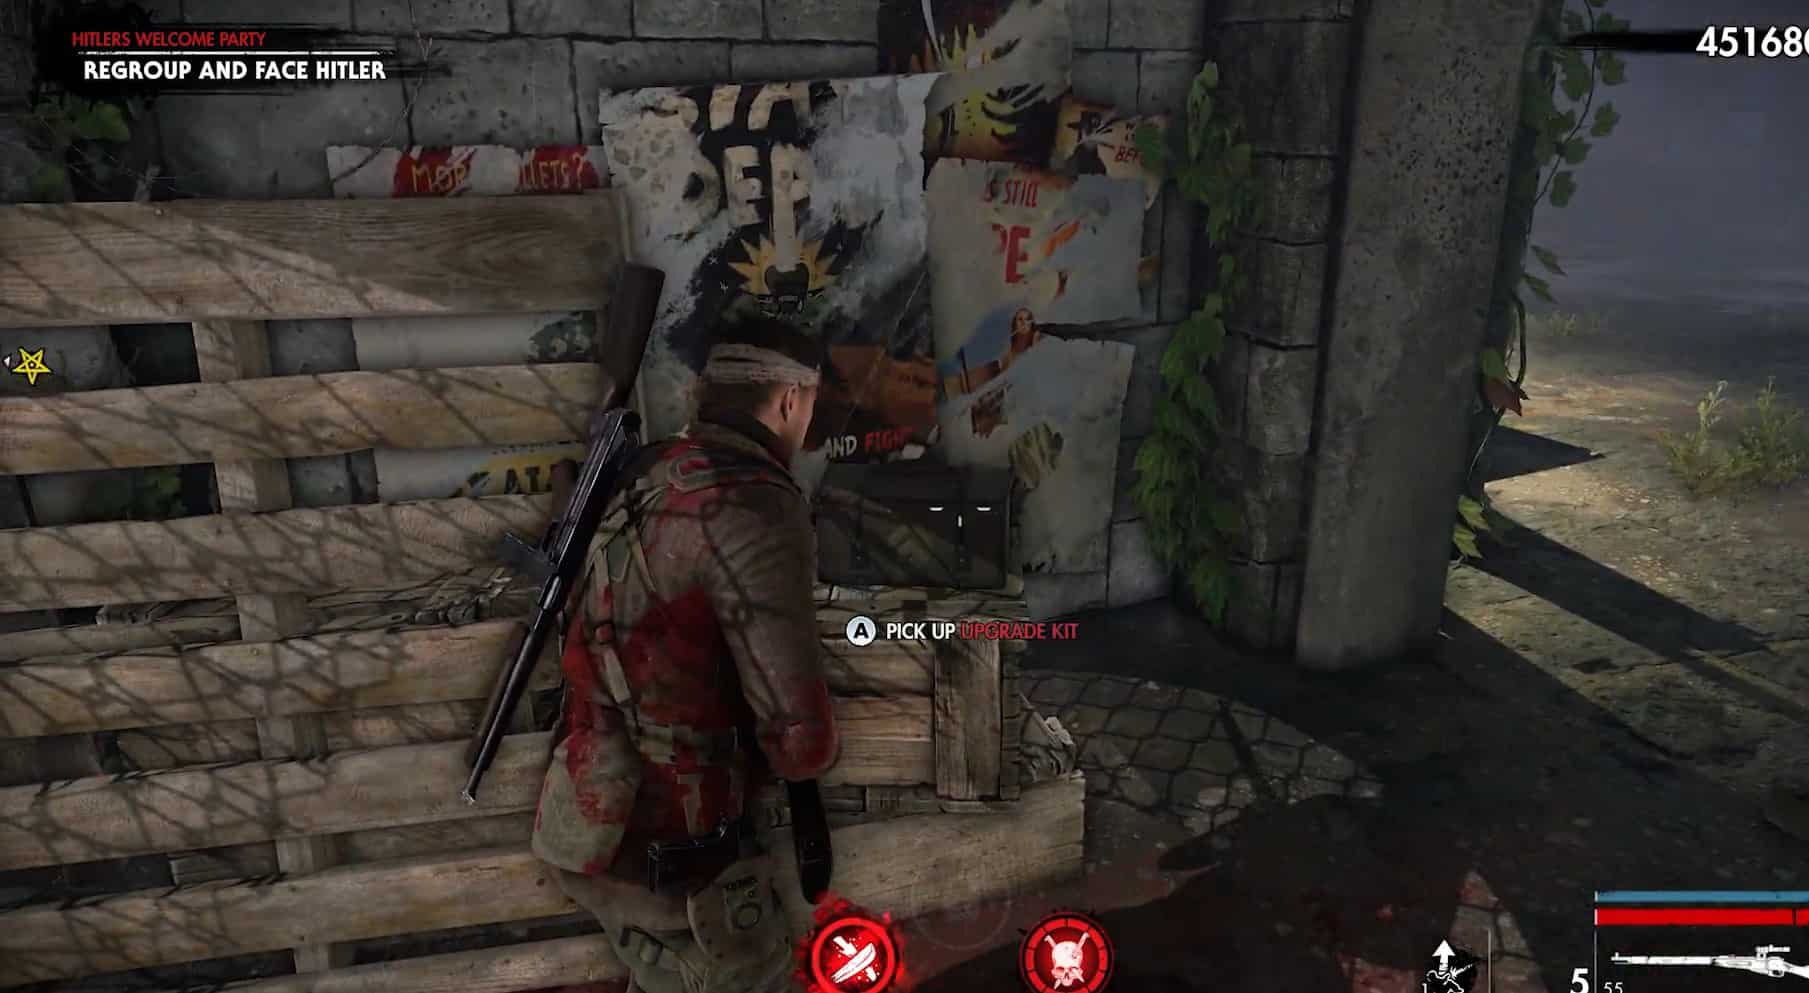
30. Hitler’s Welcome Party
To find this kit, exit the safe room and turn right. Go into the first entryway in front of you. It’s to the right of the car. The upgrade kit is inside the entryway on the left side.
Hell Base Upgrade Kit Locations


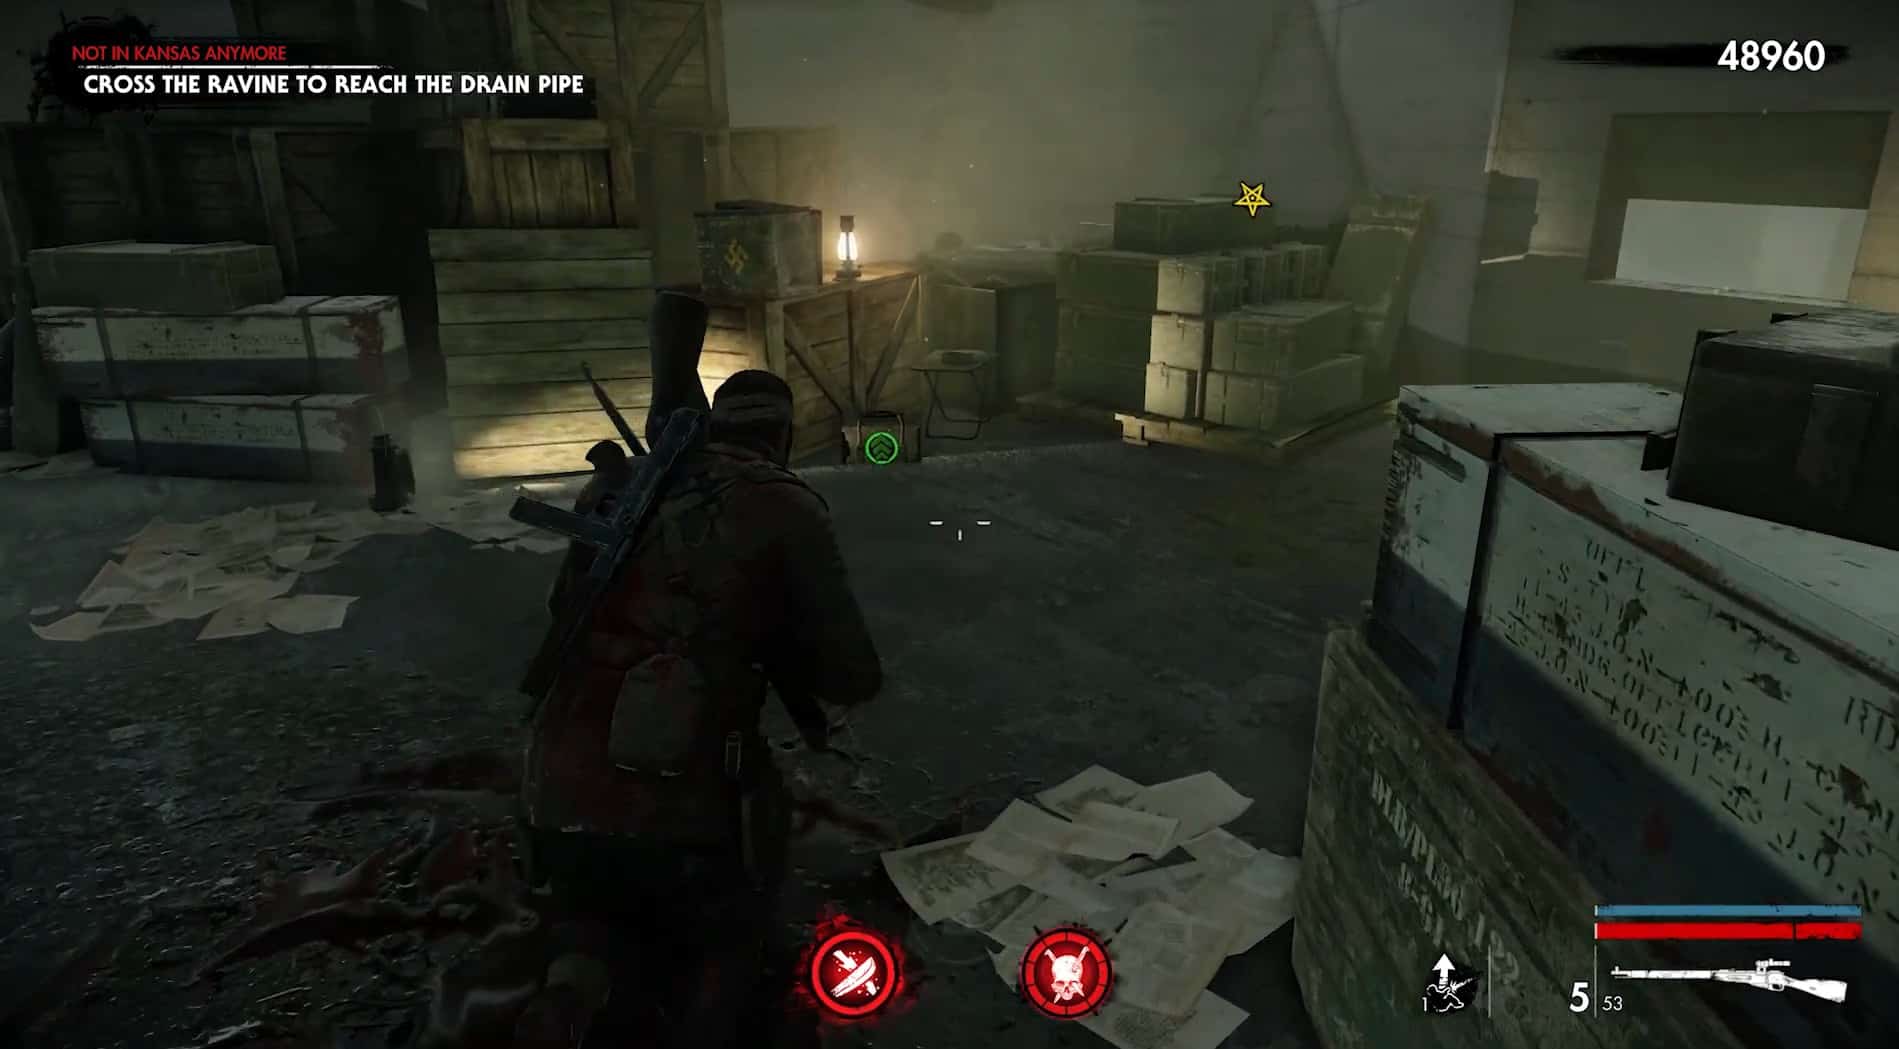
31. Not in Kansas Anymore
Go down the drainpipe and reach the bottom of the building. You will reach a wooden door. Open it and turn right inside. The upgrade kit is next to a resistance soldier
32. War Machines
After killing the butcher and the horde sealing the gate, go past the gate and into the holding cells. Go to the back of the area, past the cell with the zombie, to get the upgrade Kit.
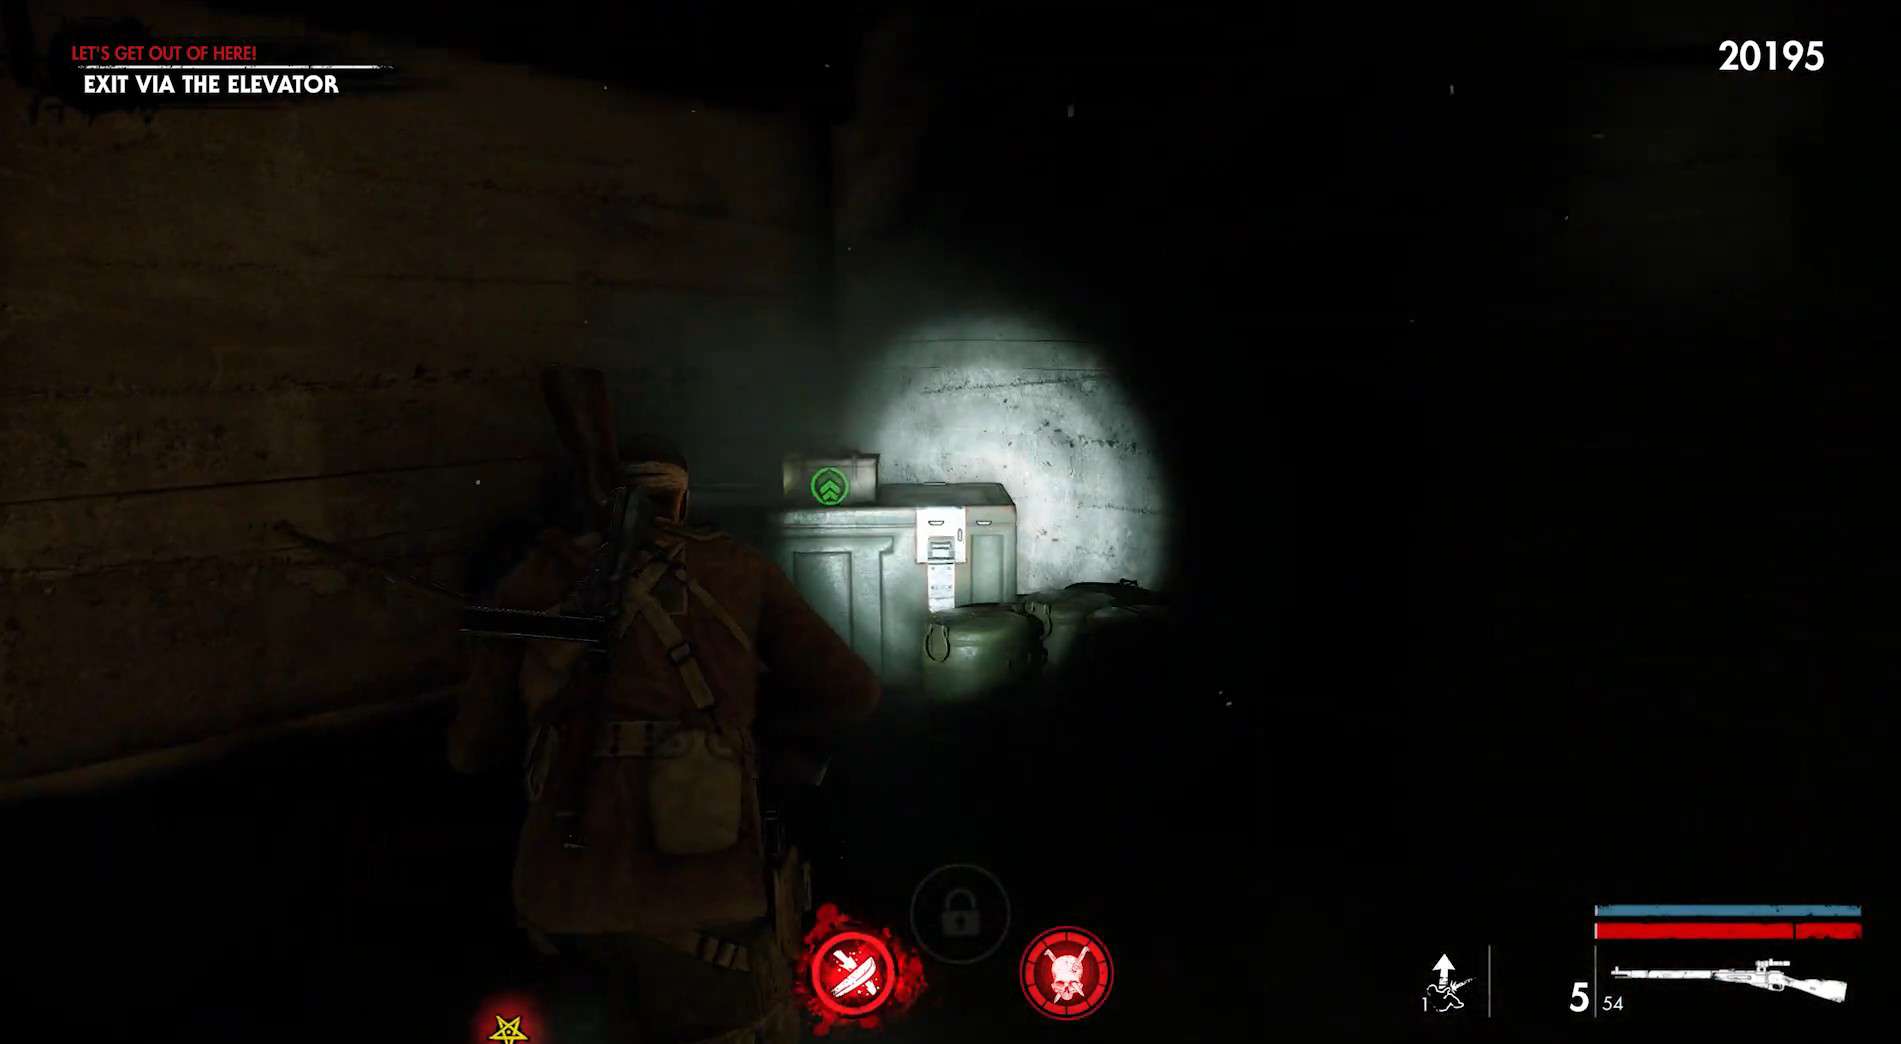
33. Let’s Get Out Of Here
Once you have successfully defended the elevator, you will notice two doors on both of your sides. Head through the left door, and you will find the upgrade kit in a corner.
34. Steal the Relic
After exiting the safe room, you will see a relic floating in the middle of the area. Move forward in the same direction and go under the bridge from where Schweiger is looking over the relic and its surroundings. Turn right from the machines to spot the kit in a corner.
Hell Machine Upgrade Kit Locations
35. Obliterate Hitler’s Army
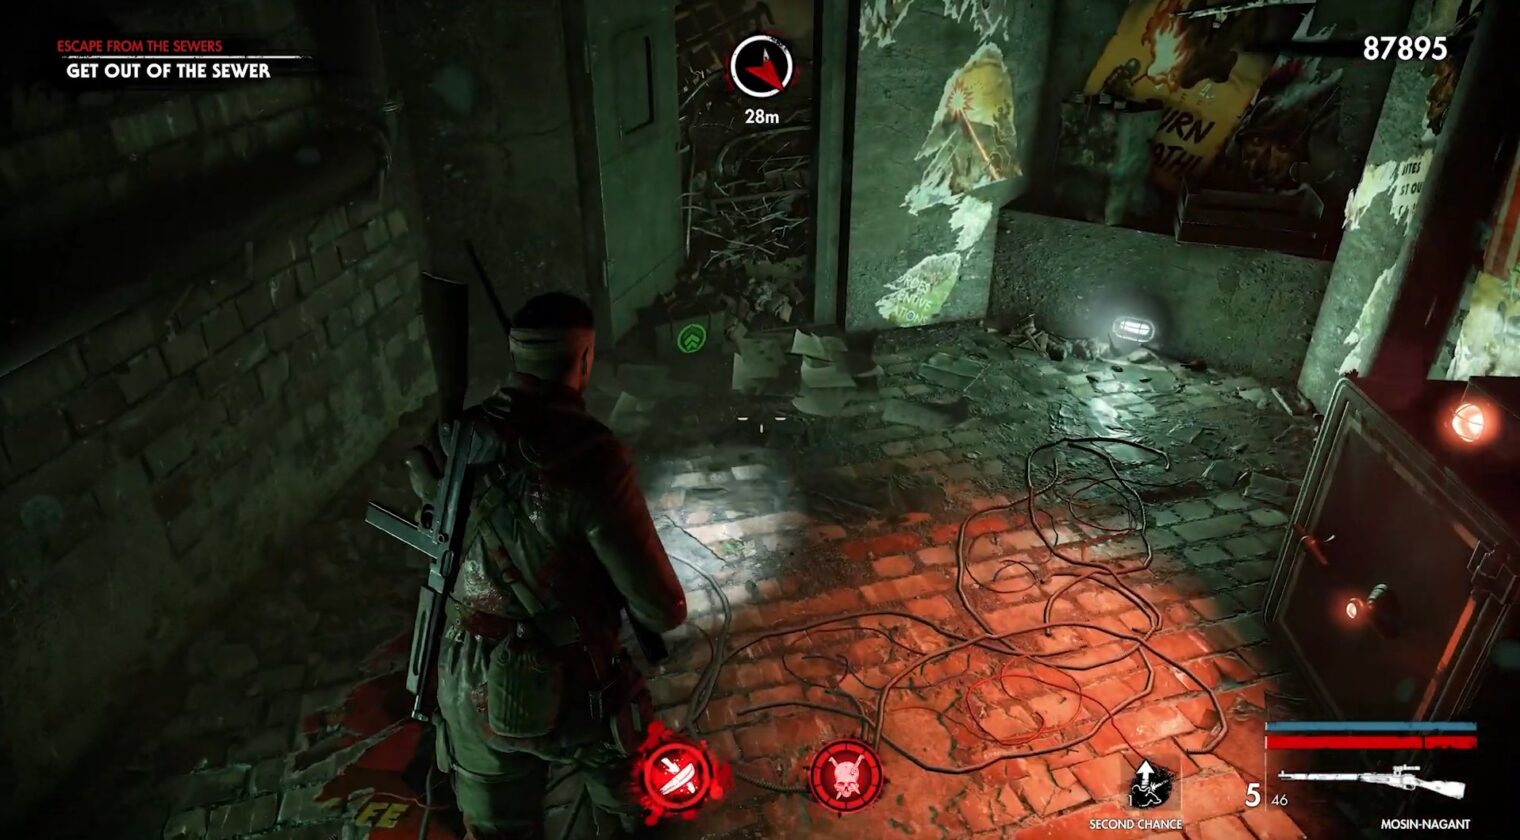
Once you’ve defeated Hitler’s tank, you will be tossed into a sewer full of blood streams. Before getting out from the other side, go left into the tunnel and paddle through the blood.
Finally, turn right and use the ladder to reach the upper floor. That’s where you will get the last upgrade kit in Zombie Army 4 Dead War.