The latest raid in Destiny 2, courtesy of the Shadowkeep Expansion, is a truly engaging and engrossing excursion onto the moon; featuring puzzles, exploration, treasure chests, and bosses, you’re most likely going to need some assistance, and that’s what this Destiny 2 Garden of Salvation Raid guide is here to do.
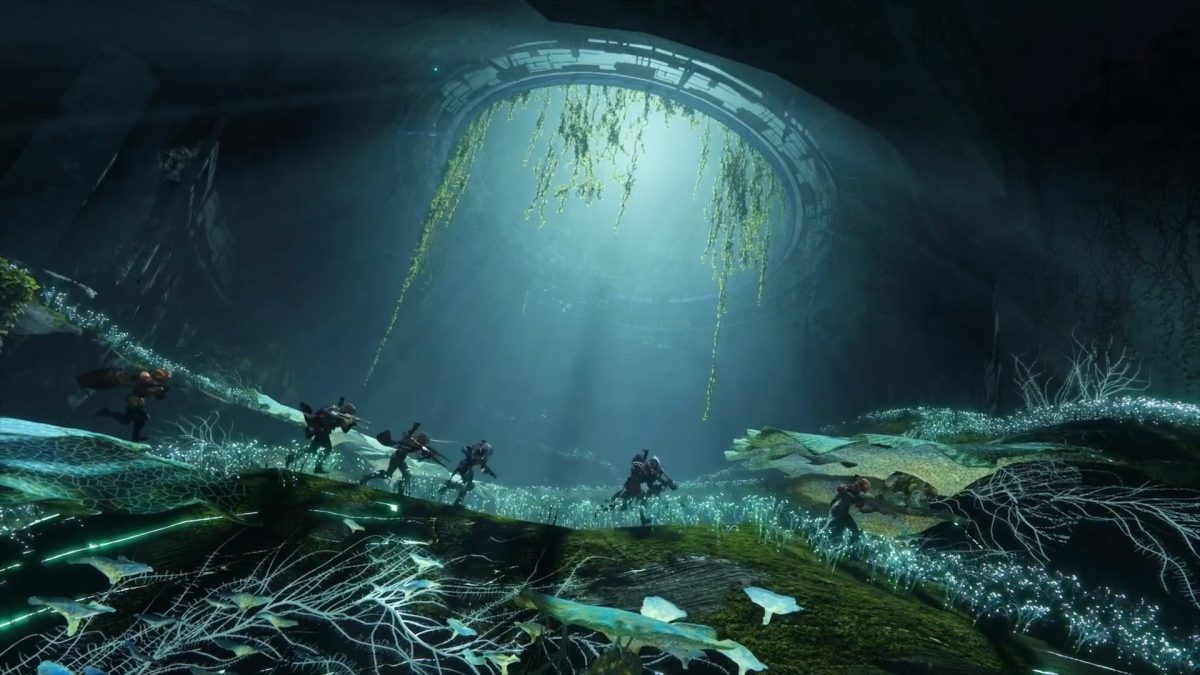
Destiny 2 Garden of Salvation Raid
Before we get to the nitty-gritty, you should be made aware of the minimum requirements needed to actually attempt Garden of Salvation raid. The raid requires a minimum power level of 940 and it goes without saying that this is the most challenging content in this expansion, you will need a full fireteam of 6 players.
Recommended Weapons:
- Huckleberry
- Longshadow
- Wendigo
- Recluse
- Izanagi’s Burden
- 21% Delirium
- Mountaintop
- Wardcliff
- Riskrunner
Recommended Sub-classes:
- Warlock: Well or Dawnblade (armor can be of your choosing)
- Hunter: Tether with Perfect Amor
- Titan
If you are still unsure about how to set up your build with the above-given recommendations, check out our Destiny 2 Builds guide.
After every large area, there are checkpoints, so you have the space needed to head back to the Tower to decrypt any engrams you may have collected along the way.
Without further ado. Let’s get to the main portion of this Shadowkeep raid guide.
Track the Artifact’s Signal (Consecrated Mind)
Your first encounter is with a giant Harpy known as the Consecrated Mind. This creature will be stitching up a Minotaur, and you will begin the encounter by killing that Minotaur.
The harpy, initially, is immune to all damage, so don’t waste your time firing at it. The harpy will drop cubes onto the ground, picking one up will give you a Voltaic Overflow buff. You cannot leave these on the ground as they will wipe you if left on the ground for 5-6 seconds.
However, you mustn’t consume more than one either, that, too, will kill you. The Voltaic Overflow will remain in effect for 2 minutes and 30 seconds (afterward, you can take it again).
The objective of this area is to form a human chain; there are a total of 5 sections, each having a small cube. The players must form a link between the cube and the closed-off section, doing so will open the next area. If a portion of the chain is red, that means a player is too far away and must reposition themselves.
The best way to approach this is to divide the team into two: 2 players should move onto the next area and deal with any enemies that spawn there; the remaining 4 should stay with the boss.
Once one of the players has gotten the Voltaic Overflow and has opened the closed-off area, they should join the group of 2 that’s gone on ahead. This group will encounter several enemies above, below and in front – two Cyclops.
Killing the Cyclops will have it respawn in the area with the harpy (the remaining players should concentrate fire on the Cyclops). In this room, there is a shield that can only be powered down once the Cyclops is gone; reform the chain with the players you have and open up the pathway to the next area.
One player should go on ahead to the next area. Every time you move forward, the harpy relocates itself to the area prior to the one most ahead. So the harpy is now in the 2nd area, and the remaining players should attempt to get the Voltaic Overflow before heading over to the next area.
In every area, take out all existing enemies and form a link to reach the next area. There will be Minotaurs to fight in the 3rd area, and once they’re dealt with, you’ll come face-to-face with a Hydra named Angelic. The cube needed to unlock the next area won’t appear until you smite Angelic; do so and form a link between the cube and the closed-off area.
As you move closer to the final area of this section, the Consecrated Mind will start retreating to the back, therefore the players that remained with it should try to get the Voltaic Overflow it’s dropping as it might be the last ones you’ll get.
In the 4th area, the Angelic will respawn and you must defeat it again in order to unlock the cube. This area actually has 3 cubes (and 3 locks). The first one is found by beating Angelic, once you’ve tethered the first cube, the second will appear – tether that and the third will appear. Form a chain between all 3 and the closed-off area and you’ll gain access to the final area of this particular section.
The final area has no lock and key but is swarming with enemies (and the harpy will be retreating to the back). You only have a limited amount of time to get through this area, so do everything you can to take out the enemies to hinder your progress – ignore the ones you have the luxury to ignore. The entire team does not need to make it to the end, only one person has to reach it and claim the pickup in order to complete this encounter.
Secret Chest:
In the second area, in a dark tunnel, you must complete a jumping puzzle. In this area you can locate a hidden chest, but only if you abandon the path forward and venture off to the side. Once you enter the dark tunnel, to the bottom right look for a large, luminescent leaf and try to land on it.
Jump forward and then to the left; to the right you’ll see a small alcove that you can enter. The chest can be found there, but be careful not to fall to your death.
Maze – Summoning the Boss
In the starting section of this area (with several corridors and towers) you will encounter a conflux as well as a small box. Shooting the small box allows you to form a chain, linking the tower with the Conflux. Doing so will earn you the Enlightened Buff (you can destroy Vex with a white shield).
There are a total of 4 towers in this area, and, much like the last encounter, you can only move onto the next tower after forming a link between the tower and the conflux in each section. The best way to do this is to form two teams, comprising of 3 members each; one team will remain behind to defend the Conflux – if any Vex sacrifices themselves to the Conflux, it will wipe out the entire team.
The second team will move forward and activate the tower, doing so will create a portal connecting the two Confluxes.
You must continue to do this until all 4 towers have been activated. Use the portals to switch teams, using the Enlightened buffs to their fullest. It will become significantly difficult as you progress as more and more teammates will have to be left behind to defend the Confluxes.
Once all 4 towers have been activated, a pathway will open to the central Pavilion. Your task here is to defend the final tower from a gigantic horde, featuring Shielded Goblins and Minotaurs, and for each tower you activated, you will have to face an Angelic.
Once the horde has been dealt with, a cube will spawn; tether it to the tower by forming a chain. Doing so will summon the boss – Consecrated Mind.
Consecrated Mind – Boss Fight
You cannot harm the boss at the start of the battle. You must first focus on taking out any Ads that appear in the area; also be wary of Big Brains (they’re likely to spin in the middle of the area).
The best way to handle this is to have 3 teams, comprising of 2 players each. The first team will be tasked with dealing with any Ads and banking motes from them.
The second team will move forward and collect the glowing cubes (the same ones you encountered the first time). Be sure to pick them up as they will wipe the team if left on the ground for too long (Consuming more than one will also kill you).
When one of the teammates walks into one of these cubes, they will be detained (something akin to the Vault of Glass). The detained cannot be freed by shooting the box.
The detained, however, are now able to look at the boss and see which of its eyes are red or white; it’ll either be the ones on the inside or the outside. The detained must signal to the third team and tell them which eyes are red; that team must shoot the red eyes. Shooting a white eye will kill the detained.
Once the detained has been freed, they will have acquired Voltaic Overflow. Once all red eyes have been destroyed, the boss can be attacked; unload as much on it as you can while you have the chance. Repeat this process until the Harpy is no more.
Boundless Horizon Boss
The boss cannot be damaged until it’s brought into the damage phase. For the final boss of the Garden of Salvation raid, the best way to go about it is to form teams of 3. There are two towers in this battle – black and white – and you must send teams to these towers.
However, before doing so, you must activate them, and you can only do so after performing a certain task: The boss will have glaring, red lights on it somewhere (weak points) and you must shoot them – this will open the portals to the light and dark tower.
Note the following: When the portals are opening, the land will be taken away from you over time, therefore you need to be constantly rebuilding land so you can tether without any hindrances, and be able to fight the boss on solid ground.
An orange portal on the right side, whereas a white portal will appear on the left side. This is where the team division comes into play: have 1 team go into one portal – their job is to kill enemies and collect as many motes as they can carry.
The team that remains behind must pull them back when it’s time to do so. A player can return to the original area by having another player open another portal and go through it. Communicate with your teammates to know exactly when to return.
All the team members who have collected the motes must deposit them into the towers (motes collected from the orange portal go into the dark tower, and motes collected from the white portal must go to the light tower).
Meanwhile, enemies will attempt to sacrifice themselves to the tower – if they succeed, the entire team will wipe!
Those who pick up the Motes are given an Enlightened Buff, so it would be tactical to have them remain behind as other players enter the portals to gather more mote.
Once enough mote has been deposited into the towers, a glowing cross will appear before the boss. Depending on the color of the cross (white or orange) you must tether it to the appropriate tower – white to light, orange to black. Once you do this, you can now attack the boss; have all your team members begin wailing on the boss, doing as much damage as humanly possible. He will eventually begin to float, shoot him in the chest for critical damage.
You can extend the damage phase by having 1 team tether the boss to stun him. You will have to repeat the process at least a couple of times to actually defeat the boss, but this method is the only one available to you, so be careful and make sure not to screw up.
That is all there is to the Destiny 2 Garden of Salvation Raid and if you would like to know more be sure to comment below.