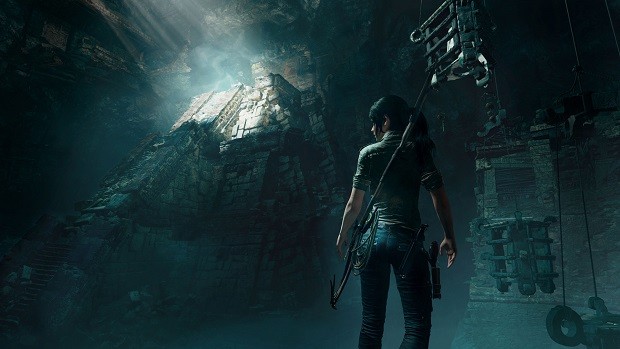
Our Shadow of the Tomb Raider Collectibles Locations Guide will help you find each and every collectible including Murals, Monoliths, Relics, Documents, and more. Our all-in-one Tomb Raider Collectibles Guide is to help you find everything as you play the game.
The world of Shadow of the Tomb Raider is a dense one. Undoubtedly, there are many secrets hidden for players to uncover.
Shadow of the Tomb Raider Collectibles Locations
Do note that in our Shadow of the Tomb Raider Collectibles Locations Guide, we have skipped Challenge Tombs and Crypts Locations. You can check out our separate guides for more help on those.
While some are just for the sake of having a collection of collectibles, others provide a deeper sense of the world and its lore. We disclose location for each of the collectibles or hidden artifacts in all the chapters of the game.
Chapter #1 – Cozumel
There are many different collectibles to be found in Cozumel including Relics, Murals, and Challenges. Our Shadow of the Tomb Raider Collectibles Locations Guide will help you find all of them so that you do not have to.
Here are the locations of all of the collectibles that can be found when you are traversing through Cozumel in Shadow of the Tomb Raider.
Explorer Bagpack
Find the bagpack in the third room right below the Mural. You need to repel down in order to access it.
Survival Cache #1
The caches can be found underwater
Survival Cache #2
Another one is right above it on land in the second room of Cozumel.
Survival Cache #3
The final one can be found if you repel down after you have created the bridge and crossed it.
Mural #1
A Mural can be found in the first room to your left side right before the first death whistle.
Mural #2
Another one is on your right side after you cross the rope bridge.
Relic #1, #2
Both of the Relics of this area are found in the second room – one of them is underwater and one to your southeast.
Whistle in the Dark
The challenge known as Whistle in the Dark can be done by shooting 5 Death Whistle Carvings. Each of them is hanging by a rope and you can find one in the first room right ahead of you.
The south side of the second room also has one as does the ending of the underwater section – turn around to find it. Find another rune when climbing the bells and the last one during the cart pushing a section of the last puzzle.
Document #1
There is only one Document and that can be found in the third room right after you climb the bell.
Treasure Chest #1
You can find it after you cut the line of the rope bridge in the third room and make a new one to get to the area above the hooking spot. You will require a lockpick to open it.
Chapter #2 – The Peruvian Jungle
The Peruvian Jungle is a massive area with many collectibles.
Many of these will be extremely hard to find for the average player due to the time constraints and our Shadow of the Tomb Raider Collectibles Locations Guide will take care of that for you.
Monolith #1
There is only one Monolith in the entire area and you can find it right before you head on towards the Bridge Puzzle.
Tomb #1
The first tomb is near the Base Camp at the start. You will need a pickaxe to get in and you can get the Caiman’s Heart for completing the puzzle inside.
Tomb #2
The second tomb is beside the Jungle Ruins Basecamp to the extreme bottom right of the area. Completing the puzzle will unlock the Eagle’s Perch.
Explorer Backpack #1
The first bagpack can be found in a cave near the second Base Camp. Look around the Plane Fuselage to find it.
Explorer Backpack #2
Another one can be found inside of the second tomb.
Archivist Map #1
The only Archivist Map can be found right before you head on towards Kuwaq Yaku.
Base Camp #1
The Plane Wreckage camp can be found when you escape the swamp.
Base Camp #2
Plane Fuselage can be found right after you defeat the Jaguars.
Base Camp #3
The third one known as Jungle Ruins is near the second tomb.
Base Camp #4
The fourth one is in the Canyon Ruins. Jaguars Den is near the place where you face the Jaguars for the second time.
Base Camp #5
The last camp known as Jungle Cavern is within the first tomb after you circle back to it.
Treasure Chest #1
There is only one treasure chest in the entire area that can be found near a cliff in the first section. Look near the Plane Wreckage Base Camp and get to it using a pickaxe and a lockpick.
Crypt #1
The first Crypt is near the Base Camp at the start. You can find Eveningstar’s Boots crafting blueprints here.
Crypt #2
The second Crypt can be accessed using your melee tools and heading north-west from the second camp. You can find Eveningstar’s Cape crafting blueprint inside it.
Relic #1
Bowl of Powder is found right before the bridge puzzle.
Relic #2
You can also find Llama Figurine if you look underneath the bridge.
Relic #3
Elongated Skull is found in the second Crypt along with Grave Market.
Relic #4
Look north to the first Base Camp to find Handkerchief.
Relic #5, #6
Find Pistol Parts besides the second tomb and Video Camera in the first area after you have met Jonah.
Relic #7
Flight Log can be found if you look near the first base camp.
Challenges
There are a total of 2 challenges in this area. The first one is called Flower Picker and it begins when you climb the canopy of the first area. There are many blue flowers here which you can collect to complete the challenge.
The second challenge is known as Ruffled Feathers and you need to take down 5 different Oropendola nests to complete it. Take a look at our Shadow of the Tomb Raider Challenges Guide for more information on how to complete these challenges.
Documents
Struggle for Power is found in the first Crypt along with one of Jack’s Journal. The first Crypt houses a Journal as well. The second Crypt houses a journal as well as A King’s Ransom.
The second tomb has At the Gate, Finger Length Away while the first one has Surprise Witness. Find another journal before you get to Kuwaq Yaku and one before the second camp.
Look for Struggle for Power before the jaguars. Lastly, find Fawcett’s last letter next to the treasure chest near the first cliff.
Murals
Death Lords is found by the second tomb along with Underworld Gate while God of Death is near the first one along with Judge’s Gaze.
The first Crypt has Urqu, The Scout and the second Crypt has Rimak, the storyteller. Lastly, find Kon right after you find Jonah.
Chapter #3 – Kuwaq Yaku
Kuwaq Yaku has a ton of collectibles spread about over its expansive area.
Finding them all can be a hassle as you have to sift through tons of different areas but you can avoid all that by using this Shadow of the Tomb Raider Collectibles Locations Guide.
Let us go ahead and look at all of the collectibles in Kuwaq Yaku in a systematic manner.
Archivist Map #1
The first map is found in a building to the east.
Archivist Map #2
The second one can be found inside of a Crypt to its south.
Archivist Map #3
There is a third one as well which is in the extreme north and you can discover it while playing through the story.
Tomb #1
The tomb can be found to the northeast of the city. Complete the puzzle inside and unlock Hurican’s Mantle.
Crypt #1
The first Crypt is to the south of town and houses the Nine Strides’ Boots crafting blueprints.
Crypt #2
The second one is to the east of town. It has no puzzle but you require a shotgun to get in and retrieve the Condor Cowl of Urqu.
Relic #1
The Burial Doll Replica is in a building towards the south side of the city.
Relic #2
Cone Mold is near the docks.
Relic #3, #4
Promotional Toy can be found in the northern areas of the city and the Tumi Knife is in the Crypt to the south.
Challenge #1
Bottom Feeder is a challenge that can be found at the lake of Kuwaq Yaku. All you need to do is to collect 5 Aquatic Plants.
Challenge #2
This challenge is known as Nam Deu and has you destroying a total of 5 different Sacrilegious Jungle Totems. They are hanging on different trees and caves.
Challenge #3
Crude Awakenings challenge has you destroying 5 different Oil Barrels. They are scattered on the ground and usually have a red color. Shoot them to complete this challenge. For an in-depth look at all of the challenges in Kuwaq Yaku, take a look at our Shadow of the Tomb Raider Challenges Guide.
Monolith #1
There is a small island across the lake. Here you can find the monolith almost exactly in the middle of it.
Monolith #2
This monolith is found to the northeast side of the Ruins Base Camp. This monolith is to the top of some stone ruins in an area which has a small clearing.
Mural #1
This Mural can be found in the first crypt, in a darkened corner.
Mural #2
This Mural is on the back side of the town merchant.
Mural #3
Find this Mural to the north side of the ruins base camp near two boars which are roaming the area.
Mural #4
This Mural is inside the Trinity Excavation site and has a line of fire running through the middle of the cavern right beside it.
Mural #5
This mural is in the area with the rotating pillars. Find this Mural in the door right after the final one. The Mural looks like a document.
Mural #7
This mural is right opposite the 6th mural, in the same hall.
Mural #8
Once you acquire the Eagle’s Talon. Go left and this mural looks like a document that is hidden away in a darkened area.
Mural #9
This mural is to the northwest side of the Kuwaq Yaku base camp. Look in the back side of the temple where you meet Jonah.
Mural #10
This mural is found after you have finished the puzzle in the Trial of the Eagle. Find it right in front of you when you call Jonah on the radio.
Chapter #4 – The Hidden City
Follow our easy directions to discover each of the collectibles accessible during The Hidden City of Shadow of the Tomb Raider.
Since most of these are located in Crypts and Challenge Tombs, it will be easier for you to look at those guides too since both of these landmarks are hard to find on their own as well.
Relic #1
The Lord and Lady of the Dead Relic can be found in the Crypt near the Abandoned Town Base Camp.
After you have entered the Crypt, swim underwater, through the narrow opening, turn left, and keep moving forward. You will find the Relic near a golden statue that is also submerged in water.
Relic #2
Just outside of Unuratu’s Home Base Camp, head to the building situated on the left to find the Metal Relic next to a wooden basket.
Relic #3
Outside of Unuratu’s Home Base Camp, descend down the stairs and right ahead of you, you’ll be able to unlock the small chest for the Chaki Talla Relic.
Relic #4
Take a left from Unuratu’s Home Base Camp and past a Monolith to descend the staircase.
Once you have reach down, you will need to head to the stone hut which has a locked door. To cut through it, use your Upgraded Knife. The Charki and Chundos Relic are just inside as you enter it.
Relic #5
This time take a right from Unuratu’s Home Base Camp to find a hut among the waterlogged areas. The Plastic Penguin Relic is near this hut on a platform.
Relic #6
Keep advancing forward from the previous Relic until you are able to ascend a set of stairs for the next Relic, Urpa to be found near the Monolith.
Relic #7
In Paititi Market, you can crawl under a stone door that is situated next to the merchant here. Proceed to collect Ceremonial Pipe Relic inside.
Relic #8
In Paititi Market, ascend the stairs near the wall with blue streaks and take a right turn, you’ll find the Chuspas Relic lying on a table.
Relic #9
In Paititi Market Base Camp, from the wall, you encountered while looking for the previous Relic, instead of taking the stairs, head right to move in through a small opening within a stone alcove.
Proceed via the stairs here and after crossing the water body, you can crouch through an area that contains the Burial Mask Relic.
Relic #10
The Incense Burner Relic can be found on a shrine next to a rugged wall in the Temple District Base Camp.
Relic #11
The next Relic, Whistle can be found when you ascend the stairs before reaching the temple. It is lying next to a vase and some pottery.
Relic #12
Take a left from the temple in the Temple District Base Camp and another left from the staircase. Now descend down and enter the building on the right to find the Patolli Mat Relic near the treasure chest.
Relic #13
In Temple District Base Camp, head past the building that you found while searching for the previous Relic and continue proceeding forward until you enter the cave on the right. You will find the Mask of the God Relic before the tunnel.
Relic #14
From the tunnel encountered in the location of the previous Relic, descend the stairs and climb onto the rugged wall on the right. Then jump over to the left wall and climbing down, you will find the Ceremonial Touch Relic atop the small shrine.
Relic #15
In the Village Caves Base Camp, take the stairs down and turn right to cut through a blockage using the Upgraded Knife. Here you will find the Dismantled Radio Relic.
Relic #16
Head to the Temple District Base Camp and moving forward, you find the Macuahuitl in the second room of the area.
Relic #17
Moving northeast of Wild Jungle Base Camp, you will eventually come across a circular wooden structure laid out. Near it will be the Beast Effigy Relic.
Relic #18
Near the Fishing District Base Camp, head to the Crypt here. Just left of the mural there and avoiding any spear traps, work past the wall mechanism to collect the Golden Effigy Relic.
Relic #19
The Arrow Relic can be found within the Ollanta Crypt near Wild Jungle Base Camp. You can observe it lying on the ground before a narrow passage through the wall.
Monolith #1
In the Fishing District Base Camp, look for the area where the villagers are abundant in and carrying out fishing. On this small part of the land, you can clearly see the Monolith.
Monolith #2
Outside Unuratu’s Home, take a left to find a Monolith and two villagers bowing in front of it.
Monolith #3
In the waterlogged areas outside Unuratu’s Home, take a left and keep moving up to find the next Monolith.
Monolith #4
After reaching the Temple District Base Camp, descend the staircase to the left and then take another set of stairs to the left when you have the choice of going that way or right into the cave.
After the first set of stairs you have taken, you will come across the Monolith to the left.
Monolith #5
From the previous Monolith, make your way northwest until you come across a set of stairs on the left. Here you will see some villages and their leading praying to the Monolith.
Document #1
The very first Document can be found near the Abandoned Village Base Camp. Just head to a building with the destroyed building, the Document will be near some debris. You will read about Fawcett’s Legacy.
Document #2
Proceeding forward from the previous Document, use the Ascender to bring down the barricaded door. Inside you will be able to read Lopez’s Arrival.
Document #3
By the route that leads to the water body in the middle of Abandoned Village camp, bring down the barricade via the Ascender to head inside. Collect the Document to read ‘Covering the Tracks’.
Document #4
From the start of the Abandoned Base Camp, descend the stairs and head left. From this building, use a rope and connect the one ahead of it. Use the rope to reach the other building inside of which you can read the Expedition Report.
Document #5
Find a tall tree in the Fishing district Base Camp and climb up after which you need to hop onto the nearby ledge. Keep moving forward and then turn left after the wooden bridge to read The First Emperor Document.
Document #6
Outside Unuratu’s Home, proceed forward and take the ladder down. From here, turn right and climb the ledges to reach the area where you can read the El Dorado Document.
Document #7
Outside Unuratu’s Home, take left and proceed until you come across the Monolith #2 as discussed above. From here take a right and descend the stairs after which you have to take a left.
Now, you will come near the waterfall and just near it, you can find the Journal of T. Serrano 4 Document.
Document #8
In Paititi Market Base Camp, proceed right and then take the staircase on the left to move up to find a building on the left. Read the Document titled Amarus Grip here.
Document #9
In the Paititi marketplace, find the male merchant and within his hut, you can find the Famine Document to the left.
Document #10
Right next to Temple Path Base Camp, you can find the Contract Document.
Document #11
Also in Temple Path Base Camp, proceed through the stone path and ascend the wooden ledge to read the Disease and Death note.
Document #12
After getting the previous Document, make your way to the Temple of Sun tomb. In your route, you will come across a barricaded wall that you can pry open.
This wall can be climbed and is situated before the water body. Climb up and you will be able to reach the area to read the Journal of T. Serrano.
Document #13
After reaching the Temple of the Sun tomb, you will see the note lying on the left as you enter the tomb. You can thus read The Monkey Twins Document.
Document #14
Just before you leave the Temple of the Sun tomb, the Paddler Gods Document can be found lying on a table before the ledge that leads out into the jungle.
Document #15
From the Village Caves Base Camp, proceed forward and enter the cave to find the Document Unuratu’s Coronation lying on a table.
Document #16
For Epidemic Document, you need to take a right from the Village Caves Base Camp and head to the docks region. Now move south of the docks to collect the note.
Document #17
Take a left from the Village Caves Base Camp and climb up a platform. Continue along and take the stairs on the left, ascend them.
Now take a left turn to see a couple of villagers enter the building nearby. Inside, you will be able to read Devils in the Dark.
Document #18
From the previous Document, move forward and up the stone ledge to reach an opening into a tunnel. It is here, between a Relic and a Mural, that you will find the Rebirth and Resettlement Document.
Document #19
After collecting the Devils in the Dark note and just before you enter the tunnel for Rebirth and Resettlement Document, take the stairs to the left and you will come across a rugged wall that you can climb.
Now turn right and enter the building in the area that contains the ‘Two People as One’ Document.
Document #20
Right next to the Unuratu’s Home Base Camp, you are able to read the Journal of T.Serrano 3.
Document #21
Once you enter the Temple District Base Camp, look to your left to find the Troubled Lands Document lying on a horizontal stone pillar.
Document #22
From the previous Document, take the stairs up for the next Document, Trinity Lands.
Document #23
From Ossuary Base Camp, move via the doorway, to the room with the Serpent statue and either dive into the water and climb up the ledge to retrieve the Document or drop down from the statue and onto the ledge.
You will be able to read Warriors of Kukulkan entry.
Document #24
From the Fishing district Base Camp, enter the Crypt and after passing a couple of spike traps, the Document, The Cults Control can be found on the right.
Document #25
From the Fishing district Base Camp, you can find the Protection Document within the room containing a Relic as well.
Document #26
In the Wild Jungle Base Camp, while you are making your way to Ollanta Potter Crypt, climb up the tree and descend down to reach the Warning Document lying against a wall on the left.
Document #27
Just after you enter the Ollanta Potter Crypt from the Wild Jungle Base Camp, look for the More Questions Document nearby the Arrow Relic which we mentioned above.
Document #28
In the Ollanta Potter Crypt, find an opening through the wall at the bottom-most chamber. Then climb the wall to the left to read the Merchant Sacrifice Document.
Mural #1
Head to the Crypt situated in Abandoned Village. After you enter it, do not dive into the water, instead look around and nearby you can observe Chuki, The Weaver mural.
Mural #2
Outside Unuratu’s Home, take a left and continue in that direction until you come across a waterfall. Near this, you will find the Birth mural.
Mural #3
From the Fishing district Base Camp, make your way to the village. Within the area, climb up some cornstalks to find the Founding of Paititi mural around the left corner adjacent to some stone steps.
Mural #4
Entering Paititi Market from the Base Camp, you can find the mural ‘Shielding the Serpent’ right in front adjacent to some water gushing out of the stone structure.
Mural #5
From the previous mural, exit the tunnel and proceed to climb up a ragged wall situated on the right. After doing so, you will be able to make out the Civil War mural.
Mural #6
Descend the stairs from the Temple in the Temple District. Continue forward and then take a left from the dead-end. You will be able to view the First Contact mural.
Mural #7
From the Temple District Base Camp, make your way to the temple. Nearby, you will be able to climb up a ragged wall. After doing so, head right and next to a small pond, you can observe the Silver-Crowned Mountain mural.
Mural #8
In Paititi Market District, move towards the docks and as you make your way towards the north of the region, you will need to ascend a hill. Just before the building that constructs fishing equipment, the Deadly Earth Mother mural can be found.
Mural #9
In Ollanta Potter Crypt near Wild Jungle Base Camp, across from the room with the coffin to be looted, the Ollanta, the Potter mural can be found not too far away from one of the mirrors.
Mural #10
From the previous Mural, make your way to the building containing multiple boats. Then dive into the water to observe the Viracocha mural next large boulder underwater.
Mural #11
In temple district, from the Base Camp, make your way to the left ascending the stairs. Keep continuing forward until you are given a choice of two paths. Take a right to enter the cave and observe the God of Learning mural.
Mural #12
From the Base Camp in the Temple District, take the stairs and continue. Take off before the next set of stairs and head left to find the ‘Bound to Wonder’ mural.
Mural #13
From the Base Camp in Temple District, head over to the rugged wall at the exit of the room. Climb down and then ascend the stairs to get to the Temple of the Sun mural.
Mural #14
From the Base Camp in Temple District, take the ladders down and out of the room. Now descend the stairs to come across the Mirrors mural.
Mural #15
The Fertility God mural can be discovered near one of the mirrors in Temple of the Sun tomb.
Mural #16
From the Belly of the Serpent Base Camp, ascend the stairs and through an opening lying on the right turn. Immediately turn left to enter the room containing the Unuratu’s Uprising mural.
Mural #17
Right next to the Ossuary Base Camp, you may observe the Mother Deity mural.
Mural #18
While making your way from Ossuary Base Camp to the underground temple, you will come across an area with spinning blades traps. Avoiding these, move forward and take a left to discover the Path of Battle mural.
Mural #19
In the Crypt that lies within the Fishing District, avoiding and hopping over a couple of traps, keep moving forward. You will get past the Cults Control Document and soon after you will be able to observe the Peasant Savior mural.
Chapter #5 – Cenotes
Here are the locations of all of the collectibles that can be found when you are traversing through Cenotes in Shadow of the Tomb Raider.
Document #1
The first Document, Journal of T. Serrano 2, can be found by moving forward from Cenotes Vista Base Camp and then before the climbable wall to the skull area, you may uncover the lost note.
Document #2
Near the Cenotes Vista Base Camp, you may come up to the surface after getting the first two Relics. You will be treated to a secret area where you will find the A Warning note.
Document #3
In the challenge tomb of Cenotes Temple Ruins, you can discover another Document nearby a cannon and climbable wall. The note will be titled Journal of T. Serrano 5.
Document #4
Within the same tomb, in the area that is surrounded by the sharp spike traps, you will find the Journal of T. Serrano 6 in one of the corners.
Document #5
From the previous Document, just ahead, a platform you can climb is not too far from a waterfall. Here, you can uncover Journal of T. Serrano 7.
Relic #1
From the Cenotes Vista Base Camp, take to the waters, and while swimming you will come across the Crucified Figure Relic next to some other chests and a handful of piranhas in the area.
Relic #2
Within the same water body, continue swimming forward and you find the next Relic, Knights Morion adjacent to a mural.
Relic #3
In the Cenotes tomb, right after the surprise encounter, access the entry to the wall to observe the Brigittine Rosary.
Trial of the Eagle
The Trial of the Eagle does not have many collectibles but you will face problems when trying to find some of them.
Our Shadow of the Tomb Raider Collectibles Locations Guide will ensure that does not happen and you are able to course your way to 100% completion.
Document #1
The Document can be found in the top right corner of the area. The device in the middle can be used to get onto the ledge that houses the Document.
Mural #1
The first Mural is found to the extreme left of the area.
Mural #2
The second one can be found if you look to the extreme south.
Survival Cache #1
The only Survival Cache is found to the extreme left of the area, near one of the Murals.
Base Camp #1
There is only one Base Camp in the area and it is found at the start of the area.
Chapter #6 – Return to Hidden City
There are many different collectibles to be found during Return to Hidden City including Relics, Murals, and Challenges. Our Shadow of the Tomb Raider Collectibles Locations Guide will help you find all of them so that you do not have to.
Here are the locations of all of the collectibles that can be found when you are traversing through Return to Hidden City in Shadow of the Tomb Raider.
Relic #1 – Copper Mace
Fast-Travel to Skull Cave, move away from the stairs and go up the ramp near the water.
Relic #2 – Tlaloc Vase
Fast-Travel to Upper City Main Gate, head either left or right and follow the covered path over the stairs below.
Relic #3 – Year Bundle
Fast-Travel to Upper City Main Gate, head towards lower Paititi’s Entrance. Use the Upgraded Knife to cut open into the roped barricade that is to the left of the stairs.
Relic #4 – Woodle Rifle
Fast-Travel to Upper City Main Gate, climb up into the upper marketplace. Climb until you can no longer climb any further and turn left.
Relic #5 – Bloodletter
Fast-Travel to Upper City Main Gate, move into the underground path where you witnessed the Queen and Kukulkan discussing his plans before the Queen is taken away. Move to the center of the Massive Chamber, at the foot of the shrine.
Relic #6 – Mama Quilla Mask
Fast-Travel to Upper City Main Gate, move into the underground path where you witnessed the Queen and Kukulkan discussing his plans before the Queen is taken away.
Move to the center of the Massive Chamber, at the foot of the shrine. Drop down into the pit filled with skeletons.
Relic #7 – Mask of Tezcatlipoca
Fast-Travel to Upper City Main Gate, move into the underground path where you witnessed the Queen and Kukulkan discussing his plans before the Queen is taken away. Move to the middle of the room.
Relic #8 – Map of Search Areas
Fast-travel to the Temple of Kukulkan, head across the first Rope Bridge to the Centre Island, move to the next Rope Bridge and go into the room.
Relic #9 – Primitive Doll
Fast-travel to Temple of Kukulkan, and start the Ancient Aqueduct Tomb. Dive down the water and shortly after you reach back on the land, you must climb the wall nearby.
Document #1 – Resist!
Fast-travel to the Skull Cave and head up the stairs to a table near the wall.
Document #2 – A King Sacrificed
Fast-Travel to Upper City Main Gate, move into the underground path where you witnessed the Queen and Kukulkan discussing his plans before the Queen is taken away. Move to the right corner of the room.
Document #3 – Priest of the Sun
Fast-Travel to Upper City Main Gate, move into the underground path where you witnessed the Queen and Kukulkan discussing his plans before the Queen is taken away. Move to the right corner of the room, alongside the left wall.
Document #4 – Guidelines
Fast-Travel to Upper City Main Gate, move into the underground path where you witnessed the Queen and Kukulkan discussing his plans before the Queen is taken away. Move to the back of the room, near the fireplace, on the left.
Document #5 – Conspiracy
Fast-Travel to Upper City Main Gate, move into the underground path where you witnessed the Queen and Kukulkan discussing his plans before the Queen is taken away. Move to the back of the room, near the fireplace, on the right.
Document #6 – No One in, No One out
Fast-Travel to Upper City Main Gate, move into the underground path where you witnessed the Queen and Kukulkan discussing his plans before the Queen is taken away. Move to the middle of the room.
Document #7 – Company Town
Fast-Travel to Upper City Main Gate, move into the underground path where you witnessed the Queen and Kukulkan discussing his plans before the Queen is taken away. Move near the fireplace, just beside it.
Document #8 – The Prophecy
Fast-Travel to Upper City Main Gate, head towards lower Paititi’s Entrance. Use the Upgraded Knife to cut open into the roped barricade that is to the left of the stairs. Climb the wall opposite the stairs into a small room.
Document #9 – Yaaxil
Fast-Travel to Upper City Main Gate, head towards lower Paititi’s Entrance. Use the Upgraded Knife to cut open into the roped barricade that is to the left of the stairs. Climb the wall opposite the stairs into a small room.
Document #10 – In Name Only
Fast-travel to Upper City Main Gate, head towards the Queen’s prison cell. Found on a table.
Document #11 – The Cult’s Promise
Fast-travel to the Temple of Kukulkan, head across the first Rope Bridge to the Centre Island, move to the next Rope Bridge and go into the room.
Document #12 – Cult of Kukulkan
Fast-travel to the Temple of Kukulkan, head across the first Rope Bridge to the Centre Island, move to the next Rope Bridge and go into the room.
Document #13 – Reconnaissance
Fast-travel to the Temple of Kukulkan and head towards Qispi, the Merchant Crypt. Move down the hanging platform to the sarcophagus, to the right.
Document #14 – Crime and Punishment
Fast-travel to the Temple of Kukulkan and head towards Qispi, the Merchant Crypt. Move past the sarcophagus. While moving out, enter a room that is protected by a series of wall traps.
Mural #1 – Uturunku, the Ferryman
Fast-travel to the Temple of Kukulkan near the entrance of Uturunku.
Mural #2 – The Winded Serpent
Fast-travel to the Temple of Kukulkan, to the entrance of Uturunku. Follow the path to the left. Drop to the next level. Move the left under a zip line.
Mural #3 – Qispi, the Merchant
Fast-travel to the Temple of Kukulkan and head towards Qispi, the Merchant Crypt. Move past the sarcophagus. While moving out, enter a room that is protected by a series of wall traps.
Mural #4 – Ancient Aqueduct
Fast-travel to the Subterranean River, and head inside the Ancient Aqueduct Tomb. Move to the broken walls before the main puzzle chamber.
Monolith #1
Fast-travel to the Temple of Kukulkan, cross the rope bridge and move onto the center island.
Chapter #7 – Porvenir Oil Fields
Porvenir Oil Fields does not have many collectibles but you will face problems when trying to find some of them.
Our Shadow of the Tomb Raider Collectibles Locations Guide will ensure that does not happen and you are able to course your way to 100% completion.
Document #1
The first Document titled ‘Not Yet?’ can be found right next to the campfire in Beach Base Camp.
Document #2
Exit the beach Base Camp via a rope. Descending down, you will be able to collect the Journal of T. Serrano 9.
Document #3
After your encounter with some specialized task force of soldiers equipped with thermal vision, you will eventually end up in a tomb. Here, make your way towards a large golden shrine. Just behind that shrine, you can observe the Mama Zara mural.
Document #4
Within this tomb near Destroyed Bridge Base Camp, from the previous mural, search around for The Truth Document.
Document #5
Before you actually reach the Destroyed Bridge Base Camp, you can find the A Lost World note next to a fire next to a fallen tree.
Relic #1
Right next to the campfire in Destroyed Bridge Base Camp, observe the Hardhat Relic.
Chapter #8 – Mission of San Juan
There are many different collectibles to be found during the Mission of San Juan including Relics, Murals, and Challenges. Our Shadow of the Tomb Raider Collectibles Locations Guide will help you find all of them so that you do not have to.
Here are the locations of all of the collectibles that can be found when you are traversing through Mission of San Juan in Shadow of the Tomb Raider.
Relic #1 – Faded Writing
Fast-travel to the Mission Gate, move away from the entrance, down the road. When the road splits, take a right. Do not jump over the gap.
Relic #2 – Slave Collar
Fast-travel to the Mission Gate, pass through the entrance and head for the cemetery. From the cemetery entrance, head northeast and approach the tombstone under a large tree.
Relic #3 – Wheel-Lock Pistol
Fast-travel to the Mission Gate, move towards the cross on the statue near the wolf cave. Press the cross and move into the doorway ahead of the statue. Head to the crypt’s sarcophagus below. Once inside, crawl under a small hole. Just before a spike pit, take the passage to the left. Jump across the gap to find a lit room.
Relic #4 – Old Tome
Fast-travel to the Ruined Tower and approach the tower with an Ascender Barricade. Move beyond the barricade.
Relic #5 – Decorated Crucifix
Fast-travel to the Ruined Tower, head past the tower towards the flagpole. Jump the gap over the broken bridge that is to the right of the flagpole.
Relic #6 – Primitive Doll
Fast travel to the Flood Basin, and approach the main chamber. There is a structure underneath the water wheel used to adjust the water in the main chamber. Dive into the water until you reach a Jade vein.
Relic #7 – Mission of San Juan
Fast-travel to the Deserted Cloister. Turn 180°.
Relic #8 – Primitive Doll
This one is located near Deserted Cloister.
Relic #9 – Primitive Doll
This one is located near Deserted Cloister.
Document #1 – Disaster upon Disaster
Fast-travel to the Mission Gate, and approach the merchant sitting on the fountain. Move a few feet away from the merchant.
Document #2 – Mission of Saint John
Fast-travel to the Mission Gate, head past the Merchant. There is a seating area with a few villagers eating or talking. Move towards the nuns, near the far wall.
Document #3 – The Miracle Club
Fast-travel to the Mission Gate, head past the Merchant. To the left are a couple of villagers praying. Head towards them, while keeping an eye on the ground.
Document #4 – Damage Repair
Fast-travel to the Mission Gate, head past the Merchant. To the left are a couple of villagers praying. Head towards them. Turn right and then go left up to the stairs into a building on the right.
Document #5 – On this Spot
Fast-travel to the Mission Gate, head past the Merchant. To the left are a couple of villagers praying. Head towards them.
Turn right and then go left up to the stairs into a building on the right. Step outside and move onto the children’s chalk drawings. Turn right to go down the stairs.
Head straight across the road into a white building and move towards the two women kneeling.
Document #6 – Journal of T. Serrano 12
Fast-travel to the Mission Gate, head past the Merchant. Keep heading in the same direction until you reach a small staircase next to a fading crucifix that loads up through an archway. Turn right here. Then turn left once inside.
Document #7 – The Chosen One
Fast-travel to the Mission Gate, move towards the cross on the statue near the wolf cave. You need to have completed the side mission “How Sweet the Sound” before attempting this.
Press the cross and move into the doorway ahead of the statue. Approach the ground to the left.
Document #8 – Believer’s Journal
Fast-travel to the Mission Gate, move towards the cross on the statue near the wolf cave. Press the cross and move into the doorway ahead of the statue.
Head to the crypt’s sarcophagus below. Once inside, crawl under a small hole and turn right. Jump over the Spike Pit.
Document #9 – Hubris
Fast-travel to the Mission Gate, move towards the cross on the statue near the wolf cave. Press the cross and move into the doorway ahead of the statue.
Head to the crypt’s sarcophagus below. Once inside, crawl under a small hole and turn right. Jump over the Spike Pit. Jump back across the Spike Pit and move through the hole in the far wall. Head towards the skeleton on the left.
Document #10 – Pure of Heart
Fast-travel to the Mission Gate, move towards the cross on the statue near the wolf cave. Press the cross and move into the doorway ahead of the statue.
Head to the crypt’s sarcophagus below. Once inside, crawl under a small hole and turn right. Jump over the Spike Pit. Jump back across the Spike Pit and move through the hole in the far wall. Head towards the skeleton on the left. Continue this path. Use the rope to cross the gap onto the craggy wall and climb up.
Document #11 – Demons
Fast-travel to the Mission Gate, move towards the cross on the statue near the wolf cave. Press the cross and move into the doorway ahead of the statue.
Head to the crypt’s sarcophagus below. Once inside, crawl under a small hole and turn right. Jump over the Spike Pit. Jump back across the Spike Pit and move through the hole in the far wall. Head towards the skeleton on the left. Continue this path. Use the rope to cross the gap onto the craggy wall and climb up. Continue getting out of the crypt until you reach a statue whose tongue must be pushed to open up a doorway. Move behind this statue into a hidden area.
Document #12 – Journal of T. Serrano 13
Fast-travel to the Riverside, move towards the small area behind Guillermo.
Document #13 – Missionary Work
Fast-travel to the Ruined Tower, head away from the tower and towards the hunting grounds through the passage on the left. Dive into the water, head to the left and move through the sizable opening. Swim up to reach a small cave.
Document #14 – Last Words
Fast-travel to the Ruined Tower, head away from the tower and towards the hunting grounds through the passage on the left.
Dive into the water and head to the right. Exit the water when you reach the path to the Thirsty Gods Tomb. Move to the Tomb, while keeping an eye on the ground.
Document #15 – Testament of T. Serrano (WIP)
Document #16 – Alux
Fast-travel to the Flood Basin, move towards the little room behind the underwater gate that leads to the Stele.
Document #17 – The Hills are Alive
Fast-travel to the Deserted Cloister and move up the steps from there.
Document #18 – Chechen and Chaca Trees
Fast-travel to the Mountain Catacombs. Move a little bit.
Document #19 – World Tree
Fast-travel to the Mountain Catacombs, Head down the exploded path under the swinging platform. Head left from the first intersection.
Document #20 – Journal of T. Serrano 8
Fast-travel to the Mission Gate, head of the library. Enter the library and move towards the left to enter a room. Move left again. Move to the middle of the room after jumping along the right wall.
Document #21 – De La Cruz Leaves
Fast-travel to the Mission Gate, head for the library. Enter the library and move towards the left to enter a room. Move left again.
Move to the middle of the room after jumping along the right wall. Move into the crack in the wall to the left. Pry the crack open.
Document #22 – Journal of T. Serrano 10
Fast-travel to the Mission Gate, head towards the library. Enter the library and move forward. Turn left at the far wall. Head towards the floor in an alcove under the stairs.
Document #23 – Ranting
Fast-travel to the Mission Gate, head for the library. Enter the library and climb up the stairs to the second level. Move to the table at the far end of the second floor.
Document #24 – Repelling the Demons
Fast-travel to the Mission Gate, head for the library. Enter the library and climb up the stairs to the second level. Move past halfway across the room towards the right.
Document #25 – De La Cruz Arrives
Fast-travel to the Mission Gate, head for the library. Enter the library and climb up the stairs to the second level. Move to the table at the far end of the second floor. Further, move towards the standing bookshelves.
Document #26 – Journal of T. Serrano 11
Fast-travel to the Mission Gate, head for the library. Enter the library and climb up the stairs to the second level. Pry open the cracked wall at the top of the stairs.
Document #27 – John the Apostle
Fast-travel to the Mission Gate, head for the library. Enter the library and climb up the stairs to the second level.
Head across the second floor to the other side of the floor and turn left just across the first large hole you see. Turn left again, towards the floor filled with rubble.
Mural #1 – Huascar, the Syncretist
Fast-travel to the Mission Gate and enter the crypt. Head for the sarcophagus. From the sarcophagus, crawl through a small passage in the wall. Turn left on the other side.
Mural #2 – God of Cocoa
Fast-travel to the Flood Basin, move up the stairs near the beginning of the Thirsty Gods Tomb and head into the room where you first drained the water.
Mural #3 – Thirsty Gods
Fast-travel to the Flood Basin move towards the main chamber of the Tomb. Enter the room that contains the spigot on the platform that is used to adjust the water level for the main chamber of this Tomb. Move away from the Spigot
Mural #4 – Tree of Life
Fast-travel to the Mountain Catacombs, Head down the exploded path under the swinging platform. Head left from the first intersection.
Continue towards the Stele across another swinging platform. Blast it to move forward. Keep on going until you jump up the wall. The path will continue to the right. Look to the left here.
Monolith #1 – Quechua Monolith
Fast-travel to the Ruined Tower, head towards the second level of the tower by using the rope line from the road leading to the Mission Gate.
Shoot a second rope line from the tower to a post in the opposite direction from the road. Travel forward and turn left.
Monolith #2 – Monolith 06
Fast-travel to the Upper City Main Gate, head down from the Upper Market in an open field.
This is all we have in our Shadow of the Tomb Raider Collectibles Locations Guide. If there is anything else that you would like to add, let us know in the comments section below!