Mass Effect Andromeda Character Skills and Abilities Guide to help you learn everything you need to know about all the skills in the game, their upgrades, effects, and the best skills to unlock.
Character Skills in Mass Effect Andromeda are categorized into three categories i.e. Combat Skills, Biotics Skills, and Tech Skills. Each of these skill trees offer plenty of skills that provide various benefits.
However, it’s important to note that Pathfinder Ryder can only have three skills equipped at any given time. Keeping this in mind, it’s a good idea to spend some time and choose what you think will benefit you the most.
For more help on Mass Effect Andromeda, check out our Character Creation Guide and Characters Guide.
Mass Effect Andromeda Character Skills and Abilities
Mass Effect Andromeda doesn’t restrict you to one class. In this iteration, you’re free to choose any skill tree and get any skill as long as you’re meeting the basic requirements. However, one important concept that you should be familiar with is Profiles.
Depending on where you’re putting your skill points, you can unlock a Profile that will grant you several boosts and bonuses. Moreover, you’ve the complete freedom of respec-ing and reassigning your available skill points on the Tempest.
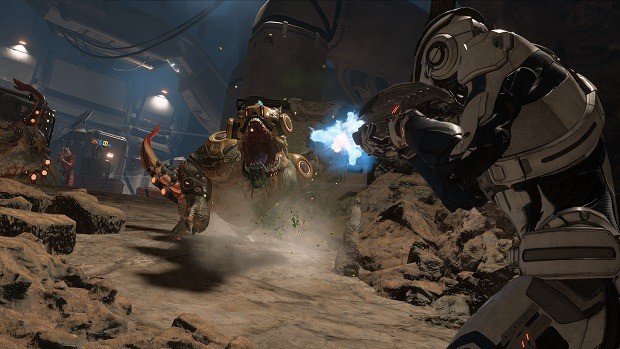
Best Starting Skills
This section of the guide details some of our recommended skills that should benefit you:
Overload
This allows you to deplete shields and stun enemies for a short duration of time.
Backlash
This grants a barrier which deflects melee attacks, reduces damage from enemies, and reflects projectiles.
Incinerate
This allows you to set your enemies ablaze and corrode their armor.
Concussive Shot
This allows you to knock down your enemies.
Barricade
This allows you to generate cover wherever you go. You can also invest some points into it to enhance regeneration.
Combat Fitness
This passive skill allows you to increase Pathfinder Ryder’s HP, shields, and weapons.
Shockwave
This allows you to throw explosives that pass through solid objects and then detonate to deal a massive amount of damage.
Combat
These skills basically allow you to improve your weapon damage and accuracy. In addition to this, you also gain access to grenades, cannons, mines, and more.
Omni Grenade
You can tap the button to throw a grenade that causes massive area damage after a 2 second fuse. You can also hold the button to shorten the grenade’s fuse timer before throwing, however, the grenade will explode if held too long. Do note that the activation requires one power cell from Omni Grenade’s limited power cell supply.
- Level 1 – Omni Grenade
- Level 2 – Grenade Capacity
- Level 3 – Damage
- Level 4 – Sticky Grenade or Frag Grenade
- Level 5 – Grenade Capacity or Shrapnel
- Level 6 – Anti-Armor or Anti-Shield
Concussive Shot
Fires a target-seeking high-impact round that knocks down unarmored, unshielded, normal-sized enemies and detonates combo primers.
- Level 1 – Concussive Shot
- Level 2 – Force
- Level 3 – Damage
- Level 4 – Recharge Speed or Repeat Concussion
- Level 5 – Radius or Damage & Force
- Level 6 – Anti-Armor or Anti-Shield
Barricade
Deploys a temporary energy barricade that will boost shield regeneration for everyone who takes cover behind it. Upgraded versions provide additional combat bonuses for allies. Do note that the activation requires one power cell from Barricade’s limited power cell supply.
- Level 1 – Barricade
- Level 2 – Power Cells
- Level 3 – Duration
- Level 4 – Duration or Power Cells
- Level 5 – Weapon Feedback or Power Feedback
- Level 6 – Regeneration or Electric Defense
Turbocharge
Temporarily vents weapon heat via armor to improve thermal clip efficiency and boost weapon firing rates.
- Level 1 – Turbocharge
- Level 2 – Recharge Speed
- Level 3 – Damage
- Level 4 – Recharge Speed or Duration
- Level 5 – Damage & Force or Accuracy & Stability
- Level 6 – Supercharge or Dump Heat
Trip Mine
Deploys an explosive mine that triggers when an enemy comes within proximity of or crosses a sensor laser. Enemies suffer more damage the closer they are to the mine. Do note that the activation requires one power cell from Trip Mine’s limited power cell supply. The maximum number of active mines equals the current number of maximum power cells.
- Level 1 – Trip Mine
- Level 2 – Power Cells
- Level 3 – Damage & Force
- Level 4 – Sensor Range or Power Cells
- Level 5 – Damage & Force or Blast Radius
- Level 6 – Detonator or EMP
Flak Cannon
Fires krogan-designed shells that burst into shrapnel upon impact. Shrapnel damage is reduced against armored enemies. Do note that the activation requires one power cell from Flak Cannon’s limited power cell supply.
- Level 1 – Flak Cannon
- Level 2 – Power Cells
- Level 3 – Damage & Force
- Level 4 – Damage & Force or Power Cells
- Level 5 – Anti-Armor or Stunning
- Level 6 – Flak or Shredder
Pistols Skill
Improves sidearm training for pistols including submachine guns. Pistols are designed largely for short to mid-range combat and shooting on the move.
- Level 1 – Pistols
- Level 2 – Accuracy
- Level 3 – Mobility
- Level 4 – Weight or Spare Ammo
- Level 5 – Reload or Clip Size
- Level 6 – Unassisted Targeting or Augmented Targeting Assistance
Assault Rifles Skill
Advanced training improves facility with assault rifles for dedicated combatants. Assault rifles offer moderate accuracy, range, and stopping power.
- Level 1 – Assault Rifles
- Level 2 – Accuracy
- Level 3 – Stability
- Level 4 – Weight or Spare Ammo
- Level 5 – Reload or Clip Size
- Level 6 – Shatter Defenses or Critical Hits
Shotguns Skill
Specialized training for close-quarters combatants. Shotguns deal high damage at short range at the expense of poor accuracy at long distances.
- Level 1 – Shotguns
- Level 2 – Stability
- Level 3 – Precision
- Level 4 – Weight or Spare Ammo
- Level 5 – Reload or Clip Size
- Level 6 – Damage & Force or Melee Synergy
Sniper Rifles Skill
Improves specialist sniper training for long-range combatants. Sniper rifles deal high damage at a distance at the cost of slow firing rates and capacities.
- Level 1 – Sniper Rifles
- Level 2 – Accuracy
- Level 3 – Headshots
- Level 4 – Weight or Spare Ammo
- Level 5 – Reload or Clip Size
- Level 6 – Damage & Force or Killing Spree
Combat Fitness
Intense physical and survival training designed to improve a combatant’s stamina and versatility in battle. Improves Max Health and shields by a set percentage.
- Level 1 – Health
- Level 2 – Shields
- Level 3 – Extra Holster
- Level 4 – Consumables or Regeneration
- Level 5 – Extra Holster or Heavy Lifting
- Level 6 – Hold the Line or in the Trenches
Combat Tools
Increases combat power damage with each skill point invested in the Combat Skill Group.
- Level 1 – Power Damage
- Level 2 – Melee
- Level 3 – Detonators
- Level 4 – Hover or Evasion
- Level 5 – Arial Melee or Detonators
- Level 6 – Arial Combat or Martial Arts
Biotic Skills
These skills are basically designed to control the field. Using these skills, you can use enemies as shields or weapons.
Pull
You can tap the button to lift an unshielded, unarmored enemy helplessly in the air and prime the target for combo detonations. Alternatively, you can also hold the button to drag the target enemy or object along with the user. Lastly, it can also be combined with the Throw power to hurl a held target.
- Level 1 – Pull
- Level 2 – Recharge Speed
- Level 3 – Duration
- Level 4 – Duration or Radius
- Level 5 – Crushing Grip or Expose
- Level 6 – Anti-Shields or Biotic Drain
Throw
Hurls a gravity field projectile to throw unshielded and unarmored targets away and detonate combo primers. You can also combine with Pull to hurl held targets.
- Level 1 – Throw
- Level 2 – Recharge Speed
- Level 3 – Damage & Force
- Level 4 – Damage & Force or Radius
- Level 5 – Duration or Recharge Speed
- Level 6 – Double Throw or Swift Detonation
Charge
Alters the biotic’s mass, launching the user at an opponent. Restores some shield strength at the charge’s end. Charge detonates combo primers on targets. This skill requires 9 Skill Points invested in Biotics.
- Level 1 – Charge
- Level 2 – Recharge Speed
- Level 3 – Damage & Force
- Level 4 – Damage & Force or Radius
- Level 5 – Weapons & Melee or Power Synergy
- Level 6 – Shock Trooper or Bastion
Nova
Channels energy into a point-blank, high-damage explosion around the user.
- Level 1 – Nova
- Level 2 – Radius
- Level 3 – Damage & Force
- Level 4 – Damage & Force or Radius
- Level 5 – Anti-Armor or Anti-Shield
- Level 6 – Seismic Nova or Shield-Powered
Shockwave
Blasts enemies with a line of explosions that proceeds through walls and other solid objects. Shockwave detonates combo primers.
- Level 1 – Shockwave
- Level 2 – Recharge Speed
- Level 3 – Damage & Force
- Level 4 – Damage & Force or Radius
- Level 5 – Recharge Speed or Reach
- Level 6 – Anti-Armor or Lifting Shockwave
Annihilation
Weaves rapidly shifting mass effect fields to slowly damage nearby enemies. Enemies caught are primed for combo detonations. Other powers activated while Annihilation is in use suffer reduced recharge speed. This skill requires 9 skill points invested in Biotics.
- Level 1 – Annihilation
- Level 2 – Recharge Penalty
- Level 3 – Damage
- Level 4 – Radius or Recharge Penalty
- Level 5 – Damage Attractor or Biotic Wind
- Level 6 – Draining Field or Vortex
Backlash
You can hold the button to generate a frontal biotic aegis barrier that reflects most projectiles and reduces the damage of other enemy attacks. A well-timed initial activation interrupts melee attacks.
- Level 1 – Backlash
- Level 2 – Recharge Speed
- Level 3 – Durability
- Level 4 – Durability or Recharge Speed
- Level 5 – Durability or Reflection
- Level 6 – Shield Resurgence or Damage Aftermath
Singularity
You can tap the button to deploy a gravity well that lifts and damages unshielded and unarmored enemies. Primes enemies for combo detonations. The effect can be ended early by double-tapping the button. This skill requires 9 skill points invested in Biotics.
- Level 1 – Singularity
- Level 2 – Recharge Speed
- Level 3 – Damage
- Level 4 – Duration or Radius
- Level 5 – Anti-Shield or Recharge Speed
- Level 6 – Exploding Singularity or Expanding Singularity
Lance
Devastates a small area with a swiftly thrown shaft of energy. Inflicts bonus damage against enemy weak points i.e. heads and detonates combo primers.
- Level 1 – Lance
- Level 2 – Recharge Speed
- Level 3 – Damage & Force
- Level 4 – Damage & Force or Radius
- Level 5 – Focused Blast or Anti-Shield
- Level 6 – Knockdown or Shield-Powered
Barrier
Maximum Shield strength scales with each skill point invested in the Biotic Skill Group. This skill requires 9 skill points invested in Biotics.
- Level 1 – Barrier
- Level 2 – Barrier Speed
- Level 3 – Barrier Regeneration
- Level 4 – Unyielding Barrier or Recuperative Barrier
- Level 5 – Biotic Link or Biotic Alacrity
- Level 6 – Active Barrier or Saving Barrier
Offensive Biotics
Increases biotic power damage and force with each skill point invested in the Biotic Skill Group.
- Level 1 – Offensive Biotics
- Level 2 – Speed
- Level 3 – Detonators
- Level 4 – Amplitude or Alacrity
- Level 5 – Exploitation or Detonation
- Level 6 – Biotic Expert or Biotic Warrior
Containment
Increases the duration of biotic power effects with each skill point invested in the Biotic Skill Group.
- Level 1 – Containment
- Level 2 – Effectiveness
- Level 3 – Anti-Shield
- Level 4 – Radius or Duration
- Level 5 – Shield Detonation or Concussive Detonation
- Level 6 – Manifold Duration or Event Horizon
Tech Skills
These skills basically allow you to equip your Pathfinder with experimental weapons and allows you to get strategic improvements for you and your squadmates.
Assault Turret
Deploys an automated assault turret that counts as a tech construct. You can tap the button to direct the turret to attack a particular target. You can also hold it to detonate the turret, damaging nearby enemies. This skill requires 9 skill points invested in Tech.
- Level 1 – Assault Turret
- Level 2 – Durability
- Level 3 – Damage
- Level 4 – Durability or Recharge Speed
- Level 5 – Damage or Omni-Link
- Level 6 – Cryo Ammo or Flamethrower
Auxiliary Systems
Improves the effectiveness of tech powers and constructs in a variety of ways, thanks to customized omni-tool and hardsuit subsystems.
- Level 1 – Duration
- Level 2 – Force
- Level 3 – Constructs
- Level 4 – Weapon Mass Reduction or Priming
- Level 5 – Enduring Tech or Impact Dilation
- Level 6 – Shield Feedback or Omni-Vents
Cryo Beam
You can hold the button to direct a continuous stream of super-cooled particles that freezes targets, priming them for combo detonations. Freezing disables unarmored enemies and weakens enemy armor, but has no effect on shielded foes.
- Level 1 – Cryo Beam
- Level 2 – Recharge Speed
- Level 3 – Damage
- Level 4 – Damage or Recharge Speed
- Level 5 – Brittle Freeze or Radius
- Level 6 – Snap Freeze or Cryo Trap
Energy Drain
Restores Shields by sapping electromagnetic energy around a target. Causes bonus damage to shields and synthetic enemies, and detonates combo primers on all primed enemies.
- Level 1 – Energy Drain
- Level 2 – Recharge Speed
- Level 3 – Effectiveness
- Level 4 – Effectiveness or Recharge Speed
- Level 5 – Extended Drain or Auxiliary Drain
- Level 6 – Damage or Team Drain
Flamethrower
You can hold the button to unleashes a short-range jet of flame that causes bonus damage to armor and ongoing burn damage. Unshielded enemies caught in the jet catch fire priming them for combo detonations.
- Level 1 – Flamethrower
- Level 2 – Recharge Speed
- Level 3 – Damage
- Level 4 – Damage or Recharge Speed
- Level 5 – Reach or Lingering Burn
- Level 6 – Anti-Armor or Blinding Heat
Incinerate
Fires a plasma projectile that does bonus damage to armor and inflicts ongoing burning damage to unshielded foes. Burning enemies are primed for combo detonations.
- Level 1 – Incinerate
- Level 2 – Recharge Speed
- Level 3 – Damage
- Level 4 – Radius or Burning
- Level 5 – Impact or Anti-Armor
- Level 6 – Detonator or Double Incinerate
Invasion
Infects opponents with an invasive VI controlled machine swarm that weakens defenses and spreads itself to nearby enemies.
- Level 1 – Invasion
- Level 2 – Recharge Speed
- Level 3 – Duration
- Level 4 – Recharge Speed or Outbreak
- Level 5 – Epidemic or Weaken
- Level 6 – Virulence or Sabotage
Offensive Tech
Maximizes the offensive capability of tech powers through specialized omni-tool software and hardware.
- Level 1 – Damage
- Level 2 – Recharge Speed
- Level 3 – Detonators
- Level 4 – Anti-Armor or Anti-Shield
- Level 5 – Detonators or Anti-Synthetic
- Level 6 – Elemental Tech or Technical Rounds
Overload
You can tap the button to unleash an electrostatic discharge upon a target. High damage to shields and synthetic enemies. Detonates Combo Powers. Alternatively, holding the button charges Overload causing it to ‘chain’ to two additional targets.
- Level 1 – Overload
- Level 2 – Recharge Speed
- Level 3 – Damage
- Level 4 – Damage or Recharge Speed
- Level 5 – Charged Overload or Anti-Shield
- Level 6 – Maximum Charge or EMP
Remnant VI
Deploys a retrofitted Remnant Observer that repairs itself over time, cloaks when critically damaged, and counts as a tech construct.
Tactical Cloak
Employs light-bending technology to render the user invisible at the cost of shield and health regeneration. Guns, powers, and melee attacks used from cloak gain a damage bonus but break the cloaking effect. This skill requires 9 skill points invested in Tech.
- Level 1 – Tactical Cloak
- Level 2 – Recharge Speed
- Level 3 – Duration
- Level 4 – Recharge Speed or Damage Bonus
- Level 5 – Duration or Speed
- Level 6 – Escape Artist or Combat Cloak
Team Support
Improves defenses and support for the whole squad through kinetic barrier generator and hardsuit enhancements. This skill requires 9 skill points invested in Tech.
- Level 1 – Shields
- Level 2 – Shield Recovery
- Level 3 – Support
- Level 4 – Squad Offensive or Support
- Level 5 – Team Recovery or Tactical Revive
- Level 6 – Defense Grid or Life Support