If you have been playing Deadlight, you would know the intensity of horrors mixed with puzzles. Deadlight is indulging enough to keep you busy for hours. If you want more out of it, you can find the plethora of secrets hidden in the game like the following Deadlight Collectibles.
Deadlight Collectibles
To save you the trouble, we have this collectibles guide for you that can help you find all the secrets to unlock all the collectibles-related achievements in Deadlight.
ACT 1 – Welcome to Seattle
Scene 1 – Left Behind
Photo (Secret 1-3)
Location. You will get this automatically at the start of the level.
Karla (Secret 2-3)
Location. Examine the dead body you find at the start of the game.
Journal Page
Location. You will notice a radio on your left once you climb up a ladder, the next door will take you to a couple of lockers. Search them and you will find the journal page. You will also get the Achievement “What’s on Your Mind”
R.T. Chase ID (Secret 3/3)
Location. When you collect the journal page, jump into the gap on your left and then find a body on your top left corner.
Scene 2 – The End of The Tunnel
Handheld
Location. When you are climbing down and learning to slide down faster, you should see a big circular opening in the wall on the left side. Jump inside and search the body you find in that area.
Poem (Secret)
Location. After you have climbed the ladder, continue moving deeper into the tunnel and look for “The Inferno Begins Here” written on the wall. You will see a body next to the tag, examine the body.
Scene 3 – Welcome to Seattle
ID: Arthur L. Allen (Secret 1-3)
Location. Hop over the electricity after this scene is started, don’t jump across the gap and fall into it. Examine the body.
Pamphlet (Secret 2-3)
Location. You will get to a big sign that is torn and waving in the wind, there is a damaged pole on the right side of it. Search it.
The Seattle Reporter (Secret 3/3)
Location. You will face an enemy, who will burst through a door – make him fall in to the gap on your left. Now go inside the area from where he came out, there is a shopping cart which you need to examine.
Scene 4 – Outskirts
Air Freshener (Secret 1/3)
Location. You will enter into a garage area where you face 3 enemies, the ground floor has a body to be examined…just next to a wall.
Journal Page #2 (1/1)
Location. Examine the lockers you find in the building after you run in the storm.
One Hundred Dollar Bill (Secret 2-3)
Location. When you have crossed the platforms that fall, there is a barb wired-fence. Don’t leap over and jump into the gap, examine the body.
J.W. Gacy ID (Secret 3/3)
Location. When you are being followed by a lot of enemies and then start sliding down the hill, jump to the ledge you see and let your enemy walk off, now examine the body there.
Scene 5 – A Chance Meeting
Health Expander (1-3)
Location. Move left, right after the scene starts. Break the planks and crawl through, examine the body.
Blue Handkerchief (Secret 1-3)
Location. Move towards the gas station and examine the body hanging near the last gas pump.
A.C Wuornos ID (Secret 2-3)
Location. When you climb up into a small building from a window, you will see a ledge that falls when you jump on it. There is a body to be examined on the other room of this area, be careful as there are enemies too.
Scene 6 – Checkpoint Charlie
Safe Point Map (Secret 1-3)
Location. You will get to an area where you will have to do some wall jumping, jump into the gap on the right and examine the body.
Medicine Book page (Secret 2-3)
Location. When you see the water tower (after leaping to the ladder) don’t crawl under it and go backwards, you should see a ladder which is going downwards. Climb down and jump into the window you see!
Music Box (Secret 3/3)
Location. Crawl under the water tower and then into the building, you will find a television, fall through the floor on the right side and you will see a music box on the left.
Journal Page #3 (1/1)
Location. When you go back outside, you should see some construction videos with some electricity on the ground. Go to the left side and search the desk!
Scene 7 – Broken Homes
Location. When you get inside a room by breaking through a window (it has a pawn sign just next to it), search the rooms for a body to be examined.
Complaint Receipt (Secret 2-4)
Location. When you have used the tower to extinguish the fire on the truck, you will jump over and head into another building. Climb into the room which has the water leak and search near the white-couch.
Testament Letter (Secret 3-4)
Location. When you are at the top of the building, the enemies will break the planks. Now go back down and then try to climb up the new path which will take you to the very top floor. Examine the body!
Eiffel Tower Postcard (Secret 4-4)
Location. When you avoid the electricity on the ground and climb up to the new floor. Go left and you will see a couple of lockers with some bodies next to them. There is a room on the left side whose body is to be examined.
Scene 8 – Lou’s Pawn Shop
Sam’s Badge – ID (Secret 1-2)
Location. Right after the scene starts, examine the body you see under the “Lou’s Pawn Shop” sign.
Couple’s Picture (2/2)
Location. When you shoot the lock after examining Sam’s body, head towards the next floor. Take a right and then jump over the gap, the bathroom has a secret next to the chair.
Act 2 Collectibles – Hunters
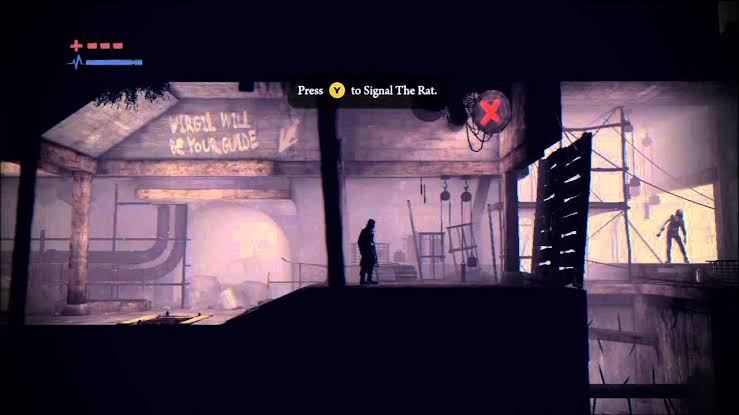
Scene 2 – Tunnel Rats
Journal Page #4 (1-1)
Location. When you whistle to call for help from the Rat another time, you will be in an area which has a ladder and a box to be pulled out. Pull out the box and don’t use it, crawl into that place instead and you will find this.
J.L Dahmer ID (Secret 1-2)
Location. You will get into a room in which 4 traps and sand bags will fall. Run past the traps and with the guidance of one of them, climb to the hanging body on your left and examine it.
Poem Page 2 (Secret 2-2)
Location. You will call the rat to open you a trap door now. You will then climb down and see a body which has to be examined.
Scene 3 – The Collector
Rat Bone Necklace (Secret 1-1)
Location. You will dislodge a plank with the help of your sling shot and push a box to break the spikes of the slope. Follow that slope and you will reach to spot where you hang, drop down the 2 platform of spikes and then jump to the left. Drop down and follow the hidden passage.
Scene 4 – The Den
Medal of Honor (Secret 1-4)
Location. Move towards the left when the scene starts, move into the boarded door and then to the left of the ladder. You should see a red box on the top-left, use your sling shot to drop it and examine.
Polaroid (Secret 2-4)
Location. Climb the ladder and then follow the rat towards the shack. Jump onto the left box and then crawl into the hidden room.
Nang 68 photo (Secret 3-4)
Location. Continue your path downwards and you should see a box on your right (jump), drag it to the left and then search the area from where you pulled it out.
9 circles of hell illustration (Secret 4-4)
Location. You will come to a spot where you will have to break through a wall, there is a secret room on the left side on which you can jump.
Scene 5 – Ascend
K.A. Bianchi ID (Secret 1-3)
Location. When you cross a subway train, jump from it towards the boarded door. Break it and collect!
Health Extender
Location. When you’ve climbed up from the subway, you will have to use your slingshot for clearing the gears then, don’t. Go straight after and wait on the platform, use your slingshot to hit the target above and press down on the left stick to avoid obstacles. The pick-up is located on the left side, next to a body.
Rat’s Territory Page (Secret 2/3)
Location. You will enter into a room which is full of water, use the drain to get rid of it (middle) and then move leftwards where you can crawl into a secret room.
Survivor Journal Entry (Secret 3/3)
Location. This is on your main path, on the ground when you are climbing the subway cars and then entering into one.
Scene 6 – Tree House
Rosary Wooden Beads (Secret 1-4)
Location. Examine the dead body you see after entering into a house through a window.
West Seattle Herald (Secret 2-4)
Location. The second house has this lying on the floor.
Robert C. Bundy ID (Secret 3-4)
Location. You’ll jump onto a line which will break and then you will be in a house which has lots of enemies. Jump to the window and then onto the left where you should see a railing and room which has this id.
Sick Woman Photo (Secret 4-4)
Location. This is inside the tree house.
Journal Page #5
Location. Jump and slide onto the shed which is on your right (from the tree house) and search next to the fence.
Scene 7 – The Big Bird
Location. When you are running from the helicopter, you will drop into a building. There is a body on your main route so be careful, you might miss it. When you break through the door and see the helicopter shooting, go back to the previous room and you will see it.
Scene 8 – Lydia
Half Heart Pendant (Secret 1-1)
Location. It is next to the swing set, of the park.
Journal Page #6
Location. It is right after the above collectible, next to a fence…inside a trash can.
Scene 9 – Human Flow
Children’s Stories Tape (Secret 1-2)
Location: In the garage area, hop over the railing and go left to “G3”. There is a body in the corner under the number.
A.H Fish (Secret 2-2)
Location: Outside you’ll see a bus you must jump on. Turn around from the bus and start hopping on the path left and above. Once you are back on solid ground above where you came from, you’ll keep running left into a store. Inside there is a high shelf with an ID on it. You must charge and run into the shelf to knock it down.
Scene 10 – Playoff
Journal Page #7
Location: When the scene starts, drop down and go backwards to the hot dog stand to get the page.
Military Protocol (Secret 1-2)
Location: Towards the end of the area, you will get to a door you must open that leads upstairs. Right as you had come into the room with this door, you should have run over the collectible which is by the boxes.
Pilot Letter (Secret 2-2)
Location: When you come outside, jump onto the block in front of you, then run and jump to those stairs. There is a hanging body by the fence.
Scene 11 – Emergencies
New Flue Brochure (Secret 1-3)
Location: After crashing through a wood barrier, you will see an ambulance. The collectible is on the ambulance.
Journal Page #8
Location: After the last collectible, jump into the window and the room contains the diary page.
Doctor Letter (Secret 2-3)
Location: In the elevator shaft, go to floor 3. It is right on the ground, in front of the door you must smash to continue.
Crazy Doctor Recordings (Secret 3-3)
Location: You will crash through another door, and automatically push a shelf over to block the enemies. To the right of the first aid kit is the collectible.
Scene 12 – Medicine Man
Science and Medicine Clipping (Secret 1-3)
Location: As soon as the scene starts, it is on a body next to the shelf in the middle of the room.
Karla L. Homolka ID (Secret 2-3)
Location: After getting the medicine, you will find yourself in a room with a body on a body. Collect the ID from the body.
Doctor’s Watch (Secret 3-3)
Location: You will pass through the top of the elevator shaft. Then you must leap to a room, which has a wheelchair and a body in it. Collect this from the body. Try not to fall during this leap because you cannot go back up.
Act 3 – The New Law
Scene 2 – Fallen
Green Berets Patch (Secret 1-5)
Location: As soon as you start, go backwards to the helicopter and examine the body.
H. Desalvo ID(Secret 2-5)
Location: As you run forward, you will come to a body in your path that you can examine. This is in front of a big wall with a star on it.
Henry L. Lucas ID (Secret 3-5)
Location: Jump on some wooden planks to the watch tower in the middle outside. Before jumping onto the rope line to continue on, drop down in front of the fence to find the body with the ID on it.
Safe Point Photo (Secret 4-5)
Location: After you climb the rope across, go up the ladder hanging from the other tower, and climb up. Now climb across the higher rope backwards to the opposite tower. The collectible is on the ground.
Washington Today Clipping (Secret 5-5)
Location: Right after the above collectibles is a shack. Don’t jump over the fence from the shack until you grab this collectible. Drop down and head inside to find it.
Scene 3 – On Air
Medical Report (Secret 1-4)
Location: As soon as the scene starts, you will see a very brief scene play out. A few steps forward and you will find the collectible.
D.R. Berkowitz ID (Secret 2-4)
Location: From above, go outside and once you jump the gap and climb over the truck, the ID can be found on the body close to the truck.
Journal Page #9
Location: Climb through the next building from above, and the diary is in the stack of boxes just by where you drop out from the window.
Registration Plan (Secret 3-4)
Location: In the next building, it is found before you enter the elevator on the ground.
List of Names (Secret 4-4)
Location: Once you exit the elevator, it’s right in the middle of the room.
Religious Brochure (Secret 1-4)
Location: Jump backwards to the vent and climb through. Open the other side, go across the pipe, and then jump into the other vent with the body in it.
Piece of Stella’s Sweater (Secret 2-4)
Location: It is on the floor on your main path near a computer desk, right before the shower area.
Arcadian Protocol (Secret 3-4)
Location: When you have to shut off a generator to stop electricity on the ground, you will go into a building. This is in your main path on the ground.
Robert W. Pickton ID (Secret 4-4)
Location: Inside the area has a lift that you must operate and use to get to a bar above. To the right of the lift is the last ID card.
Journal Page #10
Location: Once you enter the house at the start of the scene, it is on the floor in front of you.
Found something missing? Let us know in the comments below!