Toto-Rak is the second dungeon you will find in the Gridania region and the fifth dungeon in the game as of right now.
As with previous dungeons, you’ll need a party of 4 members around the level range of 23-25 and if this is your first time you will need to complete the level 24 step of the main story which unlocks this dungeon.
Any players above the level requirements will be synced down to level 27. Furthermore, it has a time limit of 90 minutes which is the same as all the dungeons prior to it.
FFXIV Online: ARR Toto-Rak Dungeon Guide
Location: The dungeon is located in the south shroud area.
The dungeon is fairly linear with some side rooms you may explore if you’re looking for some extra loot. The mobs you encounter in the dungeon are usually groups in packs of 2 or 3. Mobs with AOE abilities such as the Pteroc are fatal; so your tank should be looking to face those mobs away from your party. Along with this there are also ranged mobs and your DPS should prioritize these mobs as they deal some hefty damage.
Objectives and Boss Fights
Your primary objective in this dungeon will be to collect Magitek photocells and using these photocells later on to activate Magitek Terminals. There are two of these terminals in the dungeon and each of them has their own mini boss fight. Activating both the terminals will take you to the final boss Grafflas.
Confessions Chamber (Coeurl O’Nine)
The first mini boss fight you will encounter will be against Coeurl O’Nine Tails in the Confession Chamber. The boss fight is easy; just have your tank take aggro and lure him away from your party while the DPS beat down on him.
Just keep in mind that he has a PBAOE attack which will be toxicant and you will need to dodge that and the remainder of the fight will be pretty simple.
Fool’s Rest Chamber (Coeurl O’Nine)
In your second mini boss fight you will encounter Coeurl O’Nine Tails again but this time in the Fool’s Rest chamber.
This fight is pretty much the same as the previous one but the only different is that this time he will summon adds which your DPS will need to take out as soon as possible so they may return their focus onto Coeurl O’Nine Tails.
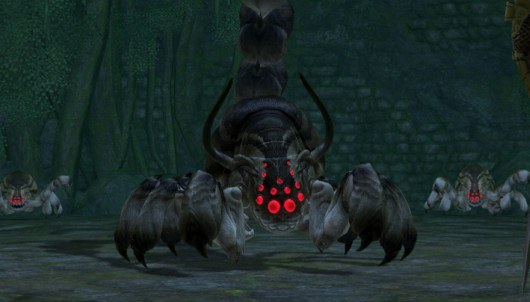
Grafflas
Your final boss fight will be against Grafflas which is one of the most complex fights you will experience early on as he has a pretty wide array of tricks at his disposal.
First of all when you enter his chamber you will notice that he is surrounded by Fleshy Pods. You need to make sure that you take them out quickly as Grafflas can use them to his advantage later in the engagement.
Grafflas also has a sticky web ability which he casts on one of your party members which summons a Fleshy Pod near them which you will need to eradicate quickly.
As the fight carries on and you have taken Grafflas down to about 60% of his HP. He will summon a pair of Comesmites. Take them out instantly so they don’t gang up on your healer.
Lastly, around midway through the fight; Grafflas will shed his skin and his tail will be exposed. From this point on he will start dropping Goo puddles in the room so your tank needs to reposition Grafflas away from these puddles so the party doesn’t take insane amount of damage that it deals.
Use the standard boss fight procedure to take him down and collect your reward afterwards to finish this dungeon.