Shadows of the Damned is a product of the minds of creative geniuses, Suda 51(No More Heroes) and Shinji Mikami (Resident Evil).
It is the story of a demon hunter, who has the love of his life kidnapped by demons. Now, he must rescue her from the hell defeating demons using only the power of the light.
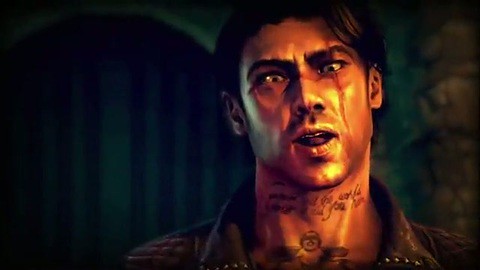
Our protagonist Garcia is a total badass demon hunter, who now needs to defeat the demons seeking vengeance upon him. Garcia will need to explore the farthest reaches of the hell with danger lurking in every corner of the darkness to rescue his love.
The task is not going to be easy, especially when his only hope to get out of there alive, is to find light and stay inside light. Also, don’t you forget collecting all the red gems in Shadows of the Damned. Use our handy and you will be fine finding just about every gem in the game.
Shadows of the Damned Walkthrough
Table of Contents
- The Big Boner
- Great Demon World Village
- Ghost Hunter
- Great Demon World Forest
- Suburban Nightmares
- Justine For All
Act 1
Start of the Act 1.
Chapter 1 – An Ordinary Life
Things will get violent after a short while. Follow on screen instructions and as you reach Garcia’s flat from the hallway, you will hear a lady shrieking. Head into the bedroom to witness something gruesome.
Some demonic creatures soon will raid the apartment. Shooting practice it will be so that you can be familiarized with the controls. They are not stationary targets though so you can’t be too sluggish. You can shoot these demons’ legs and then finish them off with a melee. Shooting the head area will do more damage.
After you have dealt with these freaks, Garcia wants to pursue her girlfriend against all odds. Select the difficulty level and enter the world of demons.
Act 2
Start of Act 2.
Chapter 1 – Take me to Hell
As you reach the gate and try to open it, a demon will welcome you. You need to shoot it a couple of times to get rid of it. Open the door second time and you will find yourself in a street. Move along to another gate and you will meet one-eyed William. This will be the instance throughout the game where you will save your game.
Light the lamp hanging up the gate there to reduce the darkness as said by Johnson. You will have some company. They aren’t that tough so all you need to do is impair them with light attacks and then destroy them with melee. Resources are important so don’t forget to explore the area for white gems or ammo.
Head inside the gate now (pull the crank) to another gate ahead. The gate cant be opened yet. Enter the door to the left and you will see Paula inside. You need to follow it although it will prove to be a a deception. Collect the strawberry at the end. Give it to the demon to open the door. Demons seem to like the fruit a lot.
As you enter the building, Paula ain’t there but you need to grab the bottles of “sake” which serve to restore your health. After you hear the sound, enter the building and then get to the other building. As you exit the room (where you also hear some shrieks), you need to light the goat’s head above the gate (to dispel darkness) to open the door.
You will soon face enemy. You will soon find that they are cluttering under a lamp. Doing you a favor? Light the lamp to get rid of them. Always remember that light is a good source to disrupt demons. As you proceed further, prevailed darkness again. This time you have nothing to get rid of it and to make things bad, demons will attack. You need to head inside the building to your right.
You will find a goat’s head inside, light it to remove darkness. To dark demons will now enter the building. You can’t just kill them with bullets’ You need to use light attacks against them. You can use Johnson’s bash attack to get rid of them. After you have dealt with them, look down the street through the window to spot a goat’s head.
Shoot it to illuminate the area so that you can continue your journey. Another diversion and this time she leaves you in the darkness. You cant dispel it. What now? Run for the exit at the end of the path. By now, you must have understood that light is your savior from demons.
As you light up the alley and just before the corner, masked demons now ill attack. It’s better that you shoot their legs and then go for stomping. Shooting their heads won’t help your cause that much. Further ahead, there will be a patch of another darkness. There is a goat’s head though on the other side of the street. Shoot it and enter the plaza beside.
After dispersing the crows inside deal with another demon variant, crowzer demons. You need to get rid of them (your guns will work) fast as the crows spit by them will suck your blood.
More enemies await down the street. Your shotgun will prove handy. After dealing with them, you will find a gate you need to open using the lust of strawberries. You will find them inside the bar along with other useful items.
As you pass through the baby demon gate, more enemies will appear. Regulars they are, use your shotgun to finish them off and then gather the loot (the eyeball too). Also don’t forget to gather the red gems under the bridge archway.
They are important to improve your attributes. More gems you collect, more powerful you will be. Fetch the eyeball to the baby demon’s gate and once you get the strawberry there, head to the other gate guarding the bridge.
As you cross the bridge, stay sharp to dodge the big hand that try to grab you. This will put you into a dark cave. Proceed further inside the cave to find your way out. Soul boosters you find inside will replenish your soul shield. Both the paths will lead you to a courtyard where you can collect some white gems and ammo.
Past the statue, a baby demon gate needs to opened first. To remove the purple vines blocking the other path, you need to destroy the core powering these vines. You can shoot the generating source by standing in the darkness. Move through the opened passage now and enter the house ahead through a window.
Guess what, Paula appears again. Not the real one ofcourse. Follow till you find that it’s another trap. Shoot the goat to dispel the darkness. Back to the house, collect the brain on the table (not hard to spot) and a some white gems from the bedroom. Move to the baby demon gate and use the skull to open the door. After some distance, bells sound again, indicating demons’ onset.
Get rid of the darkness first by shooting the goat and then you can focus on the demons. If you haven’t used the barrel of light yet (it is recommended that you don’t use them before enemy appearance), blast them now to inflict damage to the demons. After you are done with them, process through the door.
Explore the area near the pillar for a red gem. As you moved down the slopped path and climb back up the ladder. You don’t have the strawberry yet so proceed through the archway. After the stairs, darkness along with more demons. Shoot the goat for some light.Make sure that you hit the dark demons with a light attack first before shooting them.
Explore the stalls along the street form the strawberry and other items. Fetch the strawberry to the baby demon gate and get the gem inside the door. Next, proceed through the again till you find the exit. On the other side, you will face another demonic form. This one has blades to cut off your limbs.
Normal gunshots won’t work till you use a light attack. Shoot it’s weak spots on the back to knock it out. Move through the exit and then climb up the ladder. As you reach the blood pool, more demons will attack. A couple of shots and you can be free to reach the dry land. You aren’t free here now as more demons enter entertain (not exactly).
Keep in mind that you can use the exploding barrel against these demons. A couple of more demons will interrupt along the walkway, shoot them and start moving till you reach the small square through the fence. As you fight your way through the demons (either shoot them directly or use the light attacks first), explore the surrounding for your next heading.
First, you can remove the vines by shooting the core powering them. As you move through the opened entrance, darkness won’t be over yet. Grab the soul shield for some support. Ultimately you will find a goat you can shoot. Further ahead, you will find a brain on some stairs. It’s for the baby demon.
As you drop down into the dark square, demons will approach. Light is your friend. In the dark these demons are a tough nut to crack. Fetch baby the brain. For the other baby you need an eyeball. Climb up the stairs and plug in the hand with a little help from Johnson. Drop down to the streets and use the exit for the next stage.
Chapter 2 – Cannibal Carnival
In the carnival, you are searching for the music entity you just saw. His name is George. Before you can meet the guy, Paula will haunt you yet again. You need to take him down strategically. Shoot the barrel of light nearby (make sure that he is in the damage radius) to reveal its weak spot. You need to fire the exposed area as fast as you can so shotgun wont help (use the Boner).
As he stands up again, move away and keep your distance till you find another barrel. Use the same strategy. How many barrels you require to take him down? Will depend on the difficulty you are playing in. After sufficient damage, he will retreat. You can use the red beacon above to trace him. Gather any souls boosters you find along the path to stay sharp. Shoot the goat head to force George out of the darkness.
Use the same barrel strategy till and he will run yet again. Trace him for the second time now and light another goat. This time he will be crippled permanently (not dead though). Collect the blue gem on the side walk which will render you a new gun. It is more or less a machine gun to chop demons quickly. You will soon get a chance to try your new gun out. Head through the doors to the next level.
Chapter 3 – What a Wonderful World
Move through the alley into a street filled with darkness. Shoot the lamp for some light and expect some demonic forces heading your way. Your main concern should be the crowzer first and then other enemies. You can use any weapon. It’s a good time to use the power of your newly acquired weapon. Otherwise the shotgun is also a good option.
As you enter the house, pick the bottle form the floor. Move to the study room by breaking the wooden straps on the left wall. You will find some ammo in the side room beside the book on the rack. As you move down from the balcony, crawler demons will attack. They look like insects and have the ability to hide light (from goat’s head) with gloomy darkness.
You can’t fight with them in dark so your first task should be to dissipate the darkness near the goat head by light shots. Crawlers are efficient demons to pounce on you so you need to be sharp while you shoot as a miss hit can lead you vulnerable to their attacks. After you are done with them, enter the gate under the goat head (you can’t fetch the baby yet). Move through the house and exit to reach a courtyard.
A crawler will appear. Like before, remove the darkness form the goat first and then shoot the foe. Move to the alley now and light the goat ahead. A fence blocks your path. Don’t worry, you can still knock out the demon. The light from the demon will sufficient for you for the time being at least.
If the crawler manages to gloom goat’s head, you will be attacked by demons behind you. The light bash attack will buy you some time from the dark demons even in the dark. Your machine gun will prove handy in the situation. Enter the house first to find some ammo on the second floor. After a couple of alleys ahead, (there is a red gem stone in the back alley under the shelter.
The bell rings and Paula appears yet again. By now, you might have been seduced by here recurring transparent appearances. Another deception though. You can use firecrackers for temporary light sufficient for you to get past that gate. In the second courtyard, open the meet gates by shooting (light attack) the switch (some sort of medallion).
Darkness will prevail along with demons ahead. In the flooded area, the crawler may give you tough time. Deal with the dark demons first and then focus on shooting the crawler.
From the ledge, you will spot a fire cracker launcher on the plaza. Reach it quickly and activate the launcher for some lightening in the sky. You can reignite the launcher as the darkness starts to come back.
With a limited light, you need to change your strategy and focus on one foe at a time. The barrel near the baby demon gate should be utilized at the right time. Grab the eyeball dropped by the last demon and fetch it to the baby demon.
Keep on moving till you find another firecracker launcher. Activate the launcher upstairs and grab some ammo and a bottle of sake just ahead. The light form the crackers will be dimmed soon so that you can shoot the core to remove the vines blocking the door.
Christopher can give you alcohol, ammo and red stones. You should your gathered white stones with red stones so that you can have some upgrades that are very useful as things will get tough and tougher with time.
After the upgrading task is over, move through the door opposite to the garden. Keep on moving till you reach a unique fishing lamp. Shot it and will become mobile and start glowing. Follow it through the different sections of the cave to the graveyard.
You will find Gracia’s grave in the graveyard. Strange? Yes but not the first thing that is weird in this demonic world. Anyhow, focus on your foe for the time being. Move away from the darkness if your soul shield runs out. You can shoot the cores from within the cylinder so you will have to continuously enter and leave the darkness.
This is not it as boss’ minions will try to prolong the fight. Here you need to adjust according to the situation. They won’t stop spawning till you have destroyed all three cores. Gather the brain and white gems that result after it’s defeat. Move on to reach a the tower.
Across the chandelier in the tower, dispel the darkness by destroying the dark spheres held by crocodiles in the wall. You need to move the chandelier with two sticks; one moves it while other shakes it up and down.
Destroy the series of dark spheres as you move the platform. Exit won’t be revealed till you have destroyed all the spheres. So make sure that you explore each section carefully till you reach the top. You can also earn some red stones from the tower. You can attain one before the exit from the tower to the next section if you have 56 white gems collected from the tower.
You can also earn two red stones if you destroy each demon lurking along the walls as you reach top of the tower.Remember that if you missed any demon behind, you won’t be able to go back. So if you want the stone, make sure you kill each demon. First section has two, second has 4 and there are 4 more before you reach the top of the tower.
Chapter 4 – Riders of the Lost Heart
Time to meet George again. Before the big battle, replenish your tanks. Christopher in the courtyard will have some trade items for you. Buy the red stone if you have sufficient white stones that is. Ammo won’t be that important as you will have ample supply during the fight. As George enters, wait some till you find the his weak spot.
You need darkness before you can spot it’s weak point. George’s horse will do the favor for you. You can’t stay in the darkness for a long time though and George will not act as a sitting duck. So don’t forget to move away from the darkness when required. Use teether to spray quick round of bullets at his exposed parts.
As he falls down, be quick and accurate to shoot the core appeared under the fallen horse. The battle isn’t over yet as the horse will stand on it’s hind legs in center of the arena. Target the red core again while you dodge the spears from the sky.
You will have to repeat the pattern a couple of time to bring George to his knees. You aren’t done yet as George now will be transformed into a massive beast. Now there are 9 cores you need to shoot on his huge body. If you rupture one of the cores, he will drop down with pain of a while so yo can shoo other cores in succession. If you are a sharp shooter, there is a possibility that you destroy every core in one downfall.
Keep a safe distance from him or his stomp attacks will inflict a lot of damage. The small creatures emerging from land will hinder your objective. Keep on moving to increase the probability of survival. At the final stage, George will spill out darkness. Before the darkness takes you out, shoot (be accurate) the tubes spilling the goo. After you have defeated the beast, collect the weapon (Skullcussioner) as your reward which will also conclude this act.
Act 3
Start of Act 3.
Chapter 1 – It’s a Bug Hunt
After some strolling and shopping from Christopher, head to the bell tower where you will find hear Paula’s screams once again. It should not be a surprise that the chase ends in a demon confrontation. It’s time to unleash the force of your newly acquired shotgun. Move through the opened door now to the base of the bell tower.
Use the stairs and get to the rooftop. Your path will be interrupted by some weak demons which by now won’t be a problem for you. On the rooftop, grab the bottle of tequila and some ammo before you confront the dominator demon next. Focus on the strong foe first. Stun it using the light attack and then use teether to destroy it’s revealed core.
Deal with the rest of the demons and remove the darkness inside the tower by shooting the goat head near the bell at the top. Paula again. Head back downstairs and you will find a hole now. Enter the hole as you don’t have any other option for now.
In the sewers, three crawlers will approach. Steady your aim as you shoot these fast dwelling demons. A door will unlock but before you proceed, gather ammo and a tequila bottle. Baby needs a strawberry now. You can find it just ahead. Your shotgun will be sufficient for the crawlers that stop you form taking the strawberry. Don’t come back yet rather move further to find a red gemstone.
Across the gate now, as the darkness prevails, you don’t have anything to dispel it. Run through a series of meat gate till you find some light. Shoo the cores to free the door entrances from the vines. Now shoot the medallion to open the meat gates.
Next, you will have to face a Mikami head along with it’s minions. Focus on destroying it’s head as you can’t do anything about the dark demons in the darkness. Once the big head is destroyed, light will return and you can deal with the rest of the two easily.
As you enter the corridor partitioned again with a series of meat gates, darkness come back again. To free the passage, smash through the wooden straps and find the core to destroy it. After the entrance is free from the vines, move through it and plug the hand on the other side.
After you activate the sushi lamp, follow its light across the sewer. Demons that appear will be taken care of by its light. As you enter further down passage in the sewers, save your progress and refill your liquid tanks form the vending machine. Some crawlers will appear next in a room with column towers.
In such a small space the amount of crawlers can be overwhelming but the shotgun is really effecting in these close conditions. Use it take them out quickly before they can spread the darkness. The barrels there can also be used as advantage.
Leave some for the next wave. Armored demons though tough are slow to react. Target their heads for effective removal. After this close combat with the demons, another novel demon will appear (a female this time).
Dodge her till her weakness is revealed. In the darkness, stun her with the light attack first and then hit the revealed red spot. Teether will be more effective in neutralizing her quickly. As she falls, Paula will appear again and disappear into the sewers again.
This time she leaves you a blue stone which is an upgrade to your current boner which will allow you to charge explosives to destroy walls and also act as mines against the object you might be stuck with.
As you proceed further along the sewers, you will end up in a path blockage. Before you destroy the wall to exit, there is a red stone you can collect by destroying the wall that is to the right side of the gut wall. Now to open the exit, fill the glowing spots in the wall with the sticky shots of your upgraded boner. When you explode them (make sure to keep a safe distance), exit will be revealed.
Chapter 2 – Dying Concubine
Out of the sewers now and into the forest. Grab the bottle of tequila and follow the trail to the woods. Before you head deeper, explore the cave area for any useful items. To the left of the cave, a path (clear it using your boner) will lead you to a red stone, some ammo and a bottle of sake.
As you follow the trail to a clearing, a roaring demon will appear. Its red core is visible. Use teether to damage the beast. Don’t miss the opportunity of clear shots as it falls on the ground. The demon on the other hand won’t act like a sitting duck you can just shoot. You need to evade its attacks. You need to roll away at the right time to dodge its attacks.
Gather the loot and cross the bridge. Paula screams for help again. You may want to cross the bridge quickly to save her. A baby demon gate will hinder your progress. No, you can’t jump into the water from the bridge yet as it will only result in your demise rather than a rescue effort. So head back quickly to find a skull to fetch the kid.
You will find it at the center of a clearing. Don’t forget to light the firework launcher. The hand of darkness will appear. You can’t grab the skull without destroying its minions. You have few moments of light (from the fire cracks), so quickly destroy the demons using your shotgun and get back to hand the skull over to the kid. Not yet. Too early to be a true hero.
She disappears again. Instead of being sorry or sad, quickly head to the firecracker launcher to get some light. Beware that demons can attack you while you ignite the launcher. Your shotgun will have a couple of targets needed to be shot.
As you try to ignite the second launcher, two more demons will appear. Quickly ignite it to weaken your foes and then you can get rid of them easily. Light the goat head beside the vending machine to dispel the darkness. Another deceptive Paula.
As you try to cross the wooden bridge, it will break and you will fall into the water below. Head for the shore and then to the forest. You can find a red stone in the cave area to the left. It can be found at the lamp post past the second cave in the series.
You will find your path blocked by the vines. The core is not hard to find embedded In the wall but you need darkness to shoot it. Release the crawler in the cage which can cause darkness for you. Shoot the core to open the gate.
Shoot the goats head to remove the darkness again which will also make the demon vulnerable. Across the gate, another virtual glimpse of drowning Paula.
The darkness will arrive shortly along with some dark demons and a Hammerkop. You can’t harm them in darkness so start searching for light. You will find a goat’s head on the far side of the clearing. Light is back? Time for some payback. The cyber demon that appears next is heavily armored. You can destroy the armor with sticky shots of your boner.
Once its armor is down, shoot It directly and then proceed through the opened door. You will drop again from the wooden bridge ahead. Paula will accompany you in the water and will move to the other side of the lake first before she is drowned again. You will have to face enemies along your path as you strive to save her.
Grab the strawberry and fetch it to the baby demon ahead.
Before that, you can collect a red gemstone on the other side where a big tree trunk blocks the path.
Use the sticky shot from your boner to free the path that will lead you to the stone now. As you leave the lake and after you save your progress, you will find another demon baby crying for human organ. To find a skull move through the door on the left side.
Before you can collect the skull, two Hammerkop demons will appear. Short way to deal with them is that you release the crawler held inside the cave that will call in the darkness acting as a source to get rid of the two strong demons.
The darkness has always some drawbacks though. This time it will be in the form of dark demons that appear afterwards. Quickly now shoot the goat head to dispel the darkness before it is too late. Collect the brain and bring it back to the baby demon.
There she is again. Follow her to the cave. A short path to the right side leads to a gut wall which you can destroy using the sticky shots. There is a red stone up for grabs behind the wall. After you have trade with Christopher, exit through the doors ahead.
Chapter 3 – As Evil as Dead
As you move through the forest again, Paula wants a kiss this time. A kiss of death. You need to run of course. Save your progress and some enemies to deal with before you can ignite the lamp. If you shoot the barrel beneath the lamp, you will spot a red stone.
The path blocked by the wooden log can be cleared using your hot boner’s sticky shot. Shoot the lamp ahead to brighten the area. As you move past the lamp, you will find darkness again but that won’t last long as there will also be a lamp to dispel it.
Don’t forget to grab the bottle of sake on the floor. As you move further through the forest and find another lamp (don’t ignite it yet), Paula will come back but this time she assumes the state of a grim sister (Kauline).
She wants to take revenge which means some trouble for you. Shoot her with the light attacks as she summons the darkness first and then fire some bullets as her weak points are revealed. That was for attack. For defense, you need to dodge scythe attacks.
The darkness she summons also brings her clones that will surround you. Which is the real one? Look for the red blushing clone. As the battle progresses, number of clones will increase making it difficult for you to spot the red clone.
You need to stay sharp or you don’t have any other option as the wrong selection of clone will result in a scythe attack kissing your body. If choose the right one, her red core will reveal and then you know what to do next.
Once she is down, she will leave a blue gem as your reward but a scoundrel hand will appear and will deprive you of your right. Follow the hand to the darkness to claim your reward. The blue gem is on a pedestal in the dark chamber.
Hurry towards it as darkness starts sucking your soul. Don’t forget to take the soul boosters to stay on the safe side. Forget the demons for now and roll away from them to the stone. You can also find a red stone up the stairs to the right side of the path.
The stone offers more damage and a bigger clip. As you grab the stone, you don’t need to worry about the demons as you will be teleported to other place. Baby demon needs an eyeball. Start looking for it. Demons won’t make the task easy for you.
You can use light bash attacks and the sticky shots of your hot boner to clear multiple weak foes. Two Cyber demons will follow the weaker ones. They can’t be dealt with the light bashes only so you need to switch to your sticky shots.
Take out their armor and then you can use your upgraded teether to crush them. Grab the eyeball ahead and fetch it to the baby demon. After the gate, you will spot a sushi lamp. Follow its light and grab a red stone by destroying a barrel along the path.
Enemies might be lurking in the dark so you need to stay put. Collect the red stone along the stone house while following sushi.As you reach the wooden house, some demons need to be punished before your love will appear again. Enter the house.
At first, it may sound a safe place for you but soon you will be overwhelmed with demons coming from different directions. In this close quarter combat use light charge and the finishing moves to remove the demonic creatures effectively.
Paula will appear again, she will push you to the basement where you will find an ammo crate. Christopher will meet you at basement stairs. It’s time to purchase some red gems. Start searching for your lady again.
Soon you will find her on the path leading to the forest. As you move along, ignite the lamp and collect the strawberry near the demon. You don’t need to face the demon. Just pick it up and run away. Fetch it to the baby demon ahead.
You need to be fast as Paula is still at your tail. To make things worse, you need to deal with an enemy group to get an eye ball that can be fetched to the demon baby then.
Your shooting skills will be tested here as if you are late, she will catch up with you and rest won’t be any great. Get the eye to the baby to enter a cabin. The man with the machine gun won’t shoot you so there Is no need to be worried yet.
As you step down from the porch, a new demonic variant (Ninja Demon) will approach. It can teleport and has blades as weapon of destruction. Deal with them fast before they can utilize darkness for teleporting.
After another short sequence (horrible one) with Paula, the butcher demon needs to be confronted. After you have dealt with it, collect the blue stone for another weapon upgrade. Your shotgun will be able to fire 4 shots at once.
As move through the gates to the clearing demons rather test samples for your upgraded weapon will arrive. Up next is Christopher waiting for you to buy some upgrades and stones etc. Exit the level through the door.
Chapter 4 – The Bird’s Nest
As you cross the bridge, Elliot will be your foe. The weak spot is the red core on its belly. Shoot it as fast as you can. Make sure that you dodge his tongue attacks. After you have destroyed the core on the belly, he will expand his wings and more red cores will appear.
You goal remains the same but only this time he will be more aggressive. To dispel the darkness, you need to shoot the red crystals on both sides of the bridge. After his two wings are destroyed, he will fall into the magma but not dead yet. He is a demon so he will get back to the bridge again.
You now need a sticky shot at the base of the feathers to reveal its weak point again. Your upgraded machine gun will work effectively on the red cores. After you have dealt with this crow type creature, you will be awarded a blue stone (like many times before).
It isn’t a weapon upgrade rather a pervert demonic number. No more action except for some erotic female demons to close the chapter.
Act 4
Start of Act 4.
Chapter 1 – The Big Boner
Hammerkop demons are imminent. Johnson will make a new gun which can inflict a lot of damage but has some limitation like the fire rate and it can be fired from a fixed position (no mobility). A well placed of this Big Boner can take out a Hammerkop demon though. Keep an eye on the arrows at the side of the screen to know the the direction of upcoming wave so that you can aim the direction easily.
You can explore the city now if you feel like so. As you move through the darkness, don’t forget to collect the soul booster or you can be consumed by it. Soon you will have a distant glimpse of Paula. After you have passed the shiny exit, you will find a telephone booth. Make a call and then trigger Johnson’s Big Boner again.
The street alignment this time will be different somewhat. The demons will appear on the streets at varied distances making it a bit tough for you to set priorities. Obviously the ones near you need more attention than those which are at distance. And if the road blocks disturb your shooting, aim for the core in the head to get rid of them.
After you have these demons, leave the portal and you will end up In a rocky dark area. Puala will be there to help you set on the right path again. Back to the streets again with a similar case scenario. Johnoson’s Boner’s length is important to slay bigger foes. You can use the same strategy here too but only this time the demons will approach at a faster rate and double in number.
After you have dealt this final wave in the district streets, enjoy the dance ahead and follow into the dark portal for the next level.
Chapter 2 – Great Demon World Village
Like it not, you need to play this 2D section as it isn’t a side quest. Follow the on screen instructions to get used to the new controls functionality now. You must have played side scrolling games? They are easy, aren’t they? Just shoot and move with no real puzzle to solve. You need to do the same thing here. You adjust your aim and shoot at demons as they appear along your path.
You can estimate your health by looking at Garcia’s clothes. If they are worn out, then it is a symbol that you are running short of health. Make sure that you don’t get entangled in any structure in the building as it will be life threatening. This 2D section won’t be short of collectibles though so keep an eye on them too. There are a total of 50 white gems you can collect in this stage and trade them with the white stones.
You can get rid of the cloud of darkness by lightening the goat head. Nothing new except for the fact that it is in a 2D section. You need to shoot Justine to save your progress otherwise if you just fly past her, your progress won’t be saved.
Chapter 3 – Ghost Hunter
As you complete the 2D section of the game, you meet a novel enemy (Antenna Demon) in the library. They can teleport and have strong electric attacks you need to dodge. You need to destroy the plugs first of you want to stop their teleportation. Rest can be taken care of by your Hot Boner. Explore the area for any goodies and leave through the door near the vending machine.
Move to the second floor now (first circle of hell) and deal with the two hollow demons and mask demon first. Even the lamp is lit, there will be darkness to support your foes. You need to focus on one enemy at a time to get rid of the successive waves. You know how to deal with the cyber demon, right? Shoot the head with a sticky shot to remove the armor and then the exposed head is all yours.
Refill your ammo and head for the third floor. You need to open the door at the far end of the balcony for which you need to arrange the bookshelves from the balcony at the lower floor.You can shoot the light bolts to set shelves moving. You need to move them in an order; The extreme left shelve should be moved right and then move it towards your direction (downwards).
Now the third shelf on the left needs to be moved to the right and then downwards in your direction. Now the second shelf on the right should be moved to the left and then away from you. Now the shelve to the extreme right should be first moved to left and then towards you. Then move the same shelve to the right hence it connects to the platform on the second floor.
The shelve now farthest from you should be moved towards you. Move the second shelve to the left now to the right to complete the connecting bridge. Once the shelves are aligned, move through the opened door to the stairs that lead to the second floor. Vines block your passage. Enter the darkens and follow the red lines to the cores which you need to destroy to open the door.
Again, you can’t afford to stay in the darkness for long, so you should take a break after you destroy each core. You can also collect a red gem stone while you destroy the third core. You can find it along the left pathway beside the goat head. Proceed through the door to the second floor. After small enemy waves will approach a Cyber demon. You know now what to do. The armor first and then the fleshy head.
You are not done yet as some more enemies including more another cybershot will appear. Nail them and leave the section through the door. As you move across to the bridge to the other side of the library, Justine will summon two antenna demons.
Destroy the 6 cores first to stop their teleportation and the then shoot your targets. Watch out for their electric shocks though. And yes, there a red stone you can collect before moving across the bridge in the dark section to the right side before the bridge.
Crawlers are back. Don’t allow them to cover the goat head with the darkness. You can use multiple ways to get rid of them. Choose the gun that suits you the most. A Ninja Demon will follow crawlers. Use the light attack first to slow it down and then you can use your shotgun to destroy the creature.
More crawlers will arrive. Light the second goat head as you deal with this second wave. After you are done with these creepy demons, move through the exit revealed to the next floor. Don’t forget to grab the bottle of tequilla though.
Candles, a lot of these. Head to the right to explore the sheleve area. Grab some ammo and crack the growing walls for some extra items along with a red stone. Justine will force you to move to the the first floor. A Giltine Grim makes an appearance. She is ready to chop you down into pieces. Now the strategy is to target the core in her head first and then the one in the abdomen.
After you destroy the first core, darkness will prevail and some fellow demons will also join in the party. A tough time of course and you skills you have gathered so far in the game will be tested. Stay focused and ultimately you will get rid of her. You need to dodge her blade attacks and the soul boosters will serve as life line for you.
If you shoot the goat on the wall In haste, it will prolong the battle as the second core will be visible only in darkness. You can also maker her to kill the accompanying demons for you. Stand in their horde and mock at her, she will strike at you in rage but before her attack hits you, you need to move away at the right time. This will remove the side forces without any major trouble and you will be able to concentrate on your main foe.
After you have killer the troublesome female demon, you will receive another weapon (The Dentist). Its an upgraded version of Teethgrinder and is effective due to its automatic targeting. Move through the opened door to the basement. You need to fetch baby demon something to open the door.
As you explore shelves in search of the required item, keep a low profile till you find a sushi lamp around the corner. You will face some demons which will attack you as you follow sushi’s light. You will find a red stone in between the two shelves if you move forward from the first turn taken by Sushi.
As the gate opens (It is slow) you will be attacked by demons. I will say that they are here to kill your leisure time . In a narrow combat zone, shotgun is always a good option. Christopher is here for some trade. After you are done with buying and selling, proceed furhter along the hallway beside to find the skull. Some enemies will try to hinder your objective but that should not be a big problem for you.
You have the skull now, feed it to the baby demon to open the gate an advance to the next level.
Chapter 4 – Great Demon World Forest
It was a village before and now it’s a forest. You can either go forward or backwards. Just focus your aim and grab the collectibles. There will be a couple of tough sections in this area but you will clear them if you just shoot effectively. You know the tricks of the trade and the nature of the enemies you face. This will help you proceeding this section fast. Still stuck? Mention it in comments and I will look into your trouble.
Chapter 5 – Suburban Nightmares
To get to the suburban area, you need to pass through a series of caves crawling with enemies. Cross the small bridge and you will face the first enemy resistance in the level. First paralyze by shooting at their legs and then stomp these creatures for some white gems. More will attack at the next bridge. Beware of the slash attacks of pyschoarm demon.
The network of the wooden bridges ahead will be crawled by the crowzers. They will spit bloody crows of course. Shoot them one by one. Be quick to knock them out before the crows overwhelm you. Your newly acquired automatic weapon will prove handy as you can shoot these crowzers behind the cover from distance. But remember that you need to have a lock on first before you can shoot them.
Move down the plateau and move across the long bridge to reach the other side of the cave. Destroy the wall and after saving your progress, guess what? More crowzers will enter the arena. Take the first one with your hot boner while the rest (which are distant from You) can be dealt with the dentist.
As you move to the clearing now, guts wall will block the passage. That is not it as more of those creepy crow spitting demons will appear. Be evasive and take them out with your shotgun. Break the wall now (don’t forget to grab the red stone inside the barrel near the bridge.
It will be guarded by a crowzer though. Sushi lamp at your service inside the cave. Follow its light to exit the cave and finally reach the suburb area. Head left from the exit and move along till you find that the path is blocked by a baby demon gate. As you enter the yard, tombstones will raise hinting a tough closed fight. Witchdog demons at your service.
There is no use of shooting its body as these creatures are well protected by a case. It’s weak point (belly) is the option then. You will have to roll away quickly as it spins towards you. You can use the light attacks to stun them and then use the tombstones as cover. They will try to attack you and be smashed by the tombstone walls.
Once the witchdog is history, head into the house to use the vending machine. A demon will attack so watch out as you enter the house. Head to the backyard now and as you move towards the catwalk there, you will spot a Cyber demon along with gloomy darnkness.
You can’t fight the demon in the dark so avoid it and move on reach a fireworks launcher. You will have to break the wooden fence to reach it. Dispel the darkness through it . Beyond the gate covered with darkness vines is the source of darkness. So, you need to find the cores first to get rid of the darkness.
Move up to the ramp and use another firework launcher. You know how to find the cores right? Follow the red veins originating from the door and you will pinpoint the location of each core. With each core destroyed, the door will open and then you can plug the darkness hand with Johnson’s help.
Move into the house behind the hand for some trade with Christopher. Explore the area behind Christopher’s shop to find a red stone behind the darkness vines.Then move along the street to the chapel where you catch sight of Paula again. She will be dragged by Justine. Not fair? There has been nothing fair so far. You need to find a way around to get inside the chappel.
Head to the graveyard to the left side of the chappel. Baby demon wants an eyeball. Demons will spawn as you enter the graveyard. To make the masked demons among them more visible, you should the light lamp just beside the entrance. Three crowzers will attack afterwards. Toss a sticky shot on them and then detonate it to get rid of all three at once. The remnants if any can be dealt with simple shots.
Behind the gut wall is the strawberry you are looking for. Wait, there are a couple of witchdogs first you need to deal with. Expose their weak spots by tossing sticky shots at them or forcing them to hit a hard surface. You still can’t enter the church yet as you need a skull now for another demon baby.
Move back to the baby gate beside the entrance from the cave to the suburb area. Inside the house, you will find an eyeball. After collecting the loot in the house, head back to the chapel’s gate to the right side closest to Christopher’s shop. Your short trips will be accpmpanied by demons.
Enter the door to reach the garden. Before you grab the skull there, a seizing hand will appear which will surround the skull. It’s not for the first time though. That’s not it, you will have to fight a series of demons finding their way toward you. Stay put and use the light attacks to stun the stronger foes before inflicting the final blows.
After the long tiring encounter, grab the skull and feed it to the baby to finally enter the chappel. It’s Paual again, no it isn’t. Its Justine in her disguise. Whatever, as she leaves you in darkness, shoot the cores to opent he dark vines gate to proceed to the next level.
Chapter 6 – Justine For All
It’s the final 2D section now. So bare a little more if it offends you. For the most part it will remain same as most of the other 2D sections you have played before with small variations. Beware of Justine as she floats towards you. If you touch her, you will loose health. The advantage of choosing one path through the clouds is that you don’t have to face only demons that are along your chosen path.
It’s time to close the chapter with a fight with Justine. She will transform into a large monster. Don’t waste time being shocked rather start shooting at the glass case covering her skull. Destroy the three plugs and the helmet will be yellow. Now it’s time that you toss her some light shots which will force her to remove the helmet.
Don’t forget that you need to shoot the rain droplets falling from above to avoid the damage. Her grasp may look threatening but it won’t harm you. Keep on shooting at her till she is done and dusted.
You will be rewarded with a Skullblaster (you can combine 4 skulls into one massive shot with this weapon) and a way outside this creepy section. If you have been able to acquire all 50 white gems in the level, you will be rewarded with a red stone.
Act 5
Start of Act 5.
Chapter 1 – Twelve Feet Under
Move through the corridor to reach a room with multiple chambers. There are few demons behind the bars that are quite for now. As you approach them, an electric shock will smoke life into Electrodiode demons. These new variants use rush attacks which you need to dodge.
You can use your dentist to auto aim the red diodes at its back. It’s wise that you use the short burst attacks to keep an eye on its charged attacks. If you get caught, make sure that you press the onscreen buttons quick enough before it is too late. Don’t forget to grab the red stone in the barrels beside the chamber holding the demons.
Grab the eyeball and feed it to the baby demon you saw in the corridor. You will face a little resistance though so keep that in mind. After you grab the strawberry for another demon gate in the section where you just fought the Electrodiode demon, witchdog will enter the arena. Make it smash against the wall during its spin attack and then quickly fire a couple of skullshot rounds to bring it down.
Before you fetch the strawberry to the baby demon, you need to deal with two more witchdogs. Stick to the basic strategy we used earlier and you won’t have any trouble. In the next section, as you trace the red line from the darkness of vines gate to the core, you will find that some force won’t let you reach the core. Here you can use your skullshot’s new upgrade and launch and explosive charge toward the core to destroy it.
Paula will disappear again as you move downstairs. There is a baby demon gate which requires an eyeball across the stairs. Some stairs also lead to an open door to the right. Head inside to reach a room with a skull inside. As you proceed further towards the skull, a Dominator Demon will interrupt your progress. Stun it with light attack and then use the skullshot to get rid of it in no time.
Break the wooden crate there to reveal a red stone. You have the eyeball now. Get back upstairs and give it to the crying demon. Across the gate, you primary task is to thin down darkness by lighting the goat’s head. It’s bowling time now so standing on the wooden platform, use skullshot (skulls) charges to hit the pins on the far side.
You will receive a skull as a reward which you can use to open the gate in the rotunda downstairs. But before you can cross the gate, a group of different enemies will attack. Use the light attacks followed by Skullshots to remove them effectively. You can also use the hot boner though. The choice is yours.
Across the gate, you will soon see Willie so that you can save your progress. Paula is scary this time; you need to run away from her. You can use light attack to stun her for a moment to give yourself a breathing space. Quickly remove the blockage along your path and get across the door to leave her behind. As you move through the corridor, grab the tequila bottle standing on the coffin.
Several plugs in the room indicate that the Antenna Demons are imminent. They are accompanied by the dark demons and a crawler. You can’t let crawler to spread darkness so deal with it first. Then, Antenna demons should be your target. You need to destroy the plugs first so that their teleportation is stopped first.
After you are done with them, move through the door to a series of dark catacombs. Follow the red vein and shoot the core before you move downstairs.
You need to power up the blindness hand above and the source is somewhere behind the gates covered with darkness vines. Red veins from these gates are intersecting each other at one point. You can trace the cores of these gates though. You will find a red stone where you use the skullbuster charge to destroy the core inside a barrel. Make sure that you collect any soul boosters in the section to keep moving through the darkness.
Destroy the source of powering the blind hand to free the goat’s head from its grip. Ignite it now for some light. This will also reveal your further pathway. At the end of the hall past the door, turn right to meet Christopher and for some purchasing and selling. Just when you feel that you have reached the dead end, Hammerkop demon will enter through the wooden wall.
To take it down, you can use the alternate strategy. Destroy the generator first to free the goat’s head from the blindness hand. Now, free the crawler behind the bar so it can spread the darkness. It will kill the demon. You now can deal with the crawler. If you find it hectic then engage it directly and target it’s red spots with your dentist.
A bottle there beside the generator will be useful to replenish your health when needed. There is still no way out? Notice the baby demon gate enclosing a skull. It needs a strawberry though to open the gate. Head back to the place where you met Christopher earlier. You will find an opened door there. The strawberry you are seeking is near another baby demon gate. You can fetch this baby demon the skull you will find after opening the other gate downstairs.
You won’t be able to grab it straight away though as Paula won’t allow you to. Move away from her and grab it quickly before she pounces on you. Pop this strawberry to the baby demon downstairs and get the skull behind it. Head back upstairs (no more Paula) and open the gate to reach Fleming’s castle.
Chapter 2 – Different Perspectives
You are at Fleming’s courtyard. As you open the door, you will find the section full of demons. No, it’s not a dream but reality you need to face. As you enter the gate, deal with the Punkgut enemies that attack you first. You can use the barrel strategically to knock out a group of demons at the right time.
After you deal with the first wave, two witchdogs will enter. You can force it to strike the wall (use taunting like before) or you can smack it’s back with your skullshot. At the end, two Electrodiode enemies will appear. Use the Dentist for auto-aiming the cores at their backs. Once you are done with them, you can enter the castle through the opened door.
Keep on moving till you reach a room with multiple stone blocks inside. You can’t move each block. Red blocks are of your interest. Move the T shaped block first to make a connection to another control box.
Using this box now, move the stairs near the main platform There is some ammo in the crates. Also don’t forget to grab the red stone as you position the red block.
Through the gate above the stairs and you will be attacked by as masked demon and crowzer. Skullshot or hot boner are sufficient for them. Continue down to the stairs to the left. The barricaded door can be opened by lighting the goat. So, adjust the block such that you can reach the stairs leading to the goat.
There is also a bottle of tequila on the block beside. Now readjust the gate such that you can reach the gate. A set of two stairs, one will lead to the block while other to the gate. After sometime of exploration, Punkgut demons will appear. You skullshot should deal with them. After that, Pyschoarms will enter the arena followed by Masked demons. Shotgun all the way.
Hold your ground as more enemies including the crowzer will test your skills. Keep it cool and use the shotgun for the most part. To proceed through the section, you need to align the two arbitrary blocks along the door.
After the first one, cyber demon will attack. After dealing with it, align the second block. The gate will open if the blocks are aligned correctly and a bridge formed will lead you to it. A couple of enemies will attack after the gate. Combination of hot boner with the skullshot will be worthy.
The darkness is inevitable. So leave the cyber demon for the time being and search for light. Look at the spinning block to the right of the bridge. As it rotates, you will find the goat head you need to light.
You can also find a couple of gem stones in the area where stairs connect the blocks. You will have to reposition the block at the far side to make way for yourself where it apparently seems to be a dead end.
As you try to adjust the block to reveal an opening, darkness will prevail. You can’t get rid of it just yet so be quick to align the platform. There are no soul boosters in the section so you will have to rely on your health which means that if you don’t liquor, you are done for this task. You can use the vending machine to grab some drinks.
Once you are successful in revealing the exit, Christopher will meet you on the other side. It’s for the final time that you will see Christopher so spend everything you have to buy useful items.
Chapter 3 – Castle of Hassle
You need to get to the top of the tower to face your ultimate foe. You can remove the blockage by stone walls using the sticky shots. Move through the door to the right and grab the bottle of tequila in the center of the room.
Demons of dark will join in the party. Cyber demons along with some other demons will attack next. Leave the cyber demons first and deal with the other foes. For cyber demons obviously, you need to break the armor and then shoot to get rid of them. Move through the opened door to a dark portal. You can’t stay here for longer so hurriedly move towards the exit.
Before you get back to the tower path to the top, it’s time to play the game. Shoot the skullbuster to destroy the cores at the base first. You may have to try a couple of times before you can successfully lodge the grenade inside. There is also some ammo beside so feel free to take your shots. You can also earn a red stone if you kill the two demons inside. You can collect them from the exit portal.
Move through the door and move then the dark section to get back to your main path. Keep on moving till you end up in a room with two punkguts and an electrodiode. Punkguts are first in queue and then you can deal with the electric demon.
Beware of its charge attacks though. Baby demon needs a strawberry. You can find it behind one of the gates of dark portals present in the room. As you explore the portal to the right with filthy environment, the middle opening at the end of the room has a strawberry inside the cage along with three demons.
A couple of skullshots will be sufficient for these demons. The cage door will open. Grab the strawberry now and fetch It to the baby demon to open the door. After a dark section, you will reach an elevator that will lead you to Fleming. Before you enter the elevator, make sure that you refill your tanks using the crates in the area.
Chapter 4 – The Final Chapter
The six eyed freak is finally in front of you. Of course, you are the good guy but this villain won’t go down that easily. You start off with dodging his basic attacks. Roll away at the right moments or you will be tossed. Moving along the perimeter of the room will give you some advantage in dodging his attacks.
Keep an eye on his for-head as it turns pin, he will launch massive bolt attacks which you also need to dodge. You can’t damage his yet so don’t waste your bullets. He will summon darkness. His attacks won’t stop though. You can hit him with your skullblaster in between the attacks. Splattering of blood indicates the damage.
After you have inflicted sufficient damage (use hot boner at the end), his body will shatter into three parts which you need to take care of. You will have to destroy his body two more times into pieces to bring him down. His attacks will become more intense after each cycle. For the green field he sets up to shield your attacks has holes above which you can exploit to shoot. The darkness hand he summons is real tough task to avoid.
Roll away at the right time to avoid being sucked by the darkness. Once you have destroyed the final piece of his body, your long tiring effort will bear fruit and you finally will get to meet Paula, for real this time. The happiness is short lived though.
Chapter 5 – Till Death Do Us Part
She thinks you as a devil and wants her revenge. What? Yes, true. Now if you are out of shock already, grab the eye ball and feed it to the baby crying for it. As Paula follows you, you should hit her red wings. You can dodge her attacks by rolling away at the right moment.
The dark demons summoned by her will hinder your primary target. The best thing to do is avoid them as much as you can and focus on shooting her wings. After you have destroyed her wings, she will move through the white portal. Pursue her and you will find her back on the wings (4 remaining).
As you target her 4 wings simultaneously with the dentist, make sure that you keep on walking and rolling forward so that the darkness behind you does not catch up. Keep on shooting at her wings and dodging her attacks to take her anger. You won’t kill her but after a stretch of darkness like the falling curtains, Garcia will be back with the love of his life. Everything has to end well after all.